Sensaria's Product Hub is the essential feature of our system to all of our partners who sell products via Shopify, Etsy, and WooCommerce.
Product Hub page and tabs
There are five different tabs in our Product Hub:
- All includes the entirety of all the products you create, regardless of where they are saved. This consists of all products in the Storage and any of your stores.
- Storage specifically contains products that are not saved to any Shopify, Etsy, or WooCommerce stores. You can save your products to be purchased or published at a later date here.
- Shopify is where your Shopify stores are saved and where your Shopify products live for each one of your stores.
- Etsy is where your Etsy stores are saved and where your Etsy products live for each one of your stores.
- Woo is where your WooCommerce stores are saved and where your Woo products live for each one of your stores.
You can connect as many stores to one Sensaria account as you wish, but each store can only be connected to a single Sensaria account. Keep in mind that you need to use the appropriate tabs, depending on which store you are connecting to Sensaria.
For example, an Etsy store can only be connected via the Etsy tab. To find out how to connect your store to Sensaria, we recommend checking out our articles on Shopify, Etsy, and WooCommerce integrations.
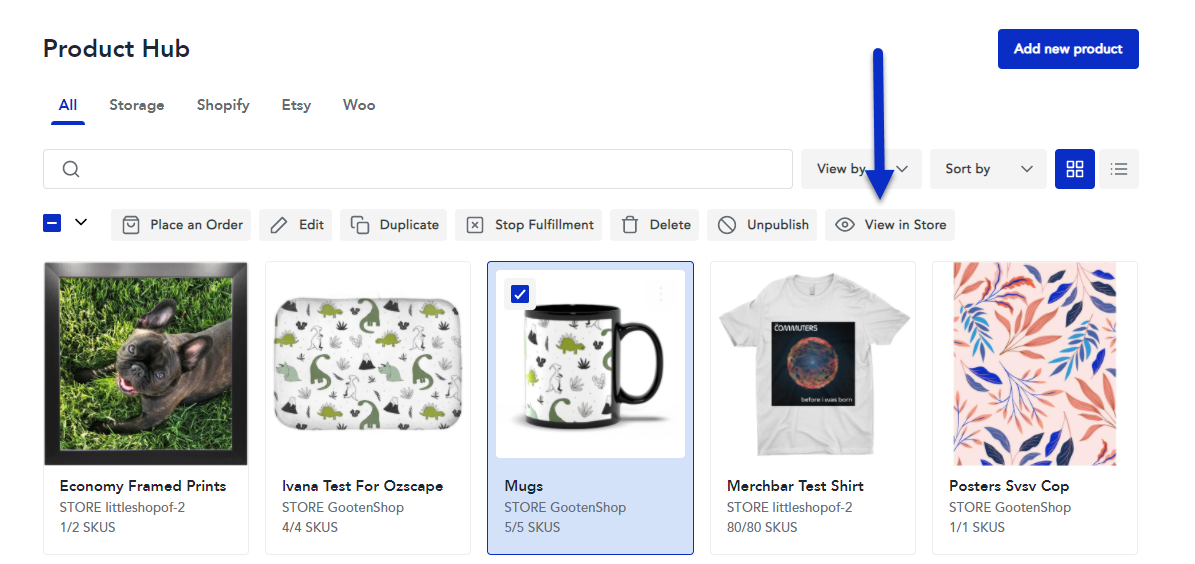
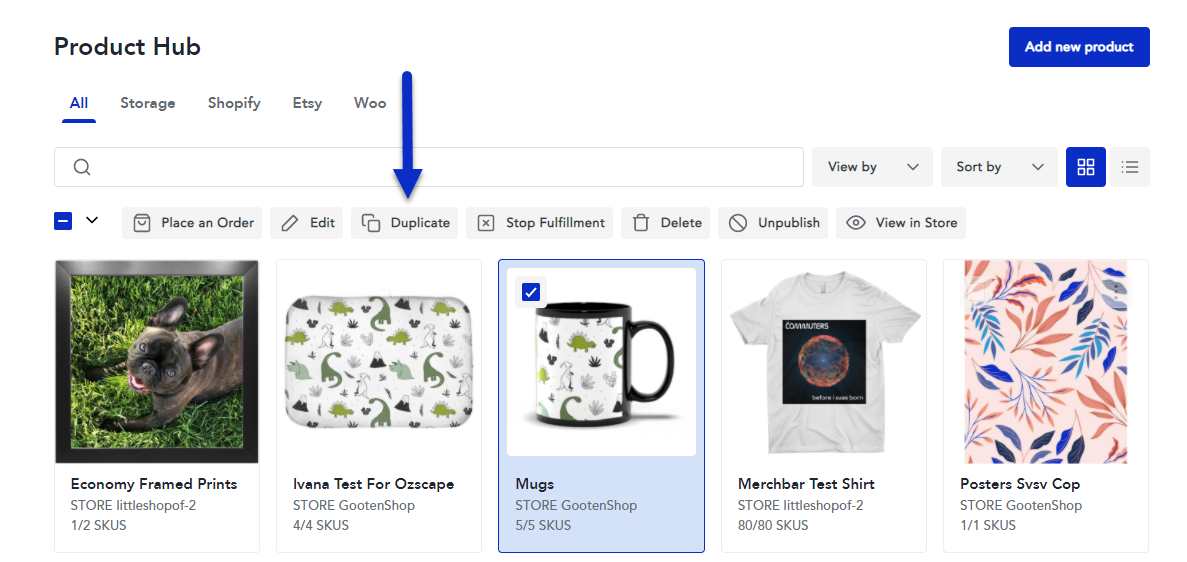
If you select any of your products by check-marking it, a toolbar with a number of the different options will appear above the products. These options will appear depending on whether you saved the product to Storage or to any of your stores.
1. Products saved to Storage can be used for placing orders, and you can also edit or delete them entirely. If a product is deleted from your storage, it will also be deleted from your store. To find out how to use the Place an Order button, we recommend this article.
2. Products saved to your Store(s) will have a few additional options which are dependent on the current status of the product:
- Duplicate products
- Stop fulfillment for products
- Delete products
- Unpublish products
- Publish products
- View product in store
Add a new product
When you want to add a new product, perform the following steps:
This Add New Product button is feature is always available on the All and Storage tabs, and you will not see it in Shopify, Etsy, and/or Woo tabs if any of these stores aren't connected to Sensaria.
1. Click on the Add New Product button.
- The button redirects you to the Product Catalog page, where you can select one of the many products from our offering.
2. Once you decide which product you'd like to create, click on Pick it.
- This will take you to the SKU selection page where you can choose between product features such as model, size, color, print placement, or image orientation.
- The variety of these options depend on the selected product. You can always go back and select a different product from our offering before you proceed to the Design page.
- One product can contain SKUs that belong to a single product category only.

Design page
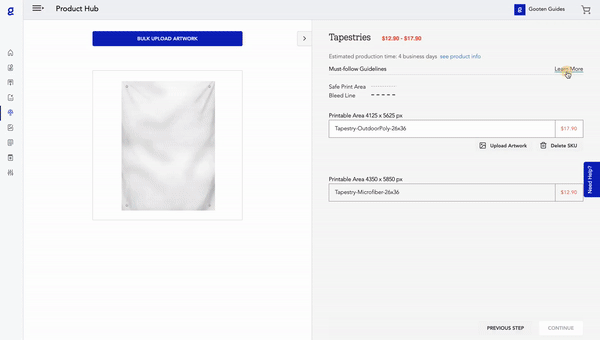
The Design page is all yours, and you can customize the products however you wish. You can use our image editor to crop, resize, and position the images. It contains a brief guide about some basic image requirements as well as the Print Area and Product view.
3. Upload an image for your product and edit your image using the editor.
- Uploading images is easy by using the Bulk upload Artwork option or the Upload button below each of the SKUs.
- Multi-sided products (SKUs) require more than one image to be uploaded before you can proceed to the Mock-up page.
- Some of the multi-sided products are flat and folded cards, throw pillows, garments with double-sided prints.
- To find out more about image requirements and how to create high-quality artwork, please visit this article.
The Print Area view shows the bleed and safe zone lines that will guide you while you're positioning your image, and the Product view will show you how the finished product will look like.
If you've selected more than one product variant (SKU) and you've changed your mind, you can easily remove one or more by clicking on the Delete SKU option below each of the SKUs.
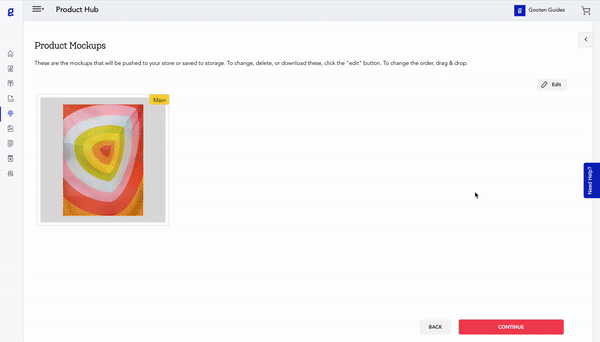
Product Mock-ups page
This page follows the Design page, and it's where you can see the product mock-ups (previews) of the products you've just designed.
Here you can change the background color for your previews so that it matches the theme of your store. You can also remove the mock-ups that you do not want to be published in your store. You also have the option to download them.
If you need to make any changes, you can always go a step back and readjust the images or remove some of the SKUs.
4. Ensure your mock-ups of your product look good and up to your standards before proceeding, Click Done Editing when you're ready to move on.
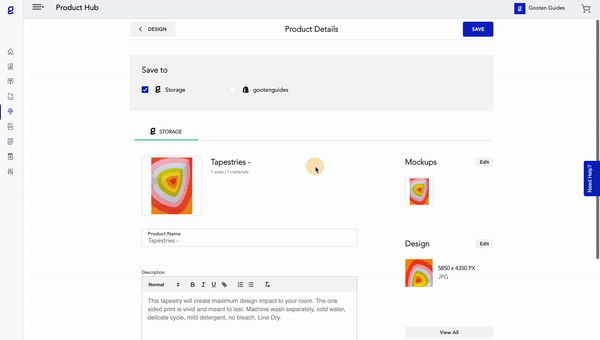
Save and Publish page
This is the final stage of creating a product. Once you're here, you need to either save the product to the Storage or one or more of your stores. You can do it all at once; make sure to turn on the toggle buttons next to each of them!
This page is also made for finishing touches. It allows you to change the following information:
- The product name
- The product description
- Prices per SKU
One of the more recent features we introduced allows you to duplicate the changes made to the product across multiple stores (as long as the product is published in those stores).
If you wish to make any additional change, touch up the images or mock-ups, you can still go back and not lose any progress you've made!
5. Fill out any additional information for your product and then select which stores you are saving your product to. Afterward, click on the Save button.
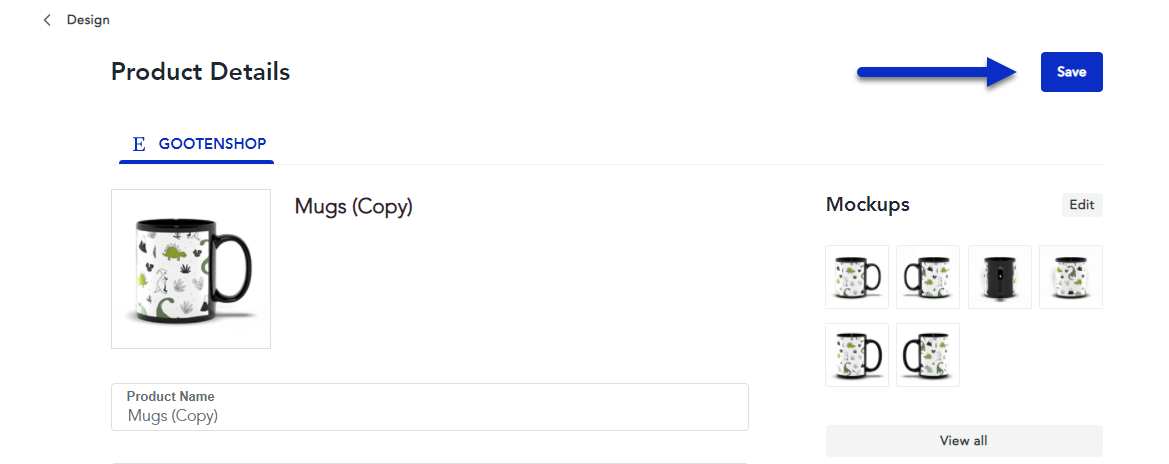
Duplicate products
Duplicating a product will create a replica of the product, including your SKU selections, artwork, and mock-ups. It will also contain any store information you filled out, like the description, pricing, tags, and collections. The duplicated product will default as a draft.
1. Select the products that you want to duplicate.
2. Once the products have been selected, click on the Duplicate button.
3. You will be navigated to the Product details page for your new duplicated product so you can easily edit the product details, artwork, and mock-ups.
If you want to activate your product in your sales channels so that it’s available for purchase, toggle on the stores you wish to publish the product to and un-check the Push to store as a draft option. You could also keep it as a draft and activate it later.

You cannot save a product to your Sensaria Storage with the same product name. We will append “(copy)” to any products in Storage with the same name.
4. After you've made your changes to the duplicated product, click on the Save Button.
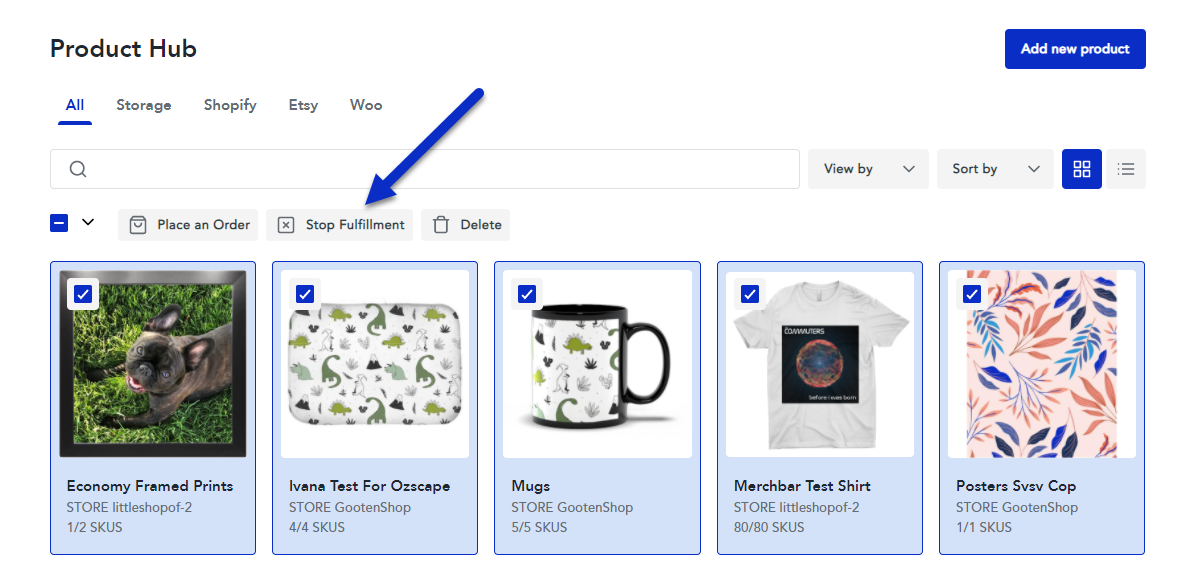
Stop fulfillment for products
To disconnect all of your products at once, select all items per page, and click Stop Fulfillment. This action will unlink all of your products from Sensaria.
You can also stop fulfillment for one or a couple of products by selecting them individually.
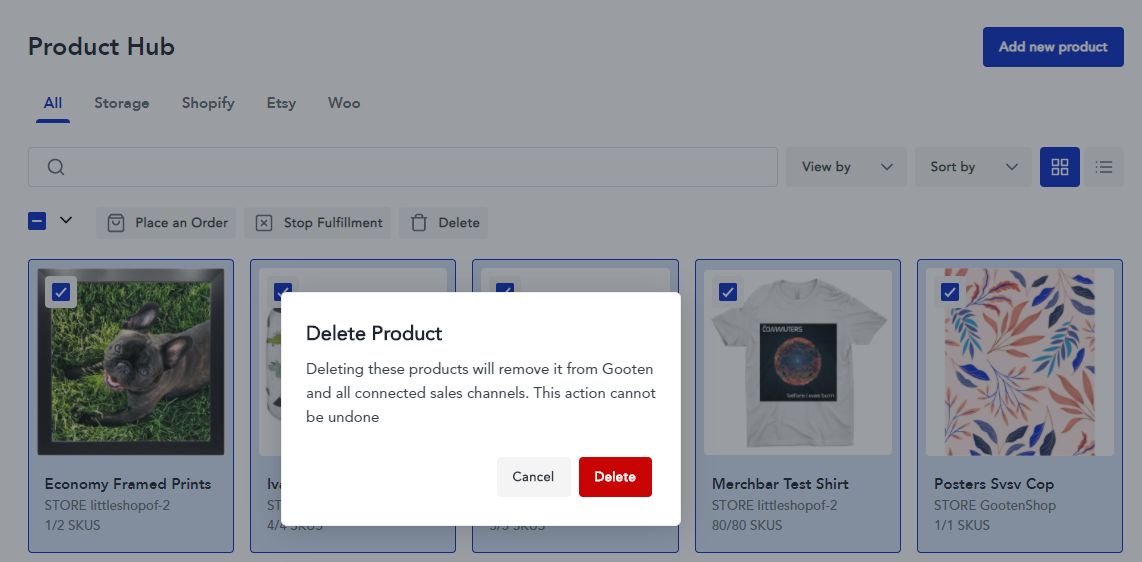
Delete products
Deleting a product from your Product Hub will also delete it from your store. If you change your mind about it deleting a product, the only way to bring the product back is to create it again from scratch using our Product Hub or in your shop's dashboard.
To delete a product from your Product Hub, you should follow the steps below:
1. Select the products that you want to delete.
2. Once the products have been selected, click on the Delete button.
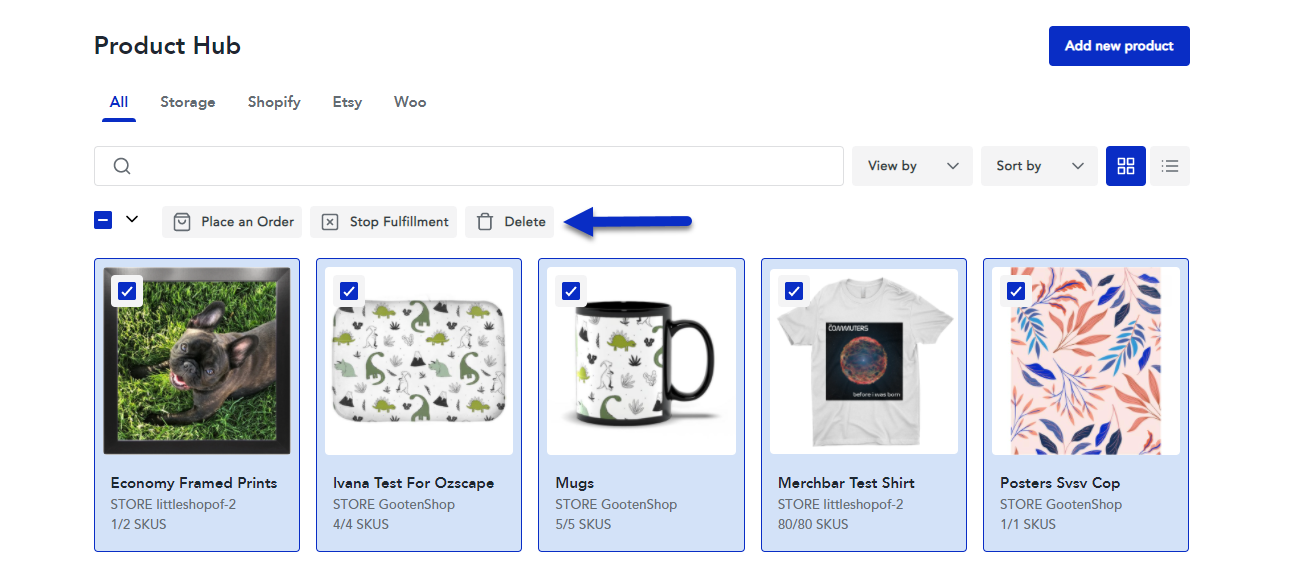
3. You will get a pop-up that will verify if you want to delete the products from your product hub or store. If you're 100% sure you're ready to delete the product, click the Delete button.
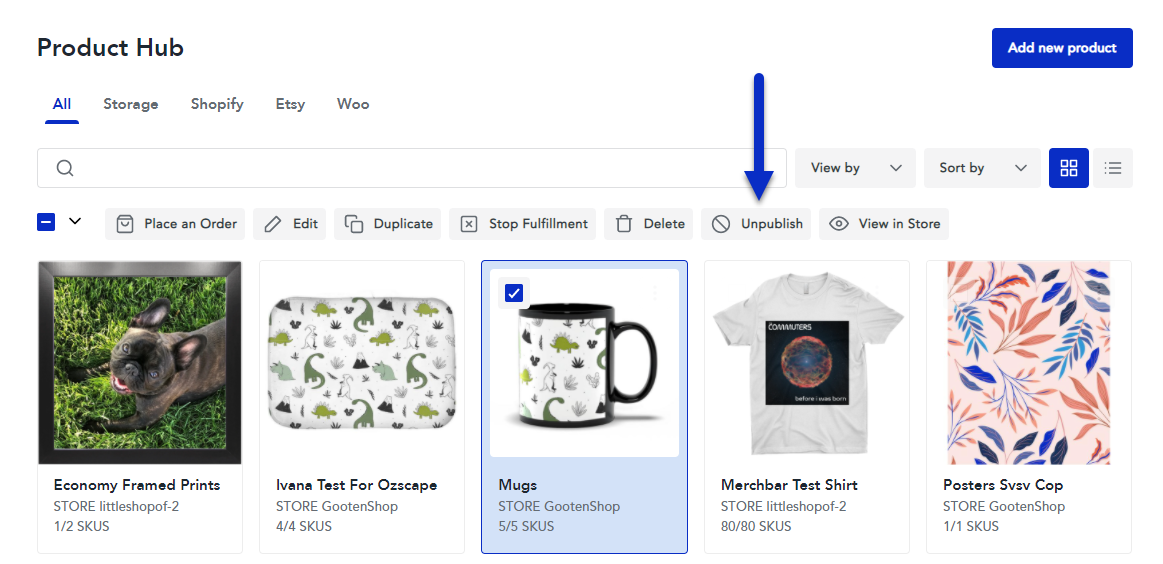
Unpublish Products
Unpublishing products will remove the selected products from your store which will not make your products available for ordering by your customers. By unpublishing your products, it will not break the integrated store's connection and you have the option to publish your product again whenever.
Note that even if unpublished, all of the products will stay connected to Sensaria SKUs. You can also unpublish one or a couple of products by selecting them individually.
1. Select the products that you want to unpublish.
2. Once the products have been selected, click on the Unpublish button.
- By clicking this, it will automatically unpublish the products right away.
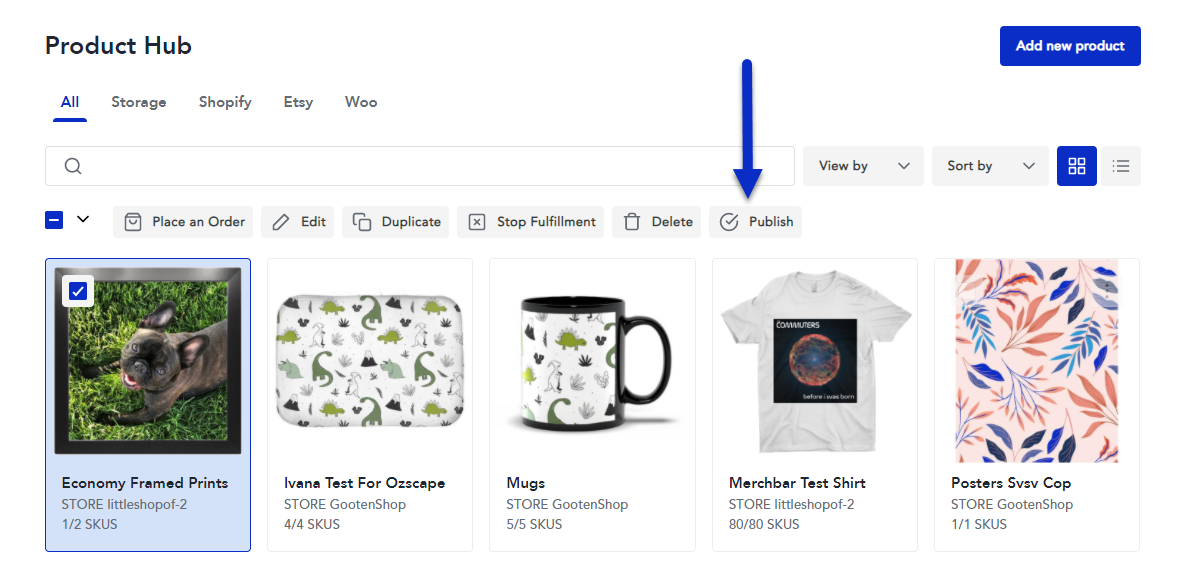
Publish Products
Publishing products will push the selected products from your Sensaria Product Hub to your store which will make your products available for ordering by your customers.
1. Select the products that you want to publish.
2. Once the products have been selected, click on the Publish button.
- By clicking this, it will automatically publish the products right away.
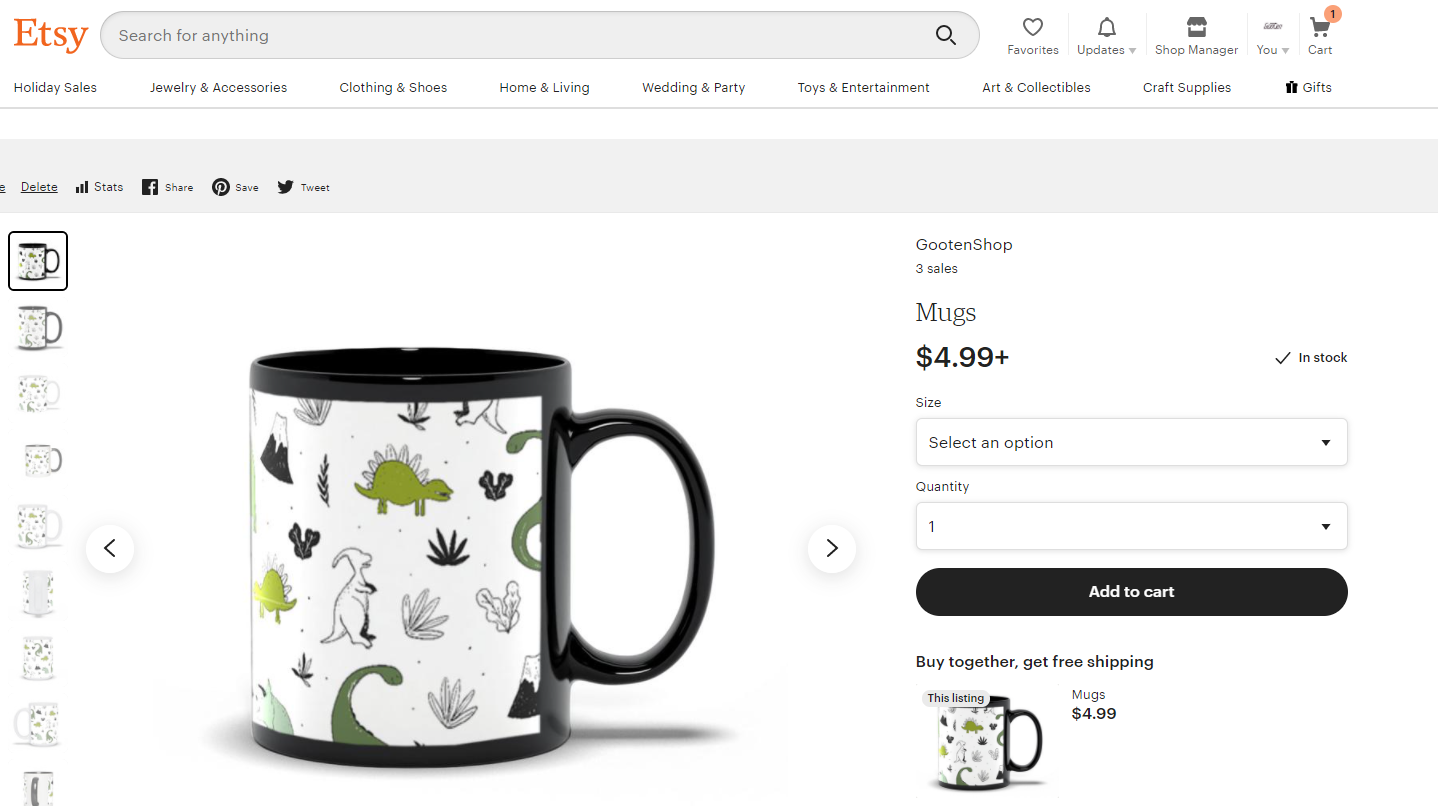
View product in store
This option will take you directly to this product in your online store, where you can review how your customers see it. This option is only available for products that are published to a store.
1. Select the product that you want to view in your store.
2. Once the product has been selected, click on the View in Store button.