If you wish to fulfill your Amazon orders through Sensaria, you can easily automate the order flow by integrating with Gooten through Order Desk. You can set up the Amazon integration quickly, and you can find the instructions below:
- You can find detailed instructions for connecting Amazon and Order Desk using this article.
- You can find detailed instructions on how to Integrate Gooten with Order Desk using this article.
- You can find more detailed instructions on connecting Order Desk with Gooten using our Order Desk article.
You can set up the Amazon orders fulfillment through Order Desk in two ways:
Using products you already have in Sensaria CBH
1. If you choose the first option, you will not have to create Inventory Items in Order Desk. In that case, you would need to have all the products created in Sensaria > Product Hub > Storage.
If you already have products created in Sensaria CBH, all you need to do is make sure that the SKUs on your items in Amazon match precisely with the SKUs for the products you have saved in Sensaria CBH. That means that each variant SKU name in Amazon needs to match the corresponding variant SKU name in Sensaria>Product Hub>Storage.
You wouldn't need to add your inventory into Order Desk as long as the SKUs that Order Desk is receiving from Amazon (or any other shopping cart) match the SKUs set up at Sensaria CBH. The order from Amazon would come into Order Desk with the SKUs, which the Order Desk would, in turn, send to Sensaria. If the SKU names match, our system will identify the products in Sensaria CBH that were ordered and fulfill them.
Also, the order rule wouldn't need to be too complicated. It would just be a rule that says, "when the order is imported into Order Desk, send it to Gooten":
- Rule Type: Order Rule
- Event: Order is Imported
- Action: Submit order to Gooten
However, the important thing to note is that the Amazon variant SKU name needs to contain 40 characters or less. Since the variant names for Storage products are not editable, that connection cannot be established for all SKUs, especially apparel, since our system appends a number to the variant SKU name in the product creation process. That number represents the product creation timestamp, making the SKU name unique and longer than 40 characters in most cases.
Adding products to Order Desk
2. If the user does not have their products set up in Sensaria CBH or cannot establish a connection as explained in the first case, the best option is to set up Inventory Items in Order Desk without creating any products in Sensaria.
This would also be the option best suitable for large stores with hundreds or thousands of products and the need for quick and efficient product migration.
*Please note that you’ll need to have variable products in your Amazon store to set up this order fulfillment model.
Amazon to Order Desk Bulk Product Migration
If you don’t already have your products set up in Sensaria CBH and want to set the products up in Order Desk instead, you can import a spreadsheet.
To import data into Order Desk, you will need to have a .csv, .xlsx, or .txt file with your data. However, you won't be able to import that data directly into Order Desk. Since each file will be unique per store, you'll first have to create a template to match the information in your specific file so that it can be translated into Order Desk's names for each field.
This Order Desk article explains how to set up an import template:
You need to create a spreadsheet (CSV file) with your item details. This spreadsheet should include all the print details Sensaria needs to fulfill the orders. The spreadsheet should have a column for each of the following details:
- Item Name: This should be the Item Name in Order Desk and should be unique for each item/variation you want to import to Order Desk.
- Item Code/SKU: This should be the partner's SKU in their Amazon store. Order Desk will identify the items in their orders using this SKU.
- print_sku: This is the product code (Sensaria SKU) that we use to know what item is in the order. We'll be the ones to provide these to the user for their items, or you can fetch these from the Product Hub during product creation.
- print_url: This is the link to the design that the user wants to print on their items. The Order Desk will pass this link over to Sensaria so that our system can retrieve the design and print it. If their item has multiple images, they can use print_url_1, print_url_2, all the way up to print_url_15 to pass on multiple links.
- print_preview: This is a link to the preview image for each item - *optional
- print_location: This is in case the users have items with multiple images. If they do, they can specify where each image should be printed. If the item contains only one print space (Ex. Center Front), there is no need for this to be in the import template/spreadsheet.
- location: This needs to be set as Gooten so later on we can create a rule in Order Desk for all items that have the location set as Gooten to be automatically sent to our system for fulfillment.
- Stock: This column will define stock levels for each inventory item you import into Order Desk.
The spreadsheet should have a column for the above details at the minimum, although it can contain columns for extra details such as the Price, Description, or similar.
The Order Desk doesn’t limit the number of variations an item can have. However, how they handle it is that they treat each variation as its own unique item. So each variation should have its own unique SKU. That's what Order Desk will use to know exactly which item is in the order.
So we wouldn't have variants being nested under one parent product. Instead, each variant would be considered its standalone product in the Order Desk system.
With that in mind, Item Name will define the item name in Order Desk, and Item Code/SKU refers to the SKU name of the variation. Each variation in Amazon should be given its own unique SKU, and then those SKUs are what should be included in the Item Code/SKU column on the spreadsheet.
The print_sku value will map the corresponding Sensaria SKU to your Amazon SKU/variant. Also, all the print_url files should be publicly available. They shouldn't require any login credentials to access so that our system can retrieve the design files and print them.
The user can specify the location for each inventory item by adding a column to the spreadsheet called Location. The value in this column should be "Gooten." When the spreadsheet is imported, all items with this value will be assigned to the "Gooten" location. You can then have a rule that says, "when an order is imported, locate all the Gooten items in the order and automatically send them to Gooten for fulfillment."
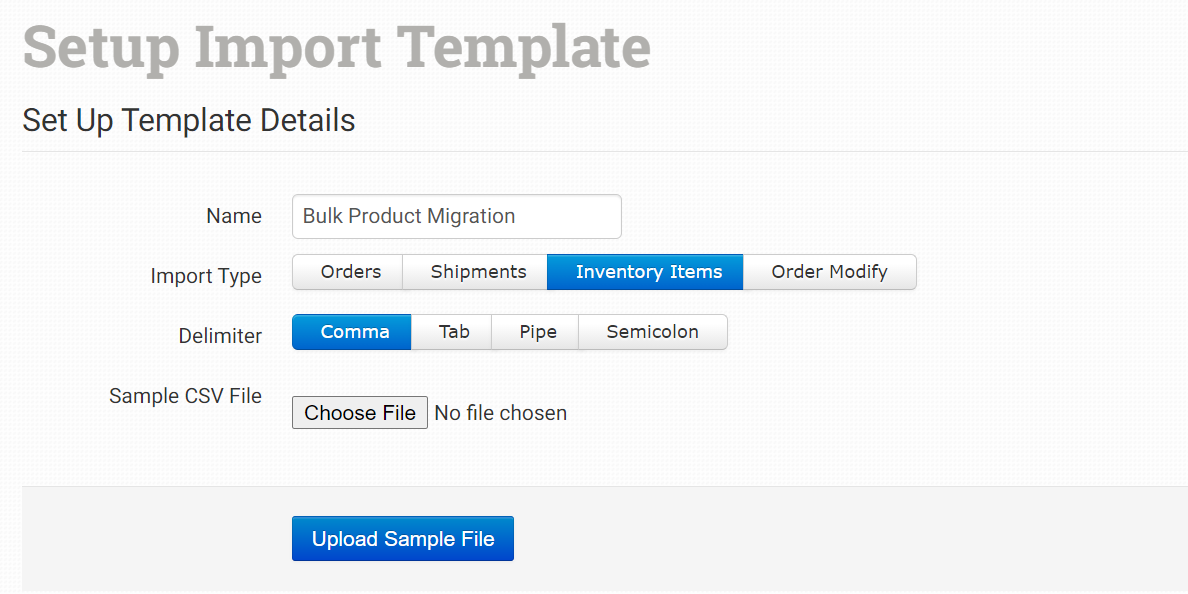
Once you have prepared the spreadsheet, you can create an import template to import the spreadsheet. The first step is to upload a sample CSV file to match the item values with the columns in your CSV.
Once you set up the template, you can upload the CSV you prepared for import. All the products would then be stored in Order Desk so when an order is imported from Amazon, the Order Desk would be able to identify the items in the order using the SKU and automatically sync in all the print details that Sensaria will need to fulfill the order such as the link to the print file. Once those details are synced in, the Order Desk will send the order to Sensaria to fulfill.
You can find an approved example of a CSV import file here:
- https://docs.google.com/spreadsheets/d/1vPuzsYFcSPBnOX-0rBOjhXGK1ouaLadjOZUp2CHDJUE/edit?usp=sharing
Note: We intentionally skipped the print_preview column as it’s not mandatory for product fulfillment and print_location since the SKU we chose in that example has only one print location available (Center Front).
Setting Up Direct Image File URLs
As for formatting the shareable image file links in Dropbox, you can follow the steps explained below. Please note that you'll need Dropbox direct links/any other image hosting service (S3/ any publicly accessible URL that goes directly to the image file), and please note that the links need to stay “live” forever.
Creating direct links:
- Navigate to the image file in your Dropbox storage
- Click on the "Share" button next to it
- Create a sharing link
- Copy the link created and paste it somewhere where you can easily edit it ***
- Replace the string “www.dropbox.com” with “dl.dropboxusercontent.com” and delete everything after .JPG or .PNG, and you'll have a direct download link
*** You can copy multiple sharing links directly into the CSV and delete the string "?dl=0" after the .JPG or .PNG using the "find and replace" feature (find “?dl=0“, replace with blank).
You can use the same function to bulk replace the string “www.dropbox.com” with “dl.dropboxusercontent.com” in the entire CSV.
Order Fulfillment Automation
To automate the entire order submission process, you need to set up a Rule in Order Desk that automatically submits all Amazon orders that arrive into Order Desk to Sensaria for fulfillment. The Order Rule would be set up as follows:
- Rule Type: Order Rule
- Event: Order is Imported
- Filter: Item Metadata inventory_location Equals Gooten
- Action: Submit Order to Gooten
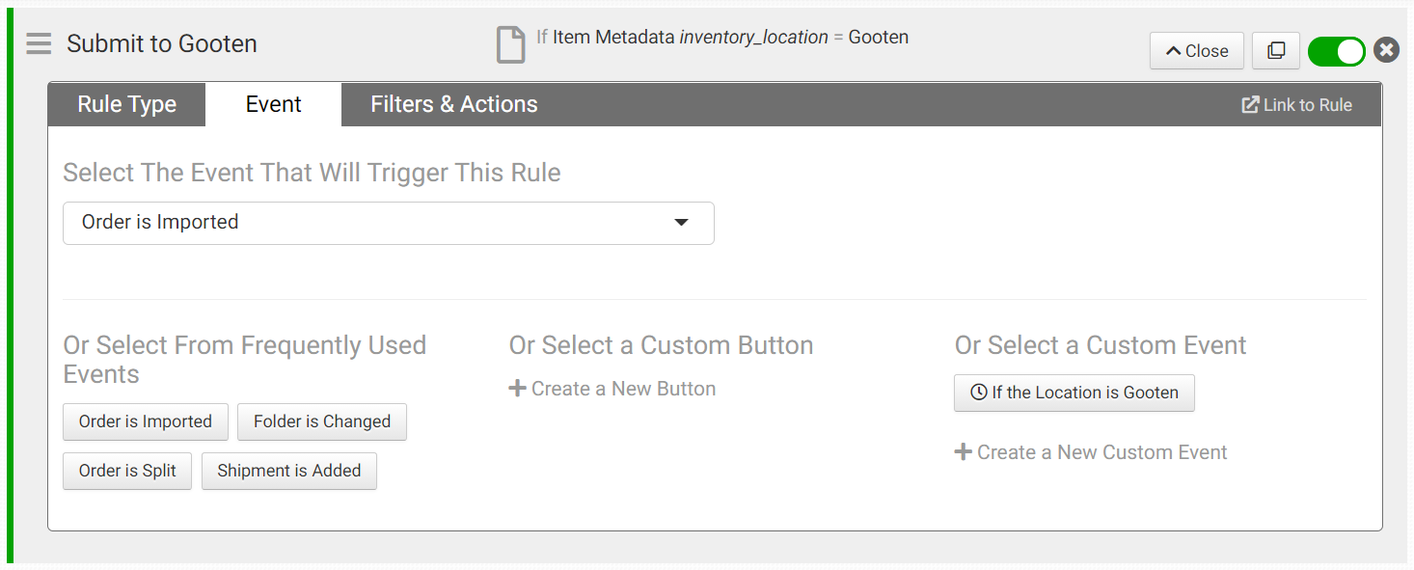
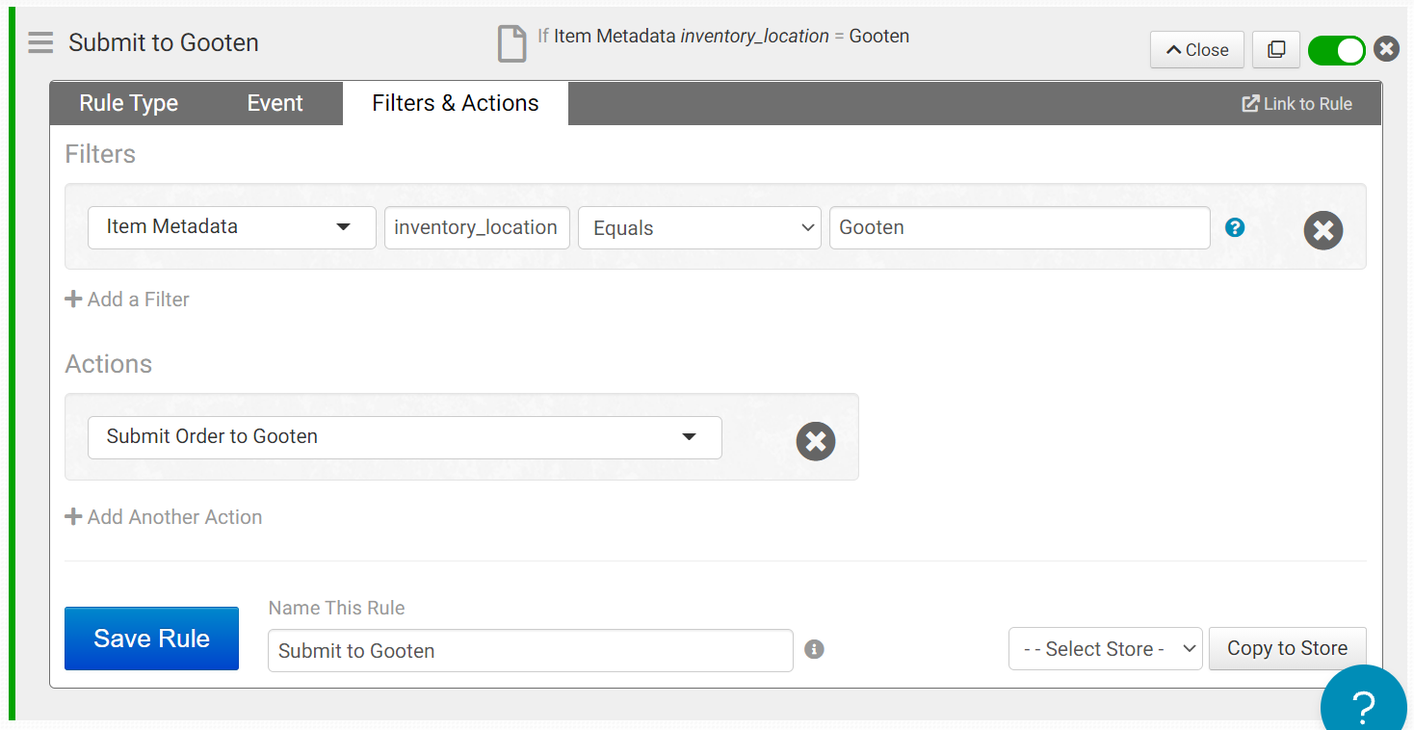
This rule says that when an order is imported, if the items have the location set as "Gooten," then the order should be immediately submitted to Sensaria.
Setting Up Shipping Methods
For the last part, Order Desk supports the following shipping method names from Sensaria CBH:
- Standard
- Expedited
- Overnight
- Worldwide Overnight
The problem here is that the shipping methods that will come in with your Amazon orders will not match the shipping methods available at Sensaria CBH. Thus, all orders will be imported to sENSARIA with the Standard shipping method or the method you previously set up under the "Default Mail Class."
However, two settings help ensure that the Order Desk can send the correct shipping method names to Sensaria. The first is the "Default Mail Class," and the second is the "Shipping Class Match."
You can use the "Default Mail Class" if you wish for all of your orders to be submitted to Sensaria with the same shipping method, like Standard, for example. But if you’d like the shipping methods available at your checkout to be translated to Sensaria with each order that comes in, we suggest that you set up the "Shipping Class Match."
You can check the Order Desk article for more details.