If you are interested in Embroidery at Sensaria, you can let our Partner Support Team know!
Due to the technical nature of creating embroidery products, it’s important you follow our embroidery guidelines to avoid any issues with your embroidery artwork. You can find our guidelines below to help when creating your design.
- Artwork file type, resolution, and sizes
- Artwork guidelines for embroidery
- Digitization
- Ordering samples
- Available thread colors
- Order embroidery products via the Product Hub
- Order embroidery products via the API FAQ
Artwork file type, resolution, and sizes
Your artwork must be saved as a PNG with a transparent background.
High DPI is not crucial for Embroidery products as our manufacturers do not utilize the PNG files for printing. They will use a stitch file created by translating your artwork file into a specially formatted file that tells the embroidery machines the type of direction for the stitches.
Your artwork sizing must be precisely 1200 x 750 px. For an easy artwork creation process, you can download the print templates.
Artwork guidelines for embroidery
There are times when your design may look spectacular on paper but may not meet your expectations on the fabric. Follow our guidelines below to help create your artwork for your embroidery product.
1. Keep your designs simple. Stitching for embroidery tends to create thicker lines than regular ink. Some designs that may look great on paper may come out convoluted or hard-to-read on the fabric it is printed on. "Less is more" is the go-to for embroidery designs as keeping it simple makes it easier to transition the design to fabric.
2. Keep your designs to a minimum. Embroidery designs are typically within a 5,000 to 6,000 stitch count range resulting in quicker production times. Our digitization process will reject any complex design that exceeds the maximum stitch count of 15,000.
3. Use bold lines, shapes, and sizes. The graphic needs to be enlarged enough to meet embroidery minimums; otherwise, it will not be embroidered. Keep the text or graphic size to a minimum. Preferably to the size of 3/16".
4. Use only the colors that are available for embroidery. Since embroidery uses stitching and requires thread, we cannot blend colors or use unique colors. You can use only the colors that we have available thread colors for, and you can find the colors in the available thread colors section below. Using a different color that is not listed may result in an error when ordering your embroidery product.
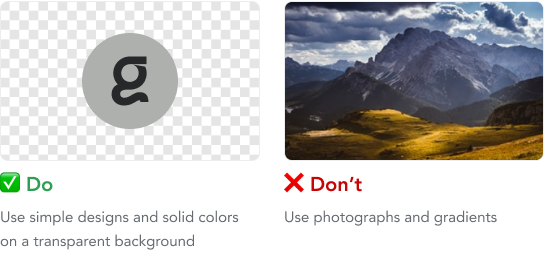
5. Use a transparent background for your design with simple designs. Some embroidery graphics will include a transparent background to use the color of the product as the backdrop. Anything outside the main design with a transparent background may result in unwanted embroidery stitches on your product.
6. Avoid using photographs. The process of embroidering cannot stitch photographic images. If you want your photographic print to be embroidered, you have to create a new design that includes solid shapes and colors and most resembles your photo. Regardless, altogether avoid using photographic images for embroidery.
7. Avoid using gradients. The process of embroidering uses solid shapes and colors. You can view the available colors in the available color section below. During the stitching process, we're not able to transition the color of one thread to another. We recommend converting it to one color or splitting the gradient into multiple solid colors if you have a gradient design.
8. Avoid using thin lines, small text, and narrow spacing. Ensure that your text is legible with careful spacing between your text or shapes. Narrow spacing can cause issues where your letters or shapes muddle together. We recommend adding additional space between lettering for clear visibility and clarity.
9. Avoid using finer detailed logos or text. Since the process of stitching is required for embroidery, the thickness of the stitching doesn't always translate your detailed design into great embroidery. Extremely complex logos can become muddled during the transition process, and the text could be crammed together, making it harder to read. This ultimately leads to recognizable logos or text, and you can avoid this by using basic versions of your logo or text.
Digitization
When you order an embroidery product for the first time, we will translate your artwork to the proper stitch file format unless you provide a digitized stitch file for your artwork. This process is called digitization, and when your artwork is digitized (when your order is moved into the InDigitization status), we charge an additional digitization fee. We will charge the digitization fee to your order, and the price is included in your overall costs for the product.
Digitization can be a lengthy process when producing an embroidery product. This process typically takes between 24-48 hours, but once it’s done, any order placed utilizing the same artwork does not need to be digitized again and will go immediately into production.
The process is necessary to create files that are readable by the manufacturer's embroidery machines. The stitch file tells the embroidery machine the direction and quantity of stitches for each design part.
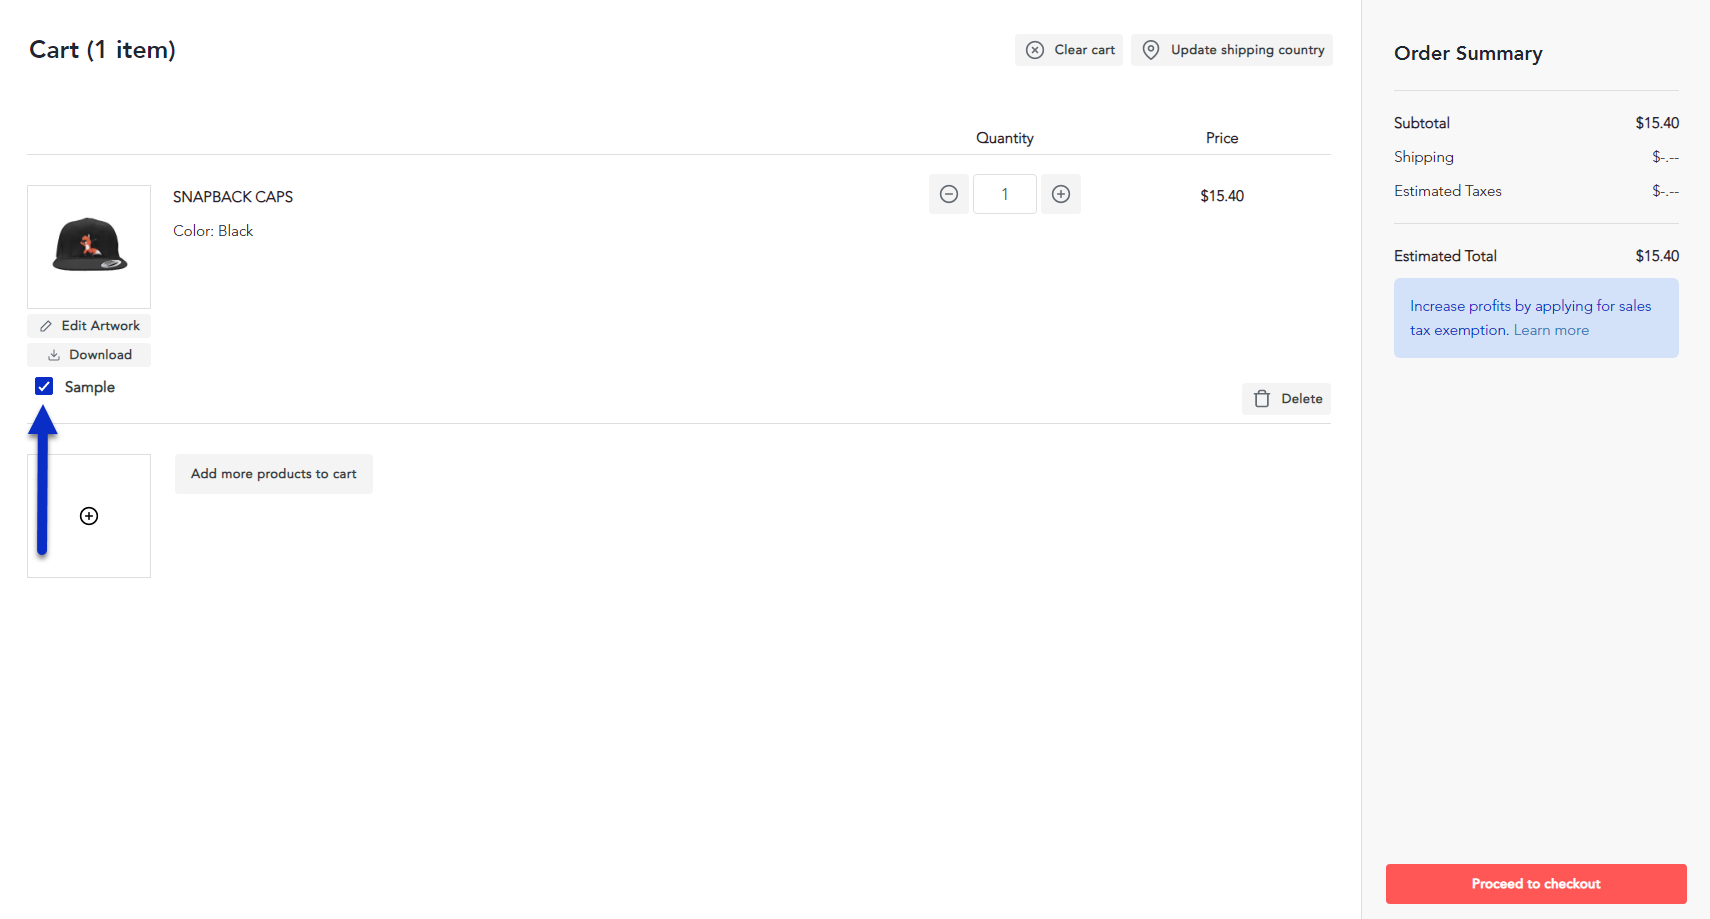
Ordering samples
We recommend you order a physical sample for yourself any time you plan on utilizing a new piece of artwork. That way, your customers do not need to wait an extra 1-2 business days for the product to be digitized and then produced.
Ordering a sample product is the best way to ensure that your design looks exactly like you want it to on your product.
Available thread colors
Embroidery colors are limited to the available thread colors listed below. Please use these thread colors when designing and creating your embroidery artwork. If these colors are not used, your embroidery product cannot be printed, and we cannot guarantee that the end product meets your expectations.
Please download the PSD & AI swatches for a quick start.
| Sensaria Colors | Brand | Thread | Sensaria Color HEX |
| Gold | Madeira | Polyneon | #FFC72C |
| Navy | Madeira | Polyneon | #141B4D |
| Vegas Gold | Madeira | Polyneon | #EBBC4E |
| Orange | Madeira | Polyneon | #FC4C02 |
| Red | Madeira | Polyneon | #EF3340 |
| Black | Madeira | Polyneon | #000000 |
| White | Madeira | Polyneon | #FFFFFF |
| Light Grey | Madeira | Polyneon | #CFCDC9 |
| Light Blue | Madeira | Polyneon | #92C1E9 |
| Hunter Green | Madeira | Polyneon | #115740 |
| Grey | Madeira | Polyneon | #9EA2A2 |
| Purple | Madeira | Polyneon | #5A2D8A |
| Royal Blue | Madeira | Polyneon | #0067B9 |
| Kelly Green | Madeira | Polyneon | #00AD50 |
| Pink | Madeira | Polyneon | #F04E98 |
Order embroidery products via the Product Hub
When creating or ordering an embroidery product via the Product Hub, two workflows are available to you when uploading your artwork for your embroidery product.
In the first workflow, you'll only need to upload a plain artwork PNG file of your mockup image during the artwork upload process. This is our primary and most used process as it doesn't require you have your stitch file prepared already. In this process, our team will digitize your PNG file. You would only need to upload the following file:
- PNG file - The PNG version of your mockup artwork. This file is used to preview and accurately place your artwork on a product.
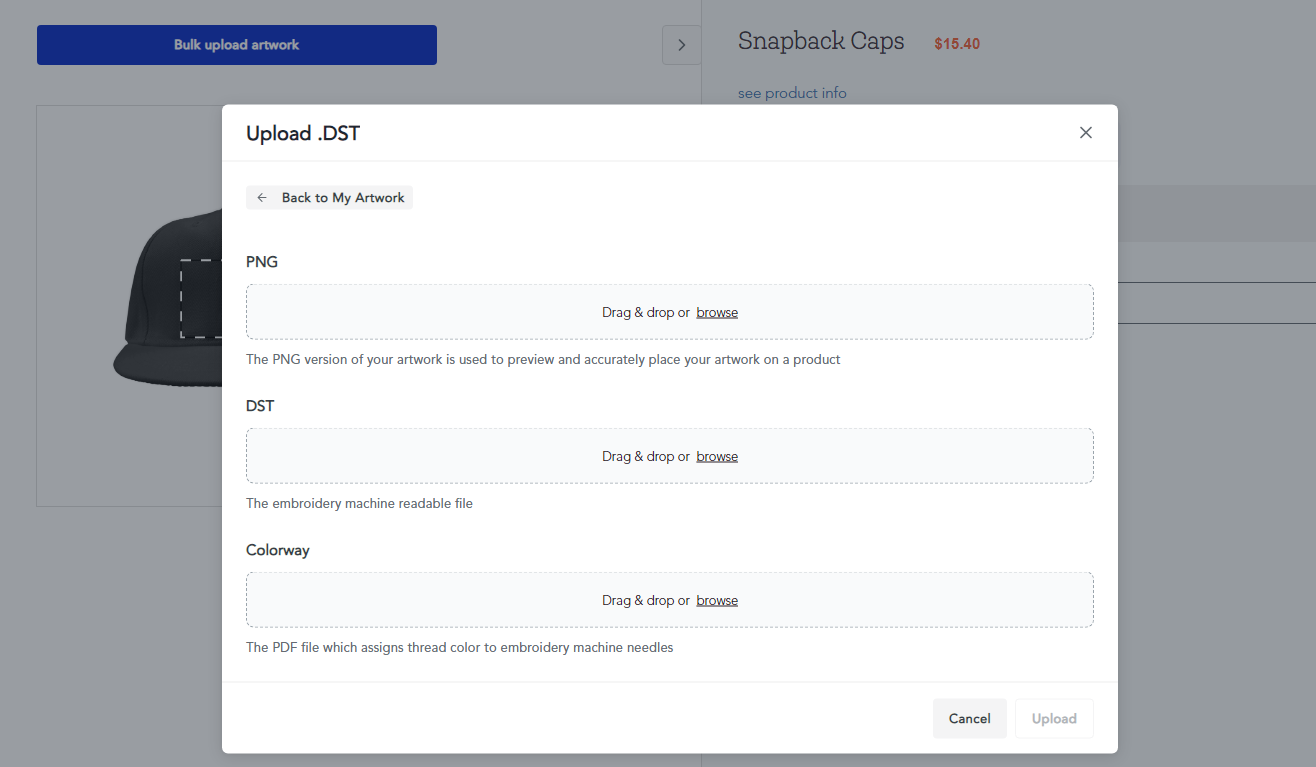
In the second workflow, you'll need to upload multiple files. During the artwork upload process, you would need to upload the following three files:
- PNG file - The PNG version of your mockup artwork. This file is used to preview and accurately place your artwork on a product.
- DST file - This is a machine-readable embroidery file.
- Colorway file - This PDF specifies the colorway that assigns the thread colors to the embroidery machine needles.
You need a PNG mockup image and colorway file for the second workflow because the DST file does not retain color information. With the second workflow, you'll have all the files ready for embroidery already.
1. In the upload artwork process, when creating an embroidery product, click on the Bulk Upload Artwork button.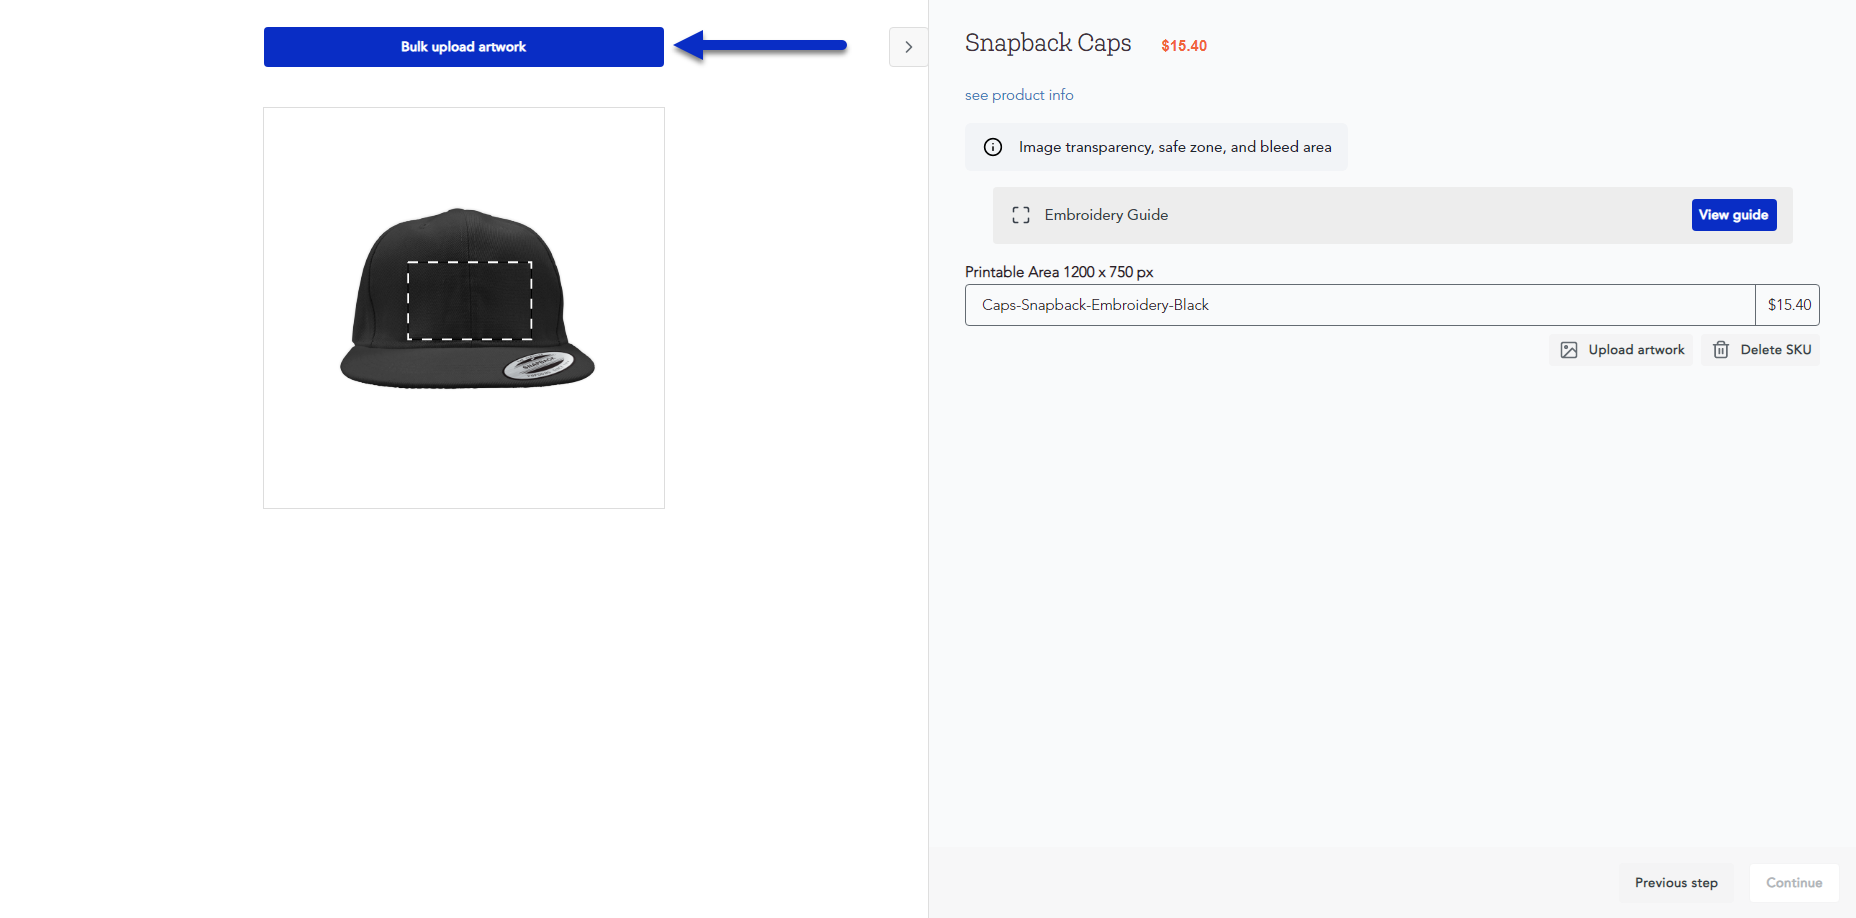
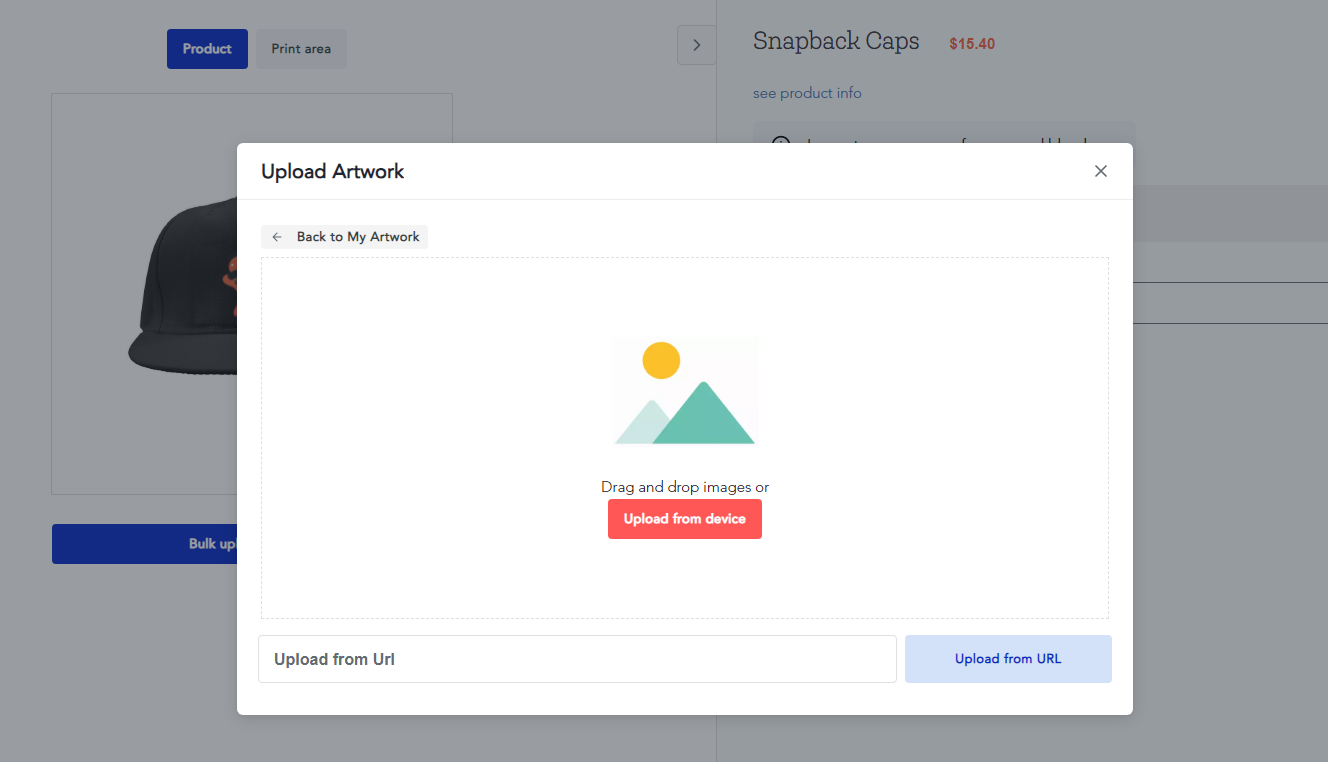
2. Click on the Upload artwork button.
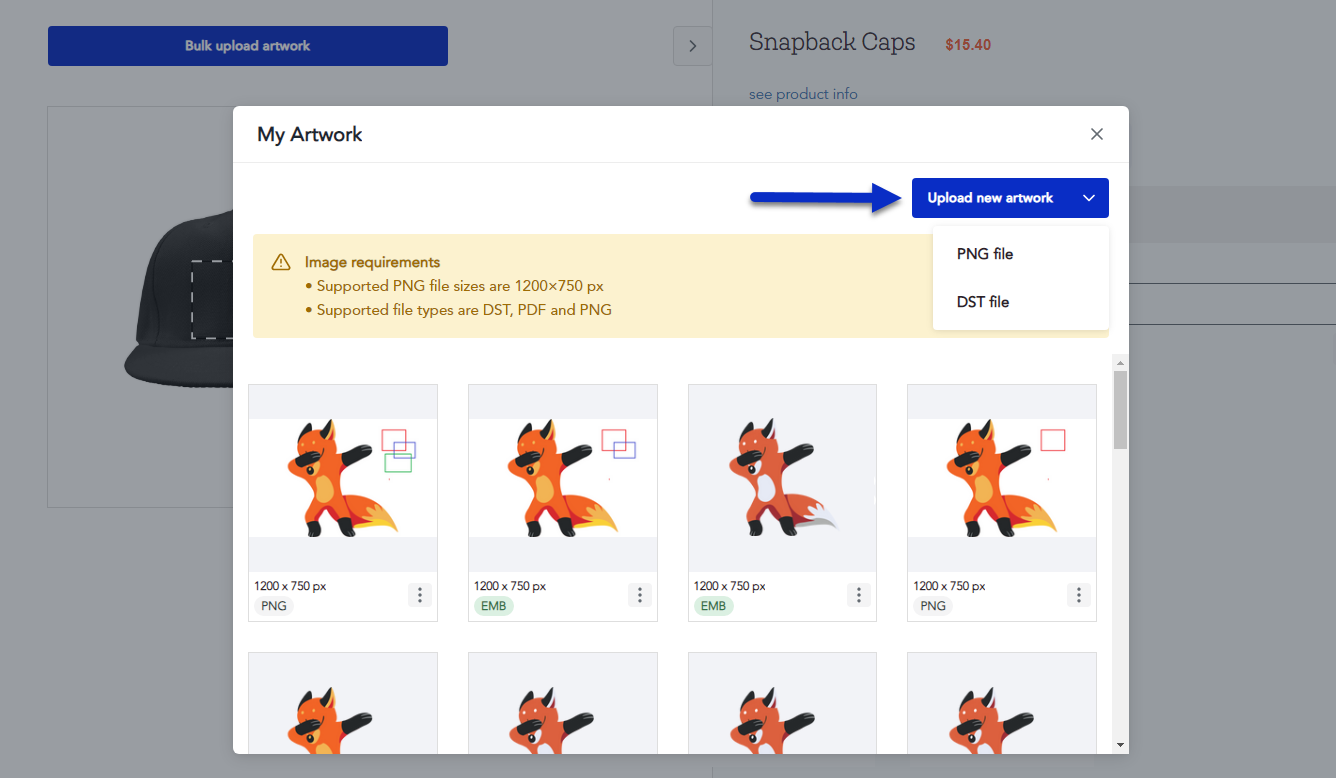
3. Here, you must upload your artwork files according to one of the following workflows below. Click on the Upload button once you've uploaded all the correct embroidery files.
- The first workflow - Add your plain PNG file with your product mockup image.
- The second workflow - Add your product mockup image as a PNG file, and then proceed to add your DST file for your embroidery product and your Colorway PDF file that specifies the colorway.
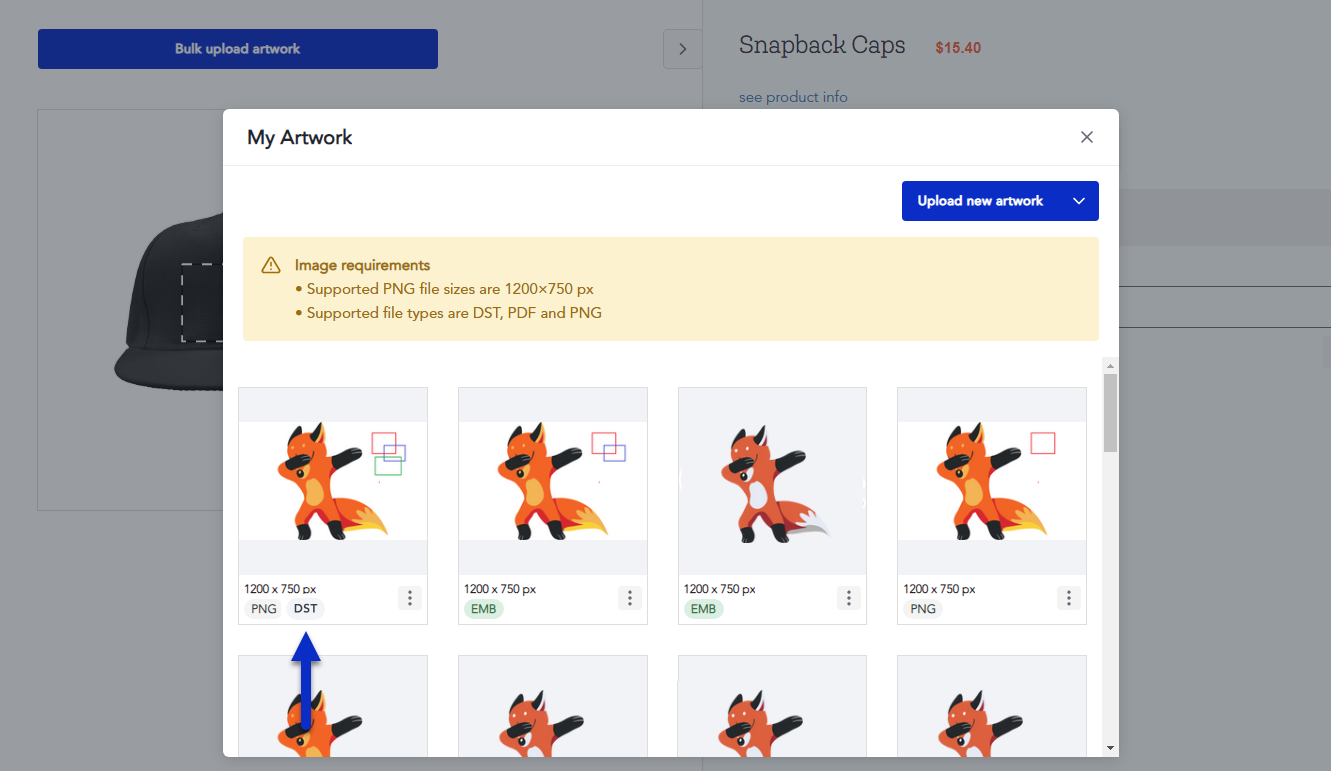
4. You'll be able to see your embroidery artwork files here once you've uploaded them. You can then select the embroidery artwork file to be used for your embroidery product.
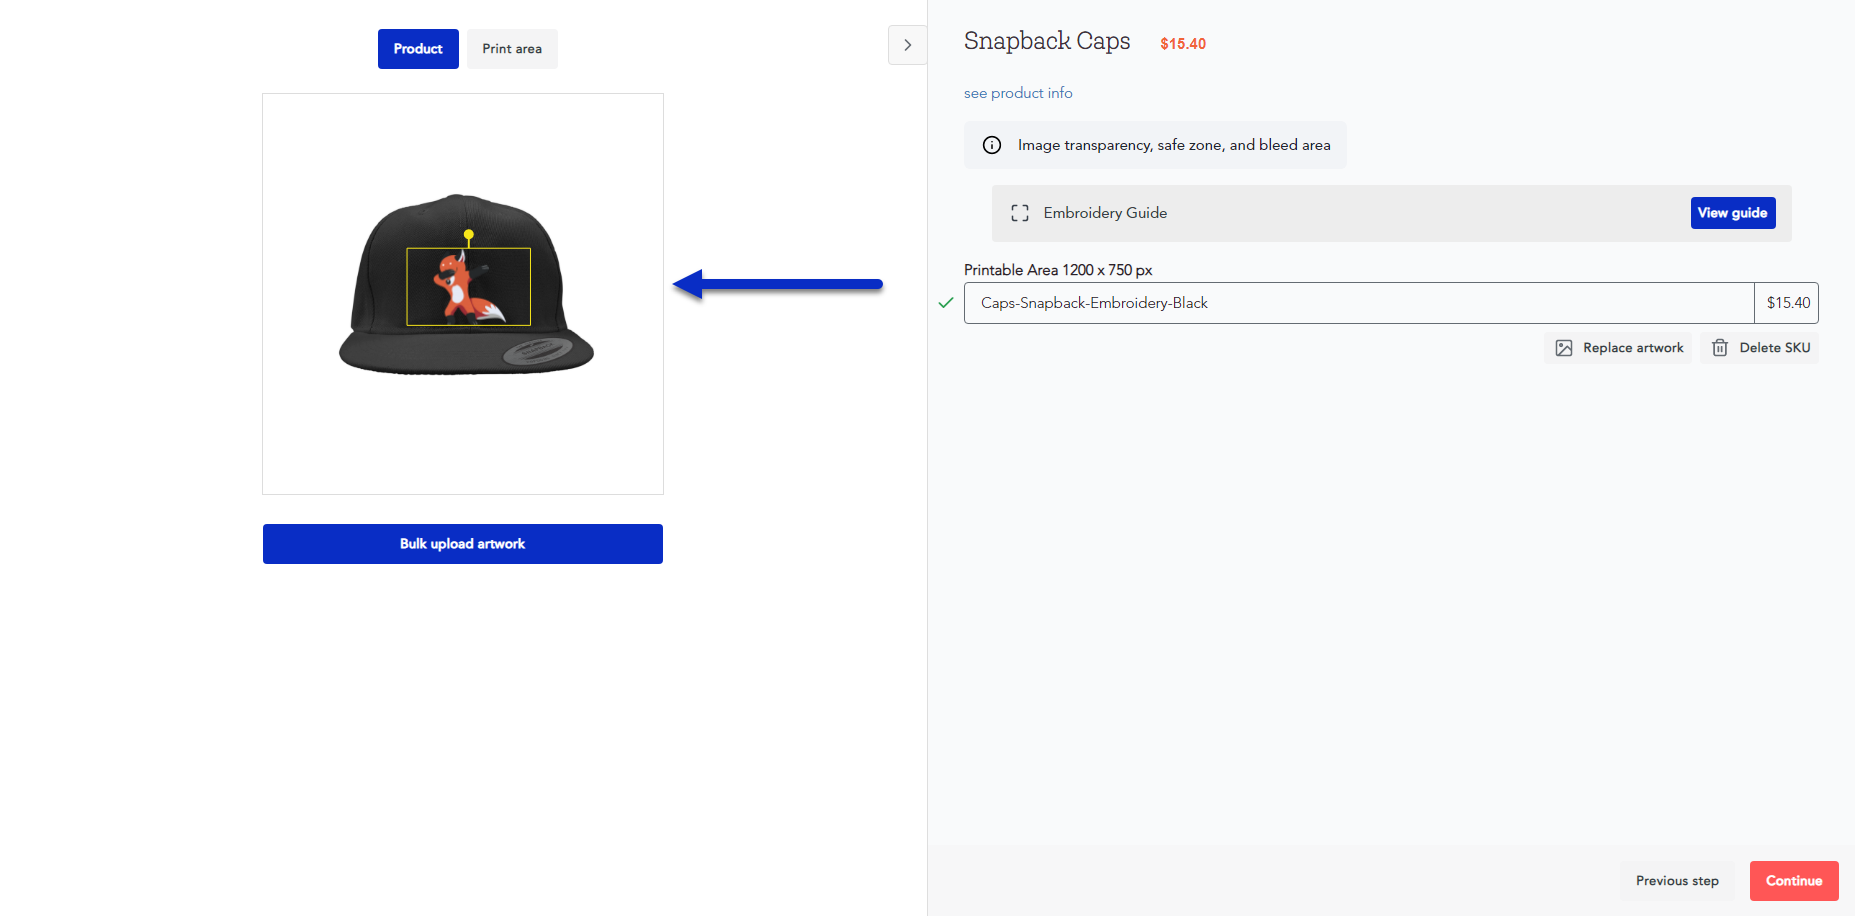
5. Once you apply your artwork file for your embroidery product, you can preview the artwork on your product.
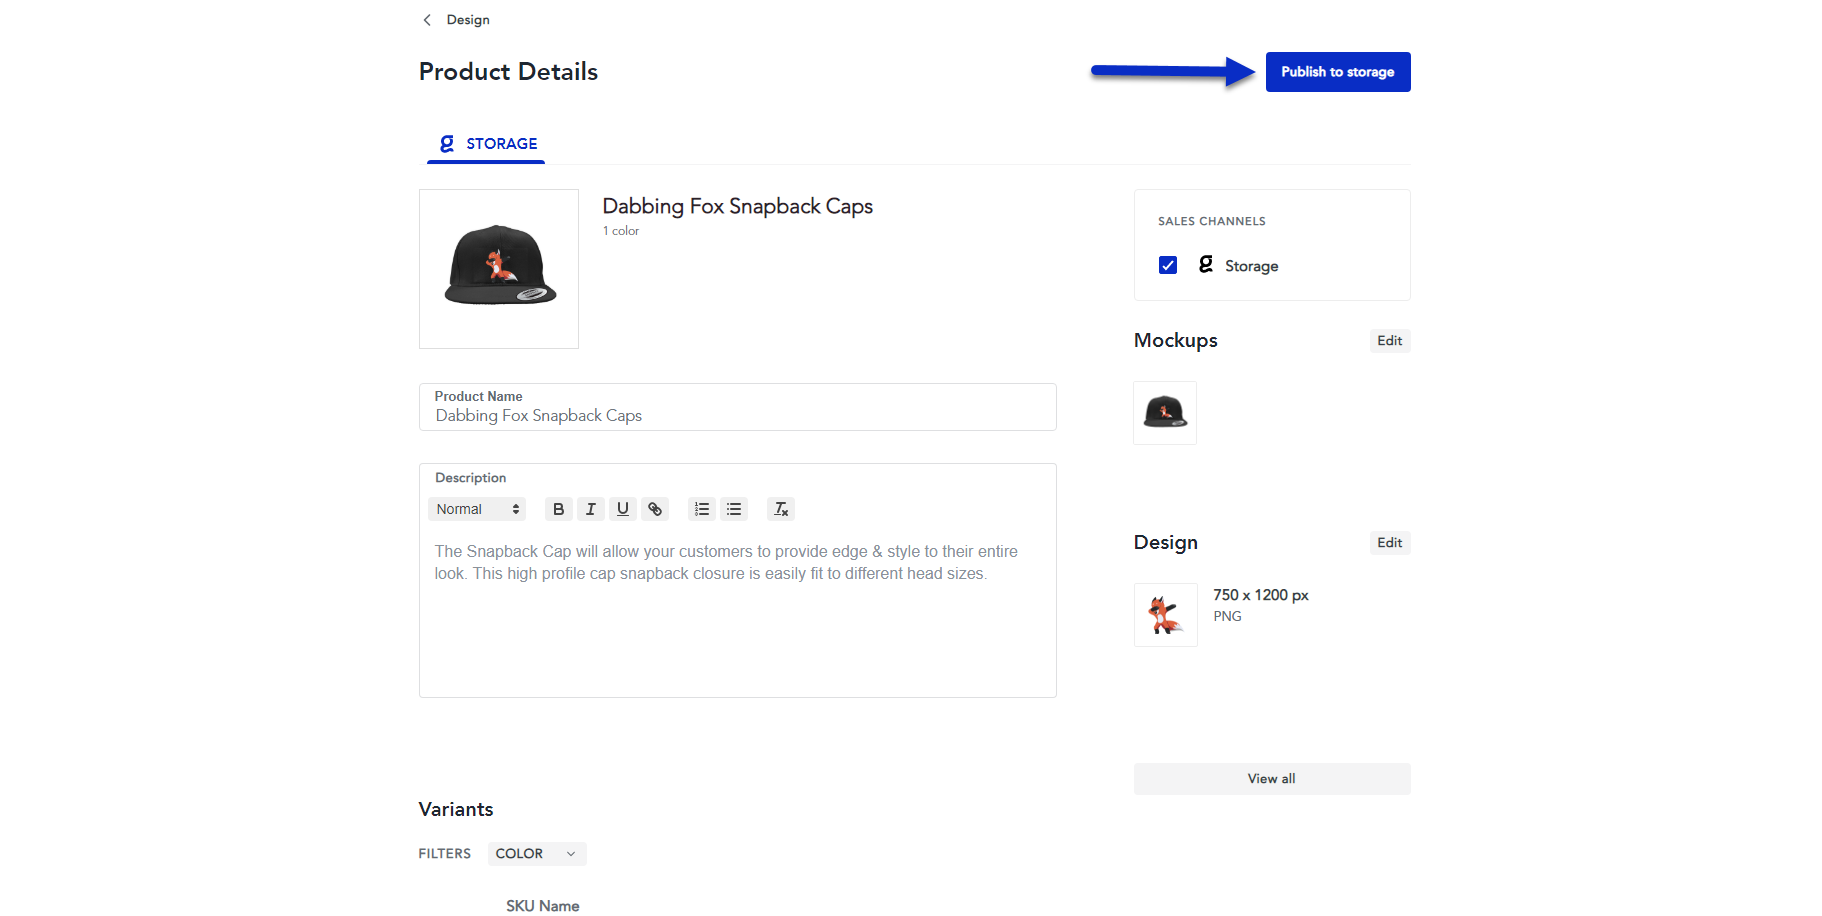
6. Continue through the product creation process, and once you're done editing the embroidery product details, you can click on the Publish button.
This will create the embroidery product in your Product Hub.
We highly recommend that you order a sample of the embroidery product to ensure that it meets your expectations before making the product available for your customers.
Order embroidery products via the API FAQ
Do you have a guide on submitting embroidery orders via the API?
- Check out our Submitting an Embroidery Order guide on our API documentation.
What is a stitch file?
- Stitch files contain the directions to create the embroidery design from the first stitch to the last stitch. Each embroidery machine has its' own way of interpreting the stitch file directions, which is why there are so many stitch file formats.
What stitch file format does Sensaria support for embroidery?
- We support DST files.
How do I create my own stitch file?
- You can create your stitch file by converting the artwork design into the proper file type. To do this, you'll need digitizing software to set your design, choose your stitch type, set the stitch direction, and set the embroidery thread colors.
What colors are specified in the stitch file?
- The colorway details are included in a separate file that accompanies the DST file. You can also view the colors in the table above.
What is the maximum stitch count limit for my design?
- We have a 15,000 maximum stitch count limit. Designs are typically kept within a 5,000 to 6,000 stitch count range. Our digitization process will reject any complex design that exceeds the maximum stitch count of 15,000.
What happens when I try to create an embroidery product without a proper stitch file?
- Our system will reject the product creation process and order, and you still receive an error.
Can I use the same stitch file for all embroidery products?
- No, the stitch file must be the exact specifications for the product that you are creating. If multiple products have the same specifications, then you can use the same stitch file. If you're creating or ordering two different products with different specifications, you must use two different stitch files with the proper specifications for each product.
Do I need to submit a regular image file?
- Yes, you also need to include a regular PNG image file so that our vendors ensure your product's product's color and quality assurance.
Once I submit an order, are there any differences in order updates via the API?
- No, the API calls to get status updates and tracking information remain the same once your embroidery product is created or ordered.
Can I get a mockup for my embroidery product?
- Yes, you can get a product mockup by using the Product Preview API call or previewing the product mockup through the product hub for your embroidery product.
If I don't have a stitch file, can I still create and submit embroidery product orders?
- If you don't have a digitized stitch file, you can create and order embroidery products through the product hub in the Sensaria Admin.
Can I continue to create embroidery products and have the artwork digitized in the Sensaria Admin?
- Yes, you can utilize the existing digitization, product, and order process available in the system.