If your store has many personalized products ordered through Sensaria, you can quickly view your personalized order items and push them to production directly from our Orders page.
If you have multiple orders not requiring personalization, you can send them to production in bulk.
Standard orders will sit in the NeedsPersonalization status until you push them into production.
If your orders end up in the NeedsPersonalization status by accident or unintentionally, you can push the order to production without changing the image for the products.
Orders may stay in the NeedsPersonalization status for up to 40 days, and once they reach this point, you can no longer submit them to our manufacturer. You must cancel orders older than this, and you should submit a new order.
Please note that Sensaria will cancel all orders in the NeedsPersonalization status after four months.
- Replace your artwork and send your order to production
- Split your order items to personalize each item
- Export needs personalization order item row
Replace your artwork and send your order item to production
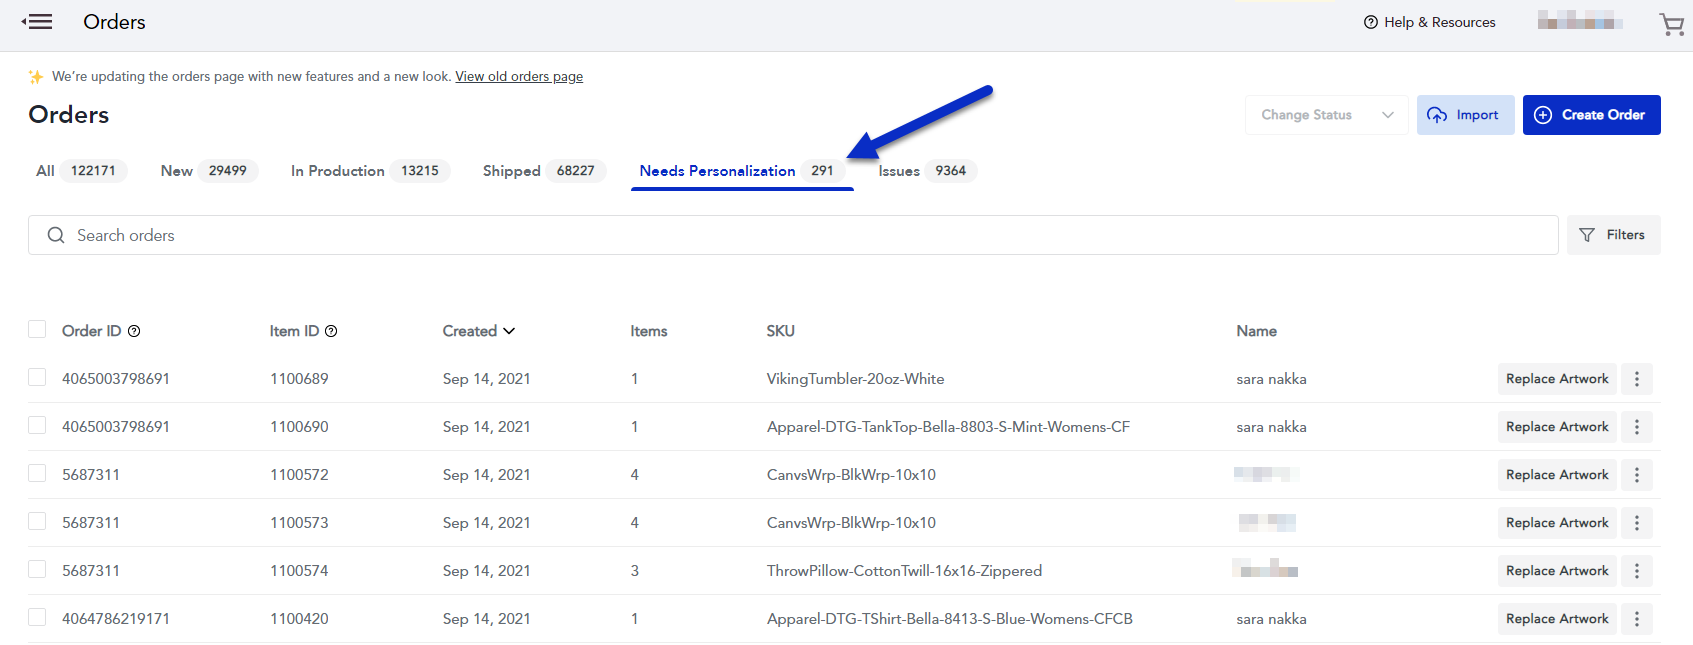
1. Go to the Needs Personalization tab on the Orders page.
On this tab, you can view all of the order items in the NeedsPersonalization status. This tab will only display the table in an order item view and not in an order view. These order items require you to add the artwork for the personalized item before being sent to production.
The Order ID column pulls the ID of the order from the platform that you're using. This helps you cross-reference and verify that the order you are replacing the artwork with is the correct one you should be updating.
When you add the artwork for the personalized item, it will automatically change the status from NeedsPersonalization into the Pending status and then be pushed through to production as long as there isn't an issue with the image.
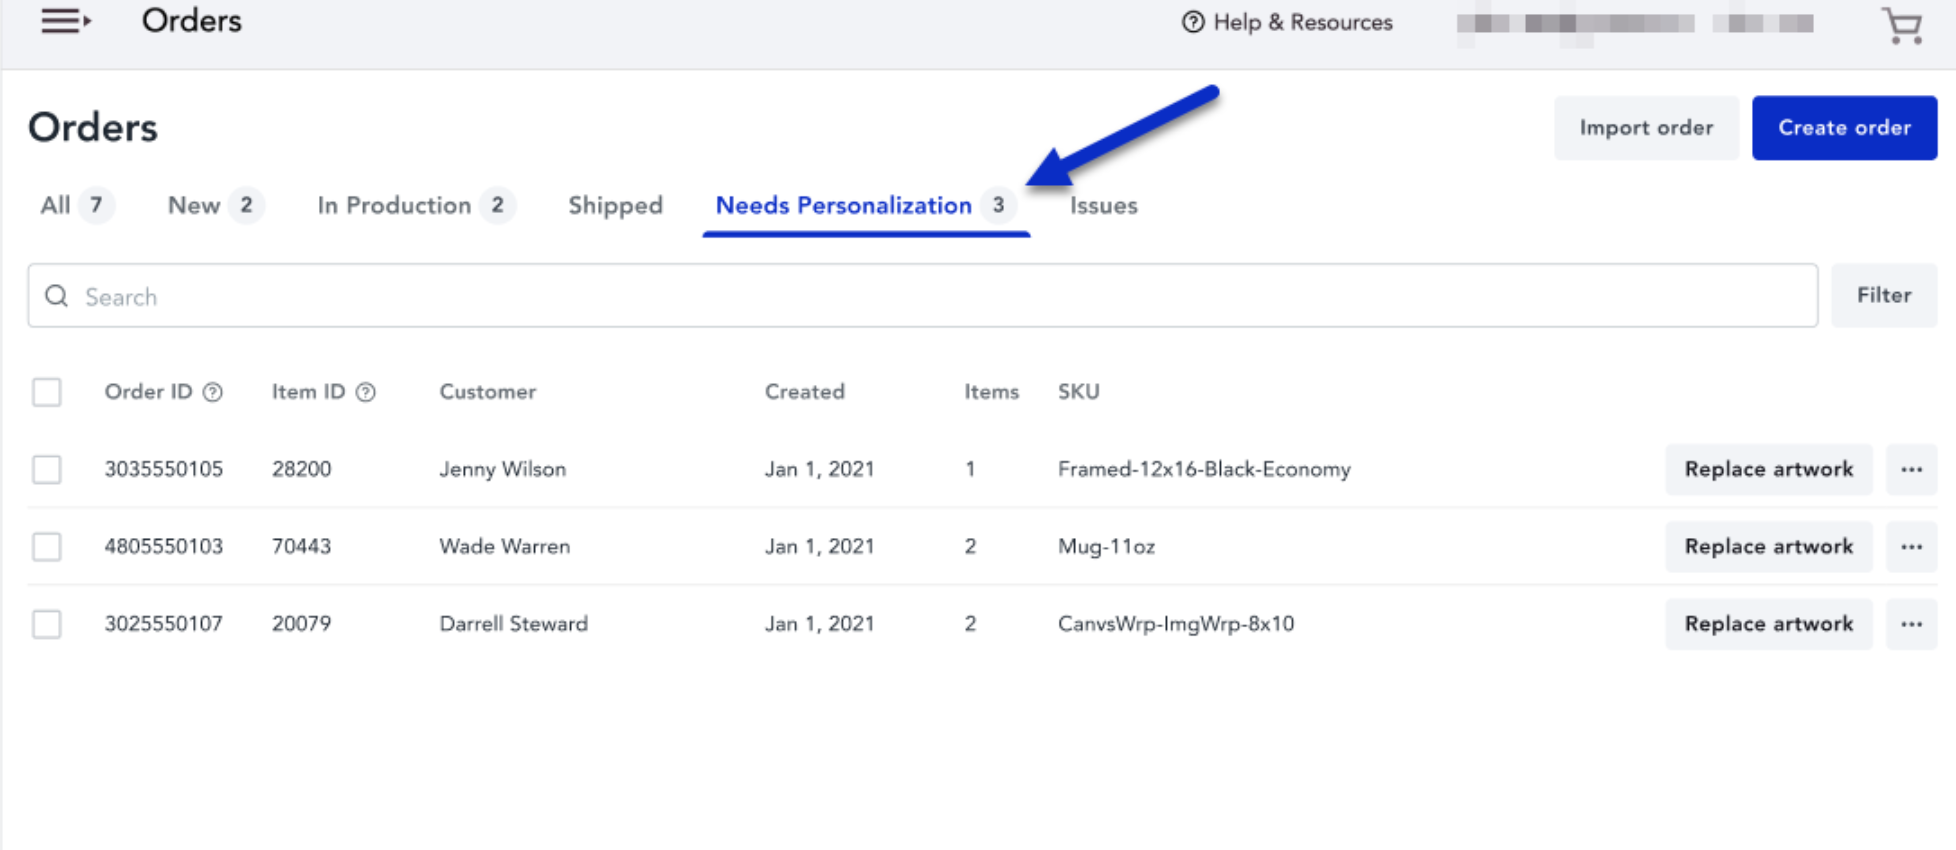
2. Click on the Replace artwork button for the personalized order item to add the artwork.

3. You can then add your new artwork for your personalized item by providing the artwork URL or uploading the image using the "Select from device" option.
- If you're providing an artwork URL, please be sure that the URL is a publically accessible link to allow our system to retrieve your design image.
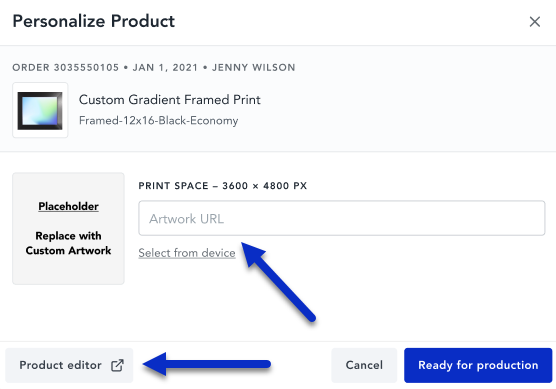
After adding your artwork to the personalized product, you can use the Product editor button to edit how the artwork looks on the product.
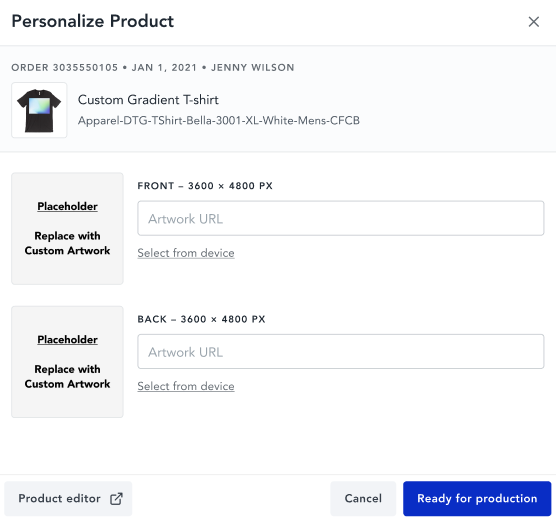
For certain products, there may be multiple print spaces for the personalized product. In that scenario, you would need to add the artwork for each print space. For example, the personalized product below allows you to add artwork for the front and back of the t-shirt product.
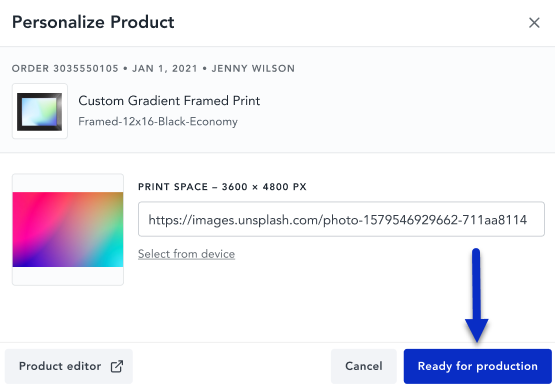
4. After you're done adding and editing your artwork, click on the Ready for production button.
This will finalize updating your artwork on your personalized order item, and our system will send the ordered item to production. Our system will move the ordered item out of the NeedsPersonalization status and into the Pending status.
The order item you just updated will be removed from the Needs Personalization tab and moved into the All tab.
Split your order items to personalize each item
If your order item has multiple quantities and you want to personalize each item individually rather than all at once, you can split the order items. By splitting the order items, you can personalize each item individually regardless of how many of the same items were ordered.
1. Go to the Needs Personalization tab on the Orders page.
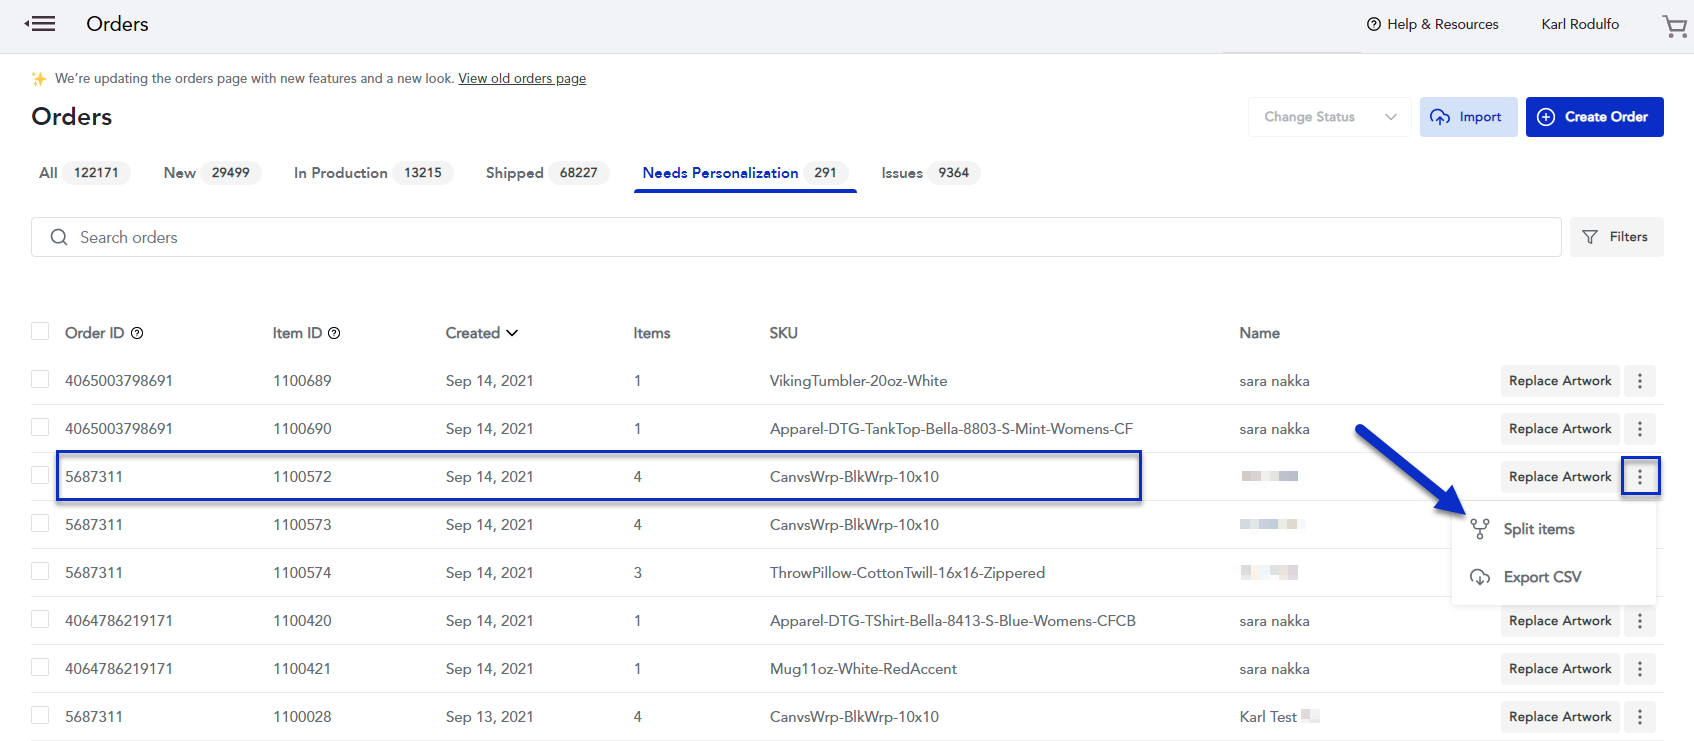
2. Look for your order item with multiple quantities that you want to split. Click on the menu in the row for the ordered item and then click on the Split items option.
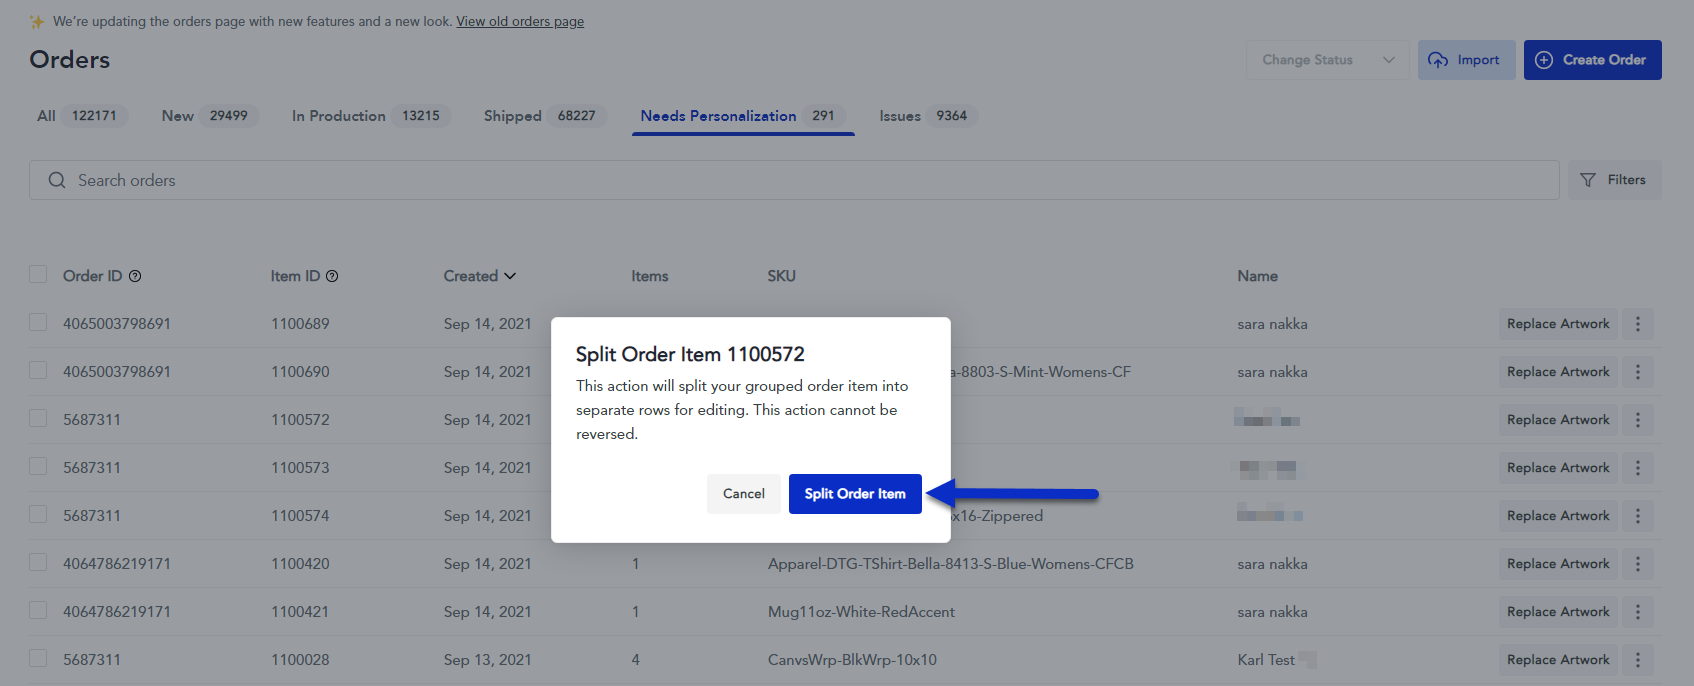
3. A prompt will appear asking you to confirm that you want to split the order items, and you can click on the Split Order Item button.
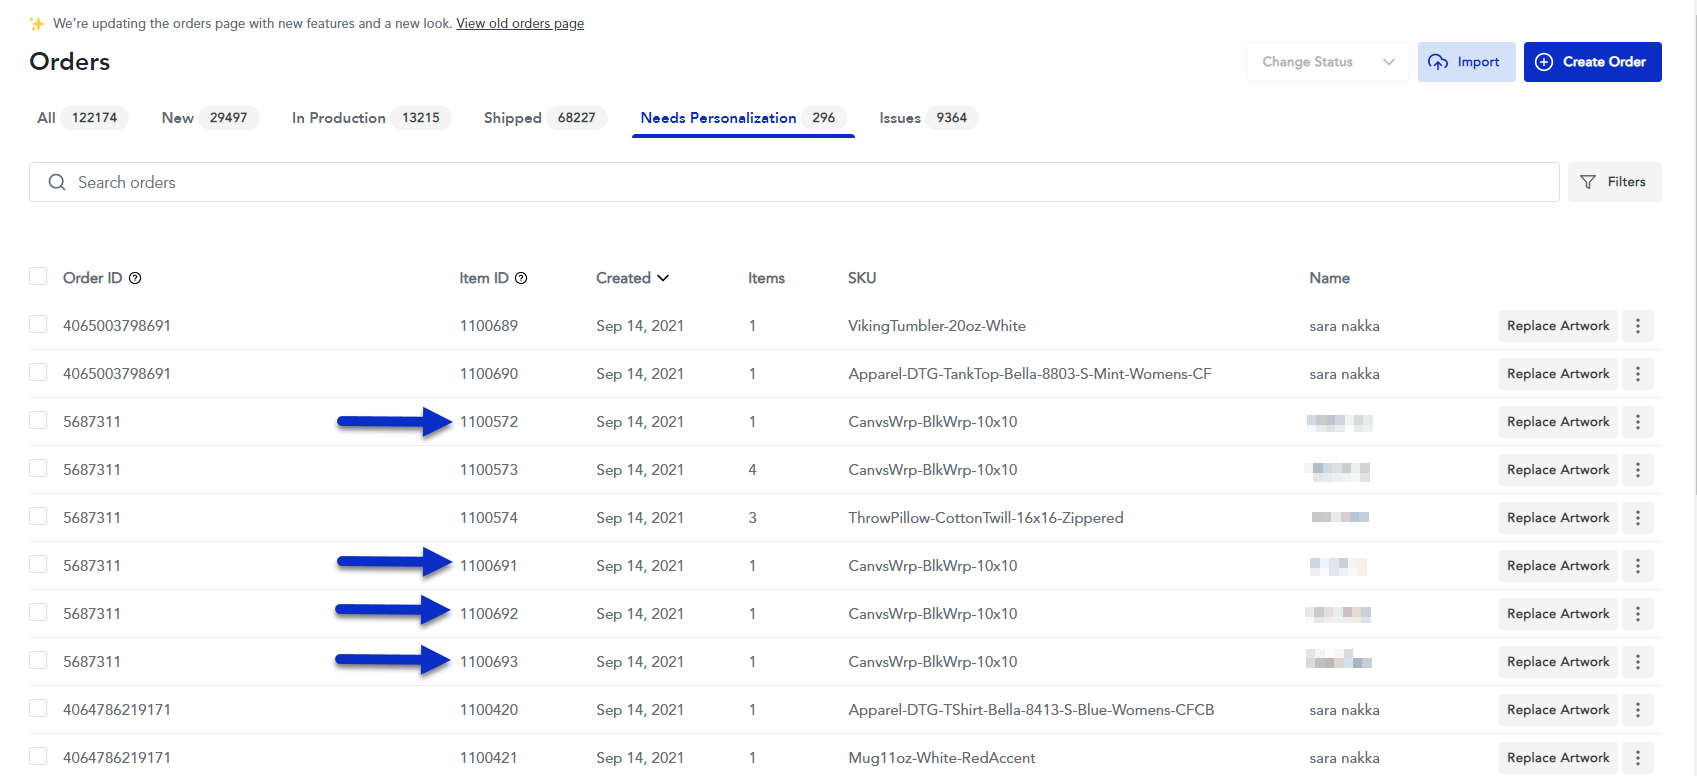
4. Once you click on the Split Order Item button, it will split the ordered item depending on how many were ordered. In this example, the order item had a quantity of 4 which resulted in splitting the order item into 4 individual items and rows.
Export needs personalization order item row
You can also export the individual row for the ordered item by utilizing the Export CSV option when clicking on the menu.
