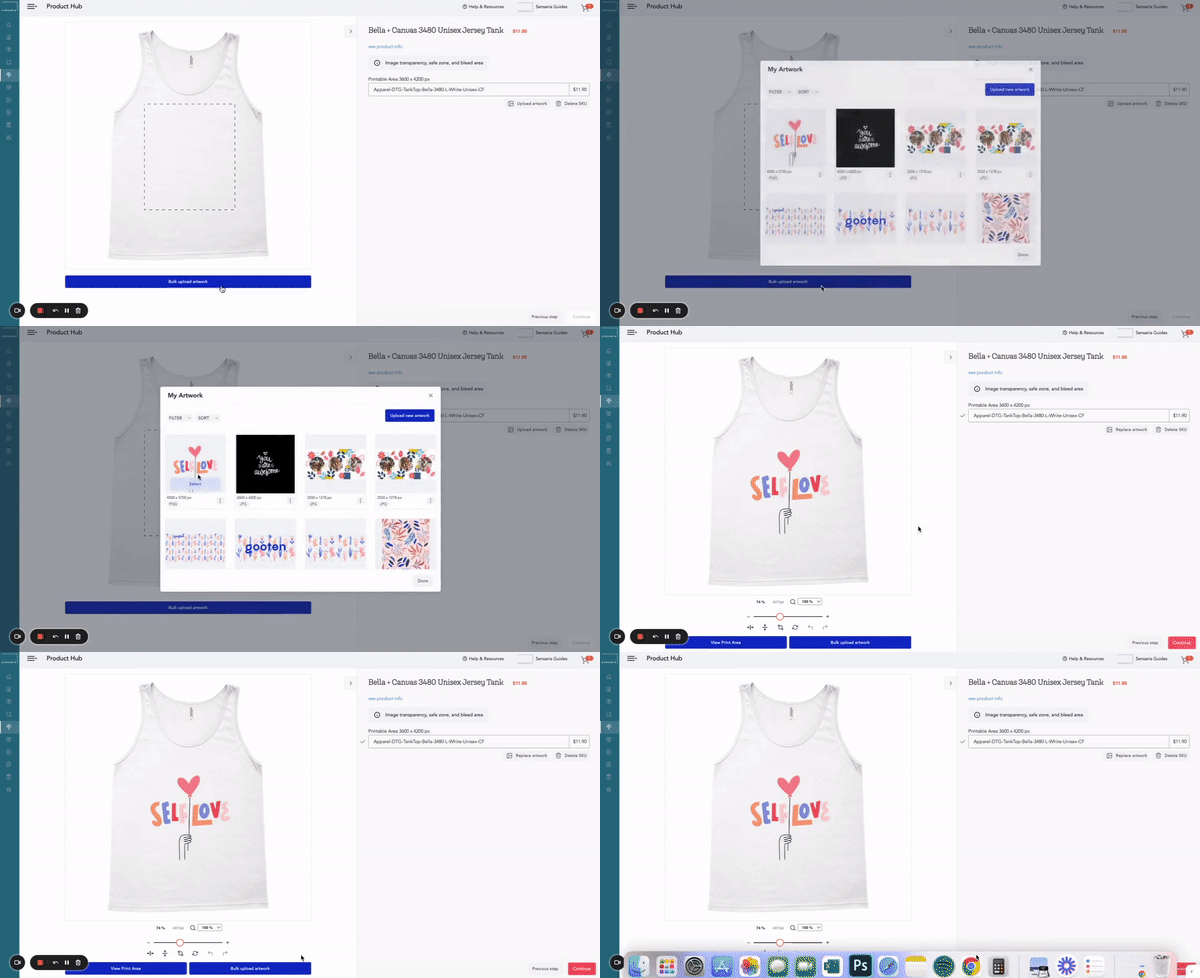
You can upload images in two ways - by using the Bulk Upload Artwork button located under the product image or you can use the Upload Artwork button located underneath the SKU on the right-hand side.
Bulk Upload Artwork Button
Single SKU Image Upload
If you’re creating a product that has only one variant and two print areas (for example, an XS T-shirt, with Center Front and Center Back printing) you can upload your artwork in two ways:
- Click on the Bulk Upload Artwork button
- Click on the Upload Artwork button
Multiple SKU Image Upload
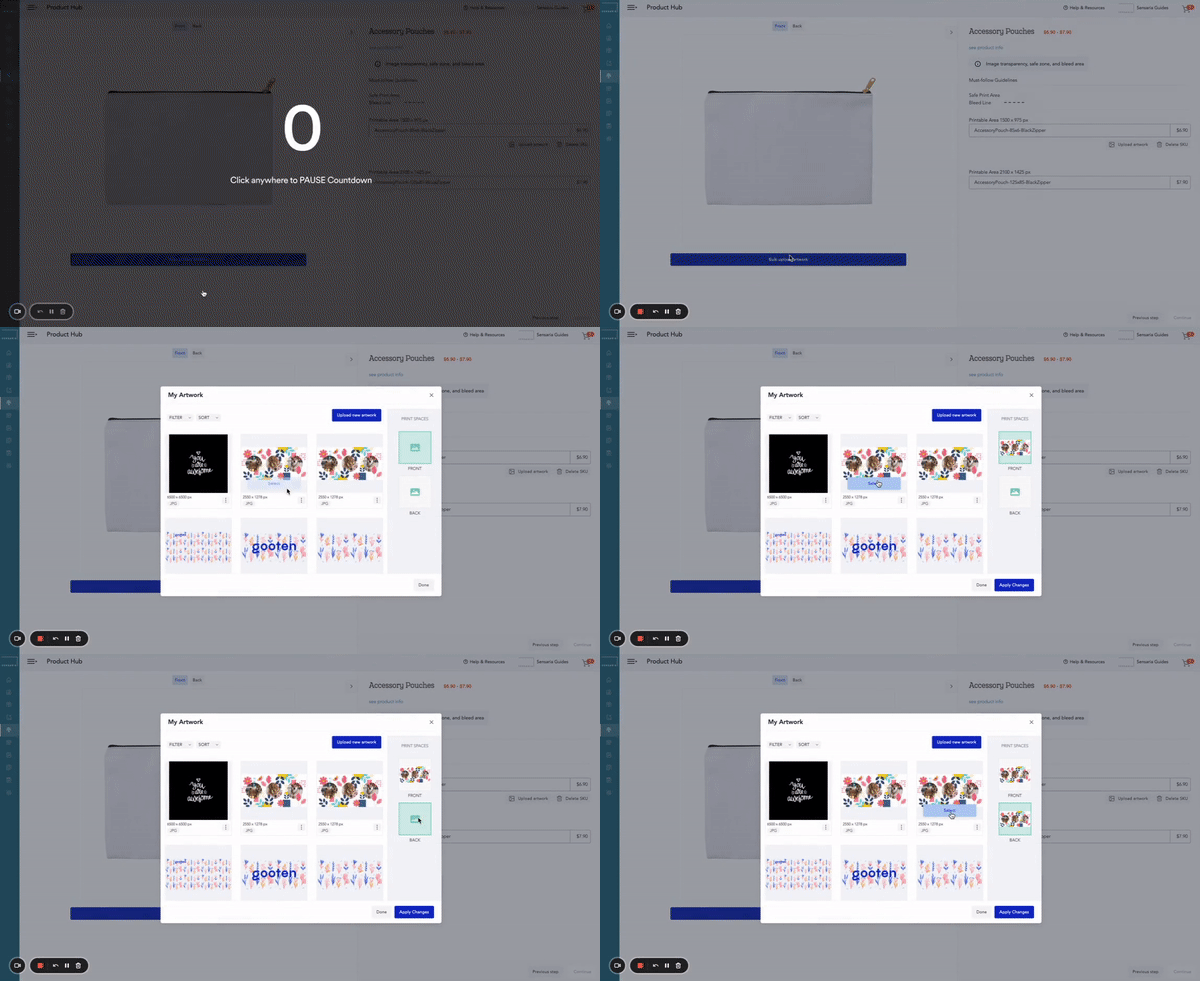
If you’re creating a product that has multiple variants and two print areas (for example, a T-shirt in multiple sizes, with Center Front and Center Back printing) you can upload the same image for all front sides of the T-shirts at once and also select the one you’d like to be uploaded on the backside of all of the T-shirts.
Once an image is uploaded, the Upload Artwork Button under each SKU becomes the Replace Artwork button which enables you to replace the image for a particular SKU.
Replace Artwork Button
If you’re creating a product that has multiple variants and/or two print areas (for example, an accessory pouch in multiple sizes), and you’d like to change the artwork for one variant or one product side only, you can do so by clicking on Replace Artwork Button under each SKU.
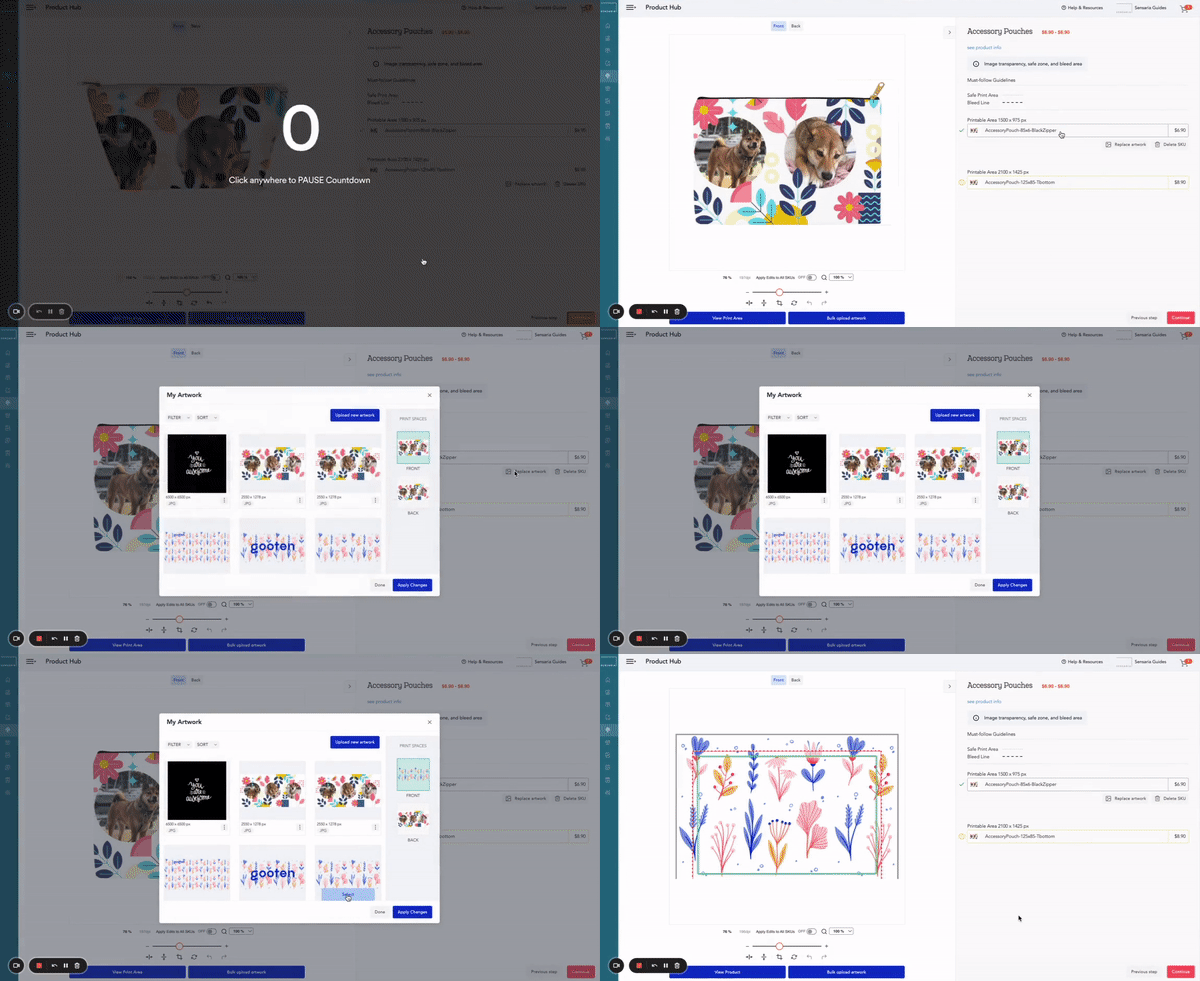
Please note you’d need to do it for all of the variants individually. To do so, please click on each SKU box and then click the upload images button below it.
When an image is uploaded, there are a few things to consider to ensure the highest quality prints on your products. Some possible issues that can occur include:
- Small Image Size
- The image is smaller than the recommended resolution and as a result, it may be stretched or blurry when printed.
- Wrong number of input images provided
- Some SKUs require more than one image, (IE. for images on the front and back)
While submitting images with the correct image specs is not necessary, if it's not done correctly, the final printed product may not come out as you expected. The image specs we provide are based on the manufacturing partner's recommendation to ensure the highest quality printed product. You can find all the necessary specs in our Product Catalog.
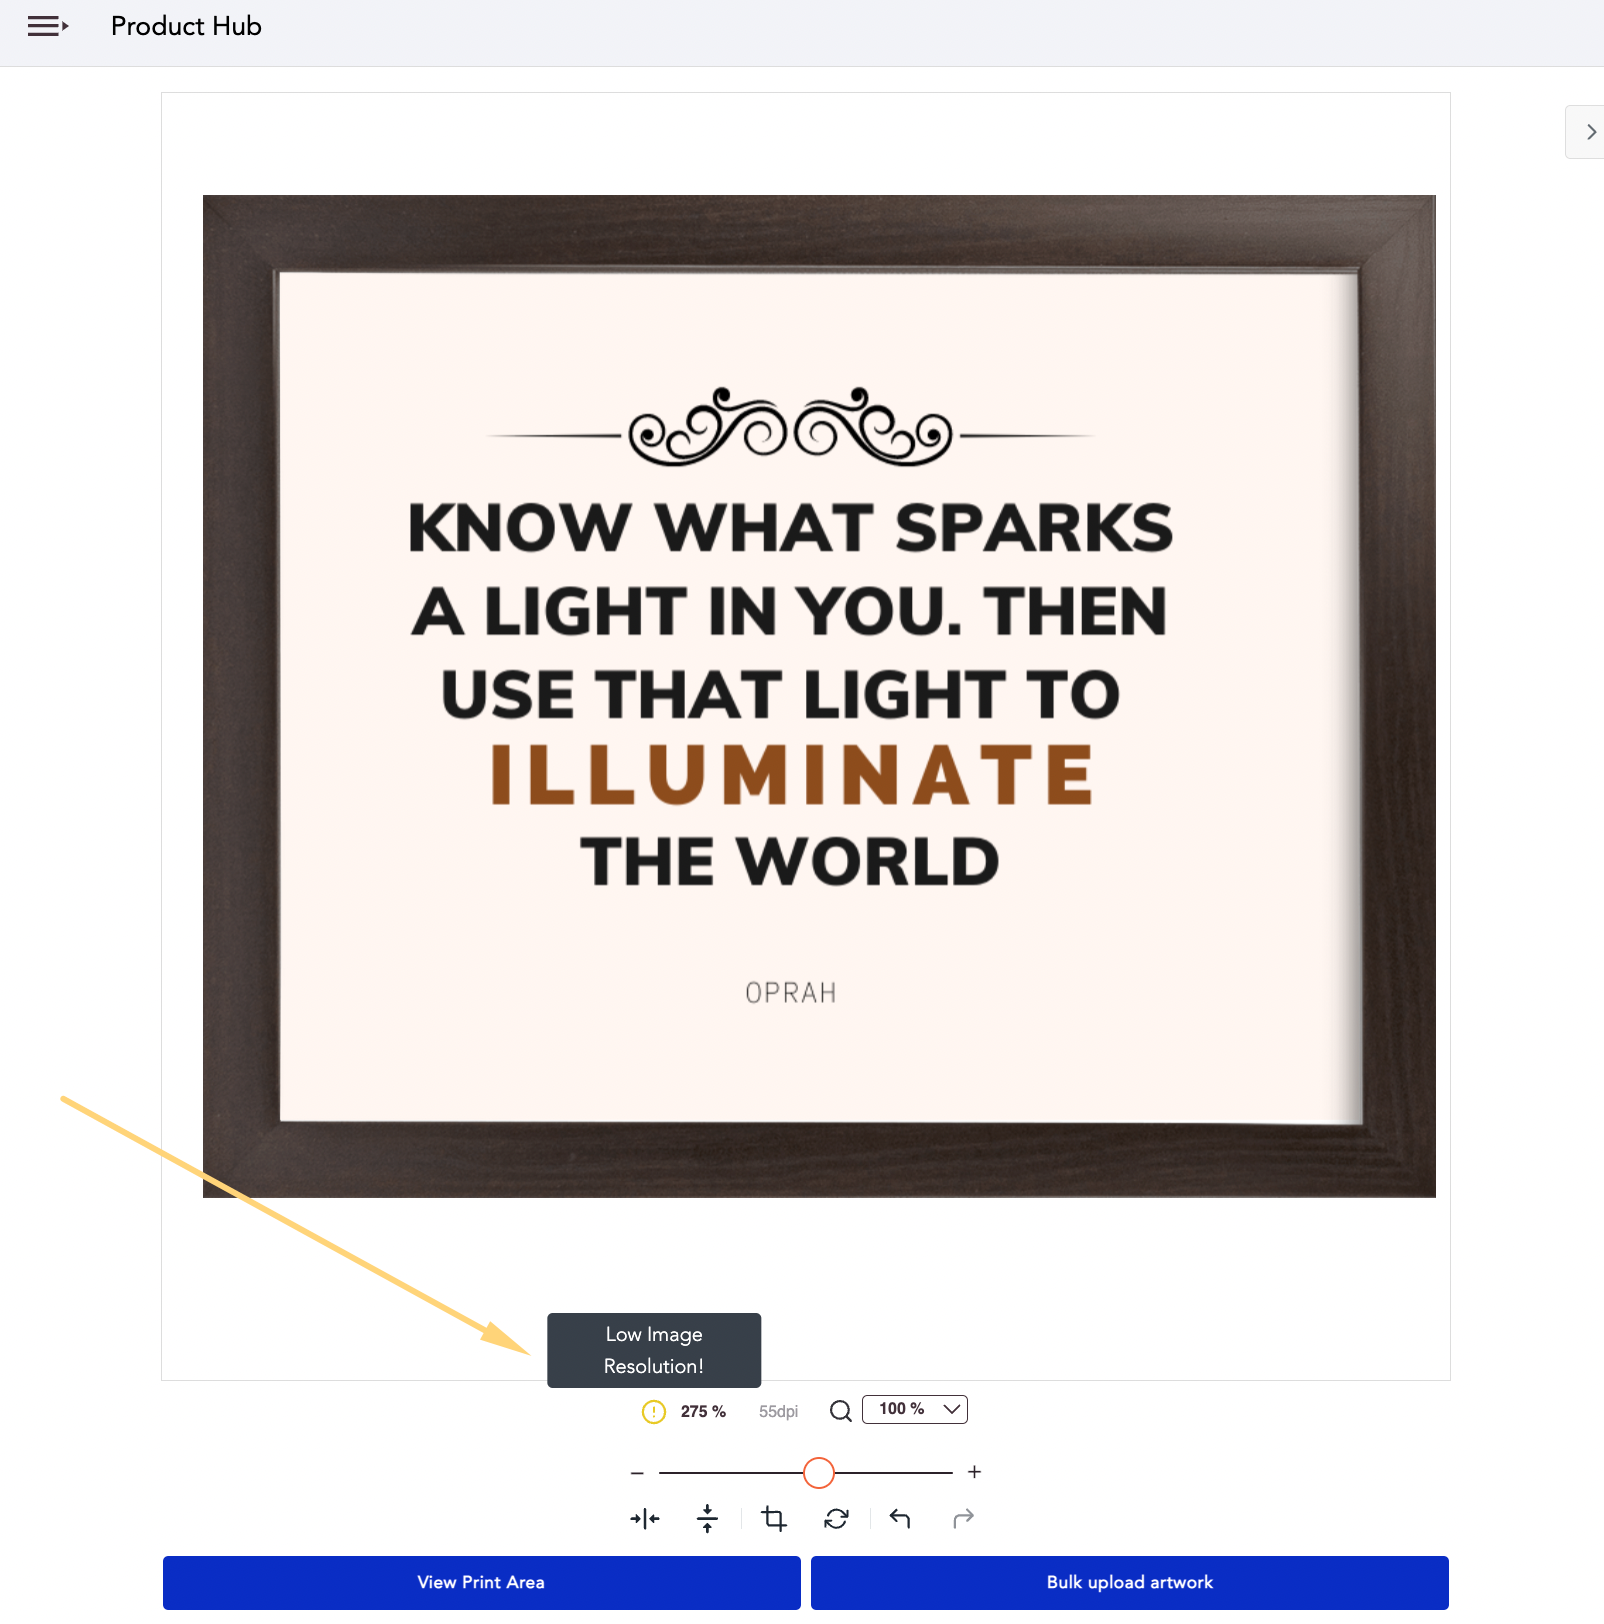
The Hub product creation process will let you know when your DPI is too low and we recommend keeping your artwork at or above 300 DPI for optimal printing if you choose to resize your design.
Each time you upload an image with a lower resolution than recommended, you will get a warning message. If everything is to your liking and you decide to proceed with the image as is, it's possible to save the product.
If your artwork doesn't cover the entire print area, our back-end image processing will automatically add transparent edges to make up for the difference in image size and update the resolution to the recommended one.
- Please note that this doesn't mean originally blurry images will become sharper. You can find more information on how to create high-quality image files in this article.
Image Orientation
When uploading your artwork to your product, you can select which orientation you want your artwork to be printed on the product.
This is useful as it lets you ensure that your artwork has the correct orientation on your product before it's printed. We often see mistakes where artwork on products is not oriented or placed correctly which results in product misprints in terms of your expected product.
To choose your artwork orientation for your product, follow the below steps.
1. When creating, editing, or syncing a product and when you're on the image editor page, there is an orientation option in which you can choose how your artwork is oriented.
- You can choose between portrait or landscape for the layout of your artwork.
- By default, your artwork orientation will be set to portrait.
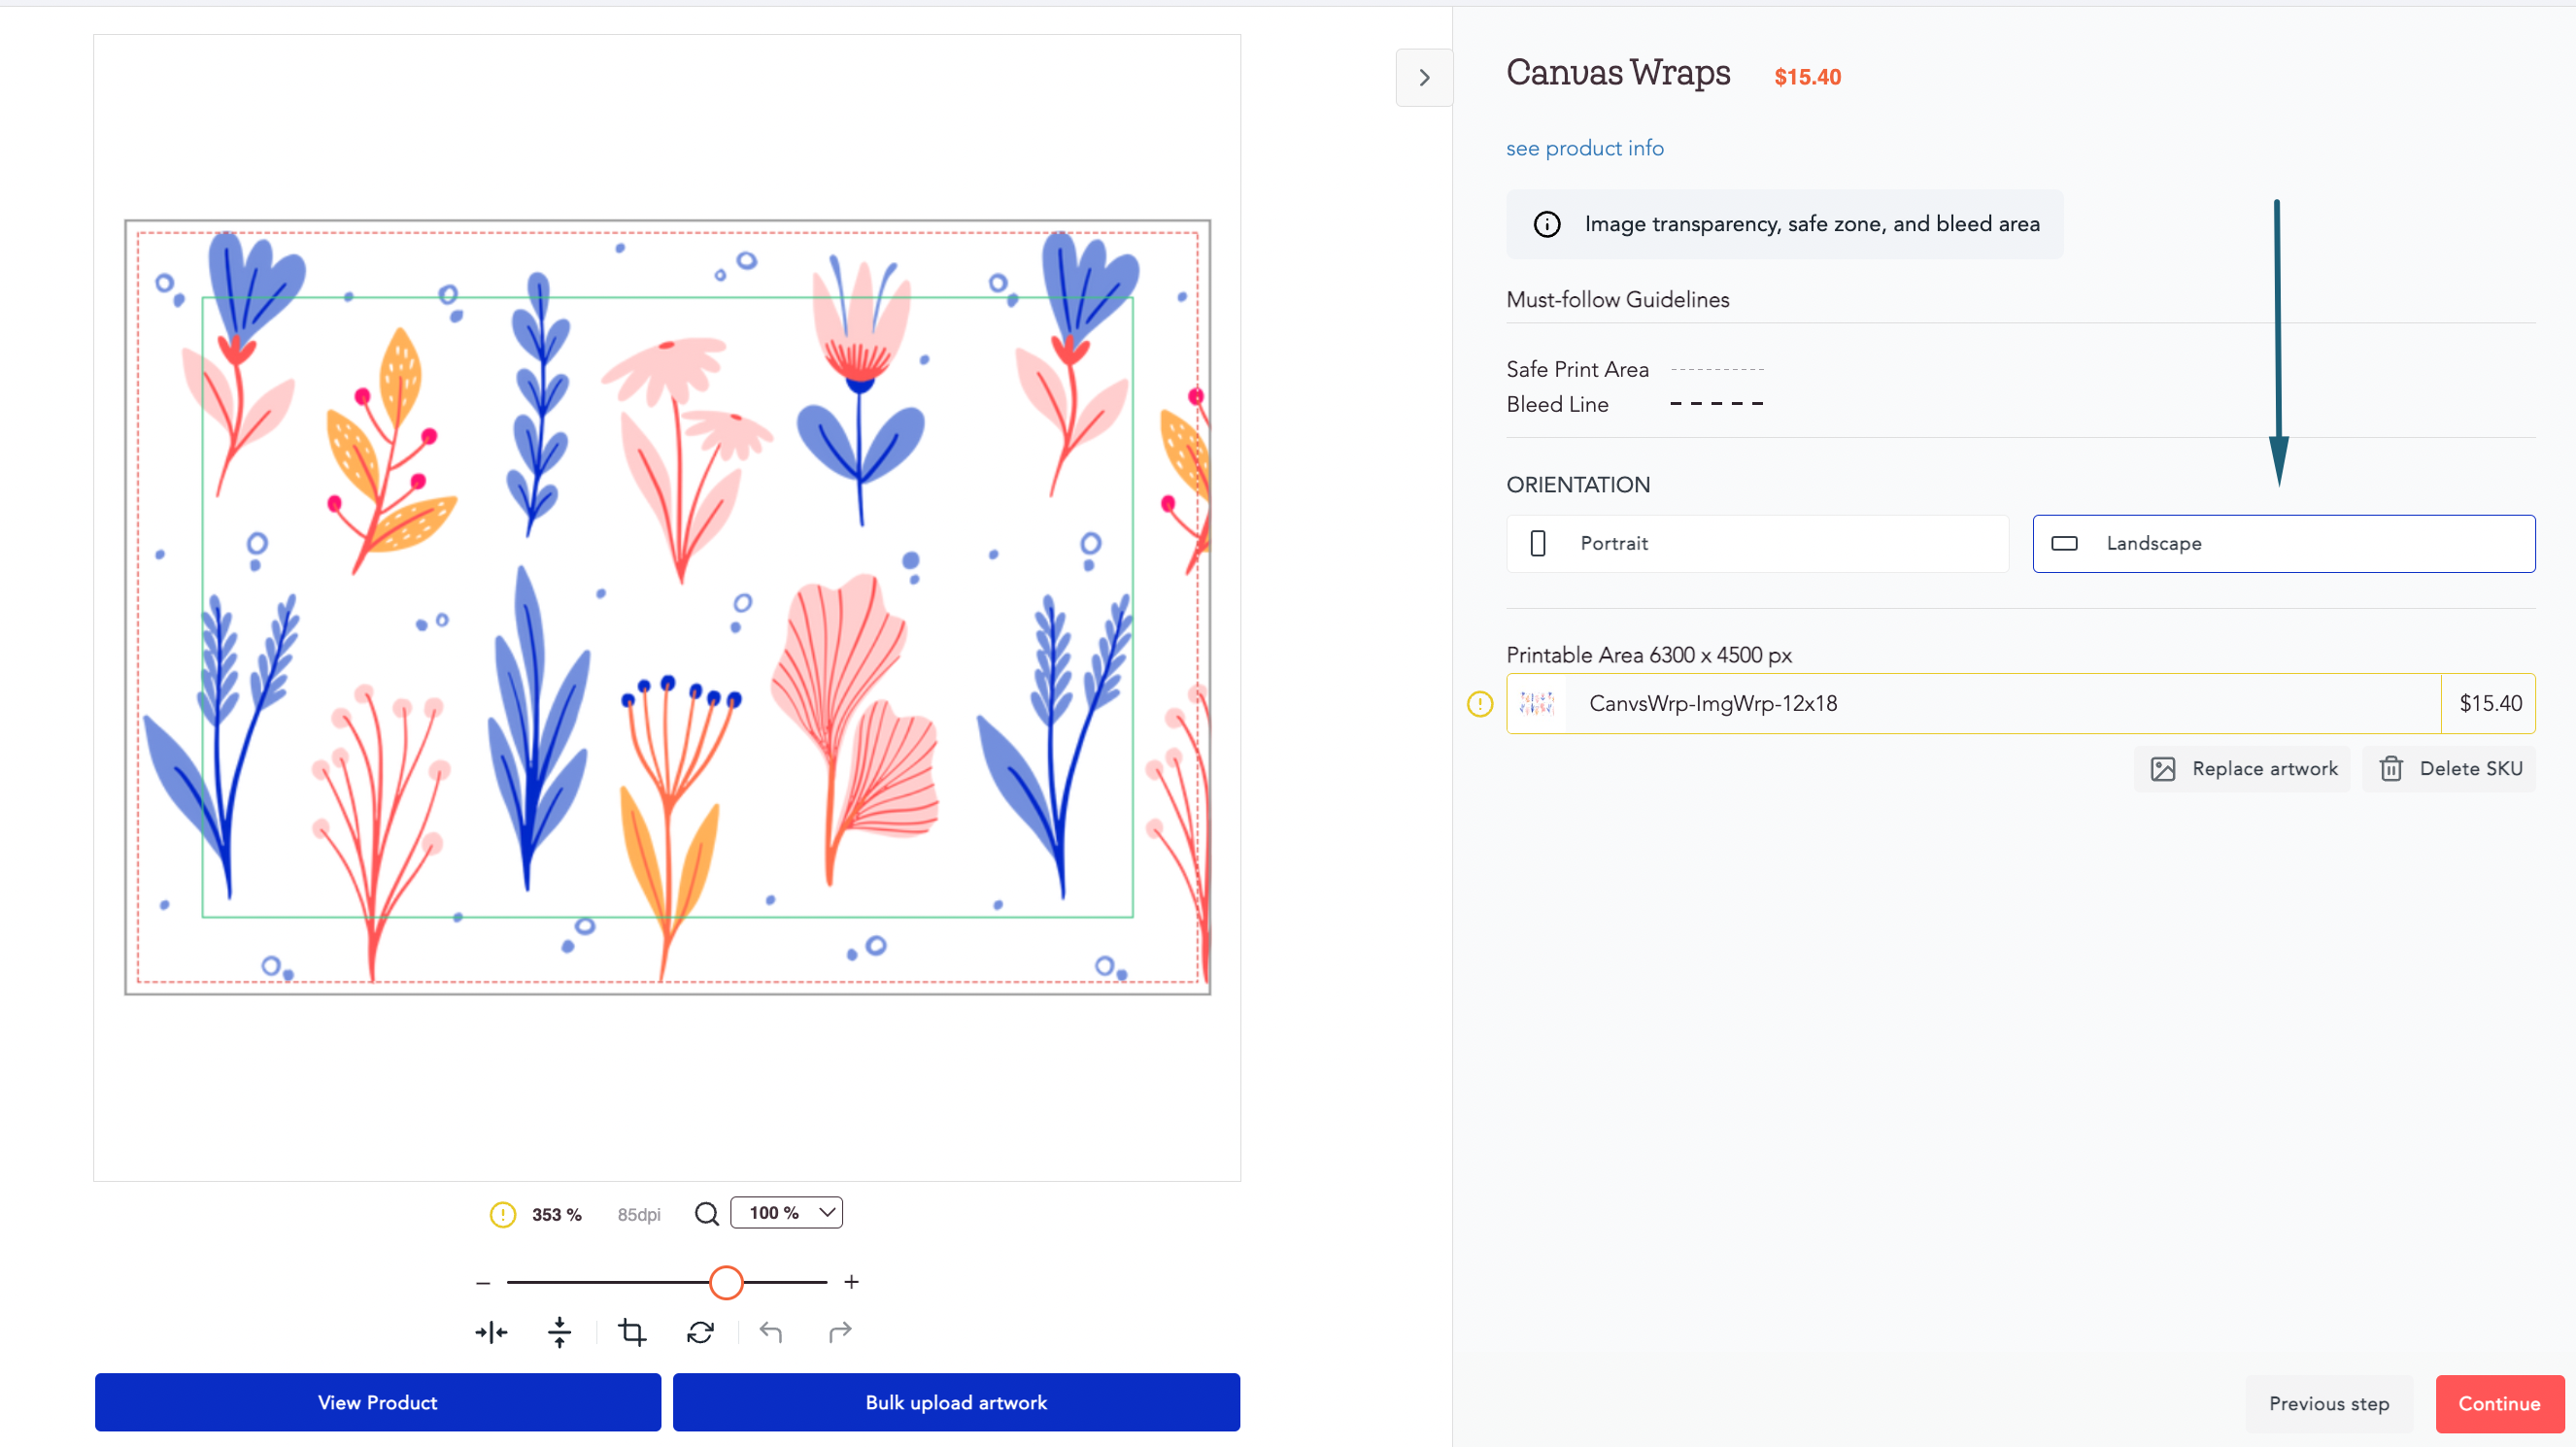
2. You can even change the artwork orientation after your artwork image has been uploaded. This allows you to use our image editor to make changes to the artwork on your product in either portrait or landscape mode.

3. After you're done choosing the orientation and making the changes to your artwork with our image editor, you can simply click the Continue button to move on.