Learn how to connect your Shopify store and start using Sensaria with your Shopify shop!
Connect my Shopify store
Connecting your Shopify store is quick and easy. Please follow the steps below:
1. Download the Sensaria app via the Shopify apps store.
- This will take you to the installation page. Sign in to your Sensaria account and proceed with the installation.
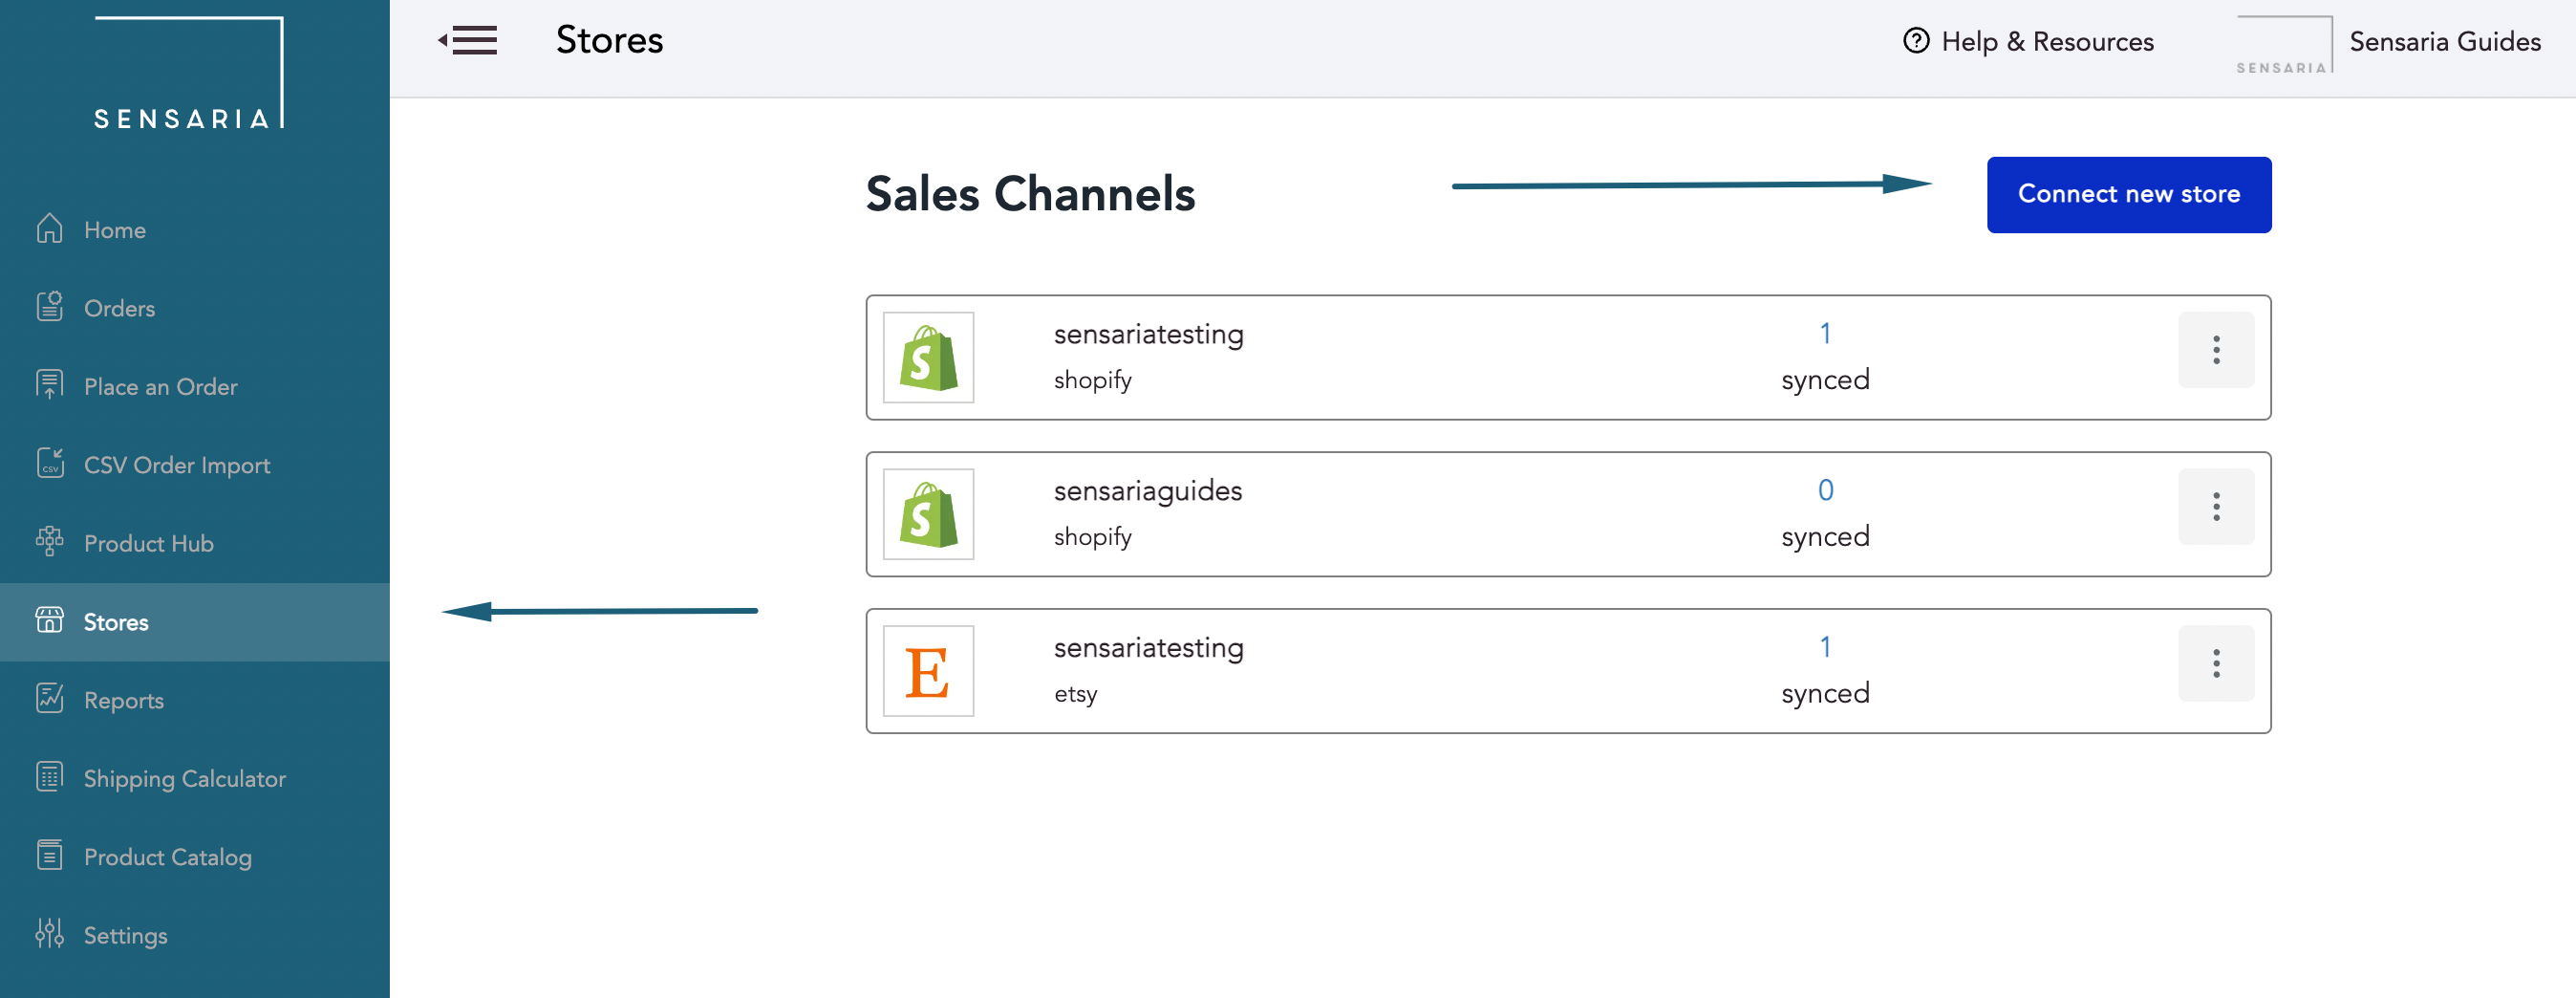
2. To add the store via the Sensaria platform, go on your Stores page and click the Connect new store button.
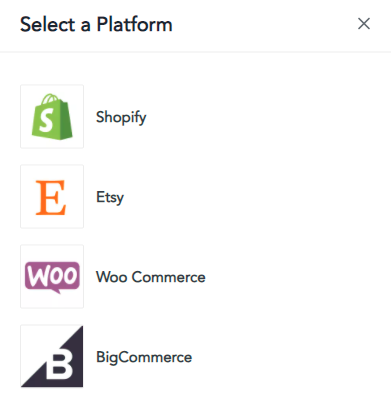
3. Click on the Shopify option as your platform.
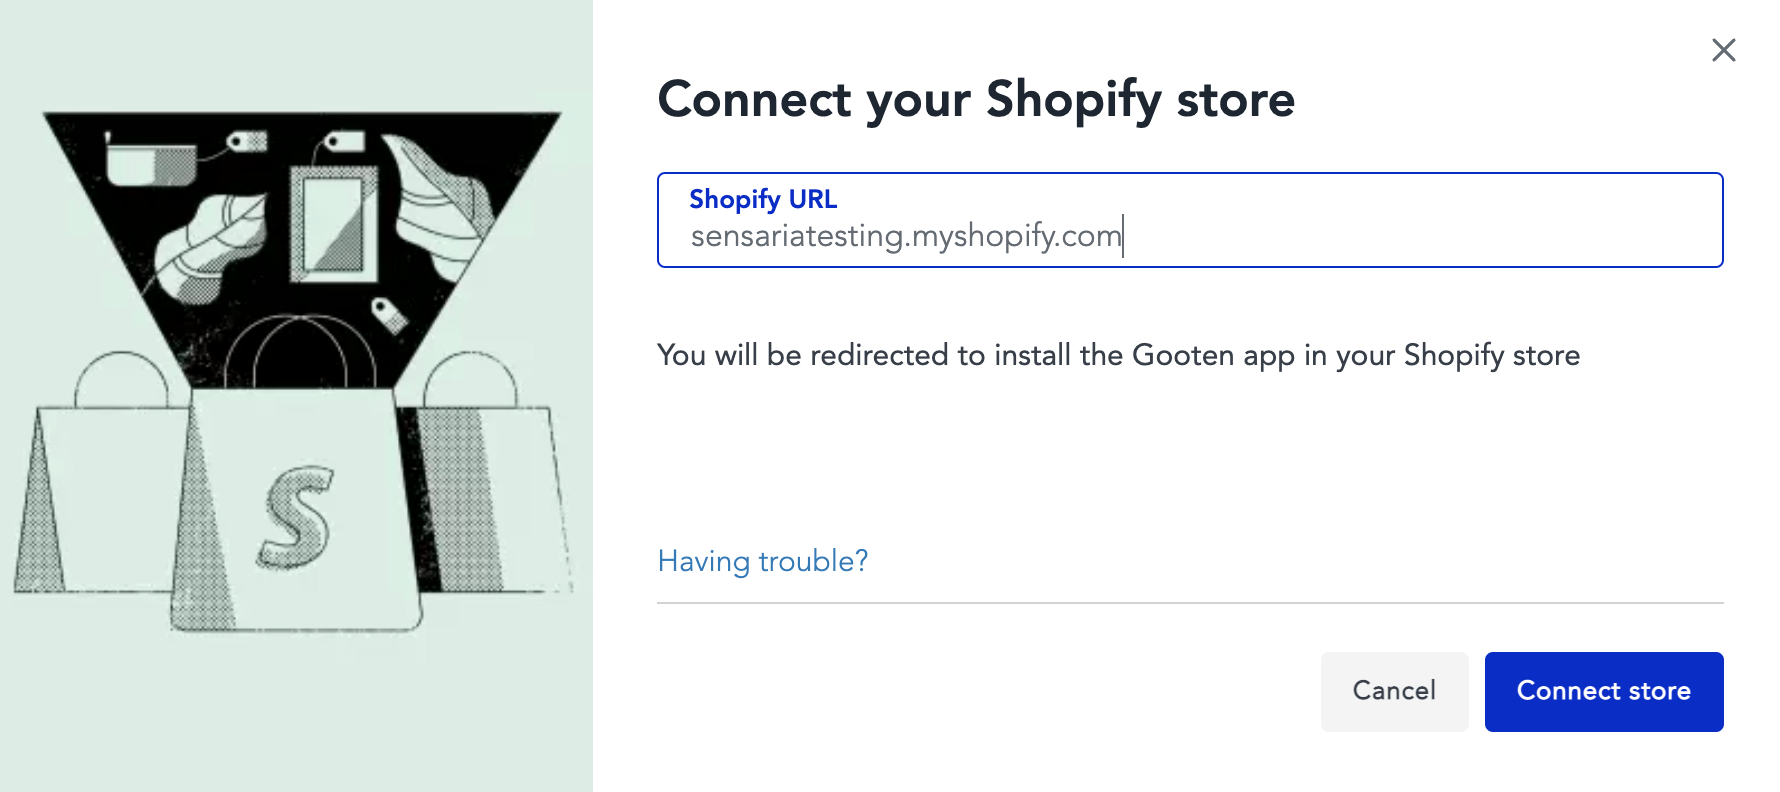
4. Then, you can add your myshopify.url in Gooten and hit Connect store for installation.
This can be done for however many stores you want to install, but please note that one Shopify store can only be connected to one Sensaria account.
Additionally, check out our brief tutorial video:
Create new products
Once your store is connected to Sensaria, you can start creating new products in the Product Hub.
Start by clicking on the Add New Product button, and work your way through the Product and Design pages until you get to the last step at the Product Details page.
This is where you will be able to edit the product name, description, SKUs, and product prices before publishing the product to your Shopify store.
Publishing your product
Let's check out how Shopify defines its product status. Please note that Shopify products have multiple statuses. These statuses determine whether or not your Shopify product is available on your sales channel.
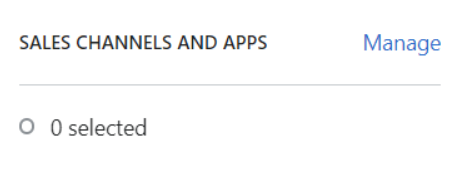
- Active status - The product has completed product details and is available under the specified sales channels.
- Published status - The product is visible and available on Shopify.
- Unpublished status - The product is NOT visible and available on Shopify. You need to publish the product on the correct sales channel before the product is available for your customers.
- Draft status - The product is not complete or has incomplete product details. Products in this status will not be available on the sales channel.
- Archived status - The product is no longer displayed on your online store. This is typically used when you don't want to permanently delete your product but keep the record and product details.
When you publish your product in the Gooten Admin, your product will always be in the Active status but either in the published or unpublished status. Your product will not be in the Draft or Archived status unless you manually change the status in the Shopify Admin.
In the Gooten Admin, you can publish your product as a hidden product which is essentially pushing your product to Shopify in an Unpublished Active status. To do this, select the Publish as hidden product option before saving the product.
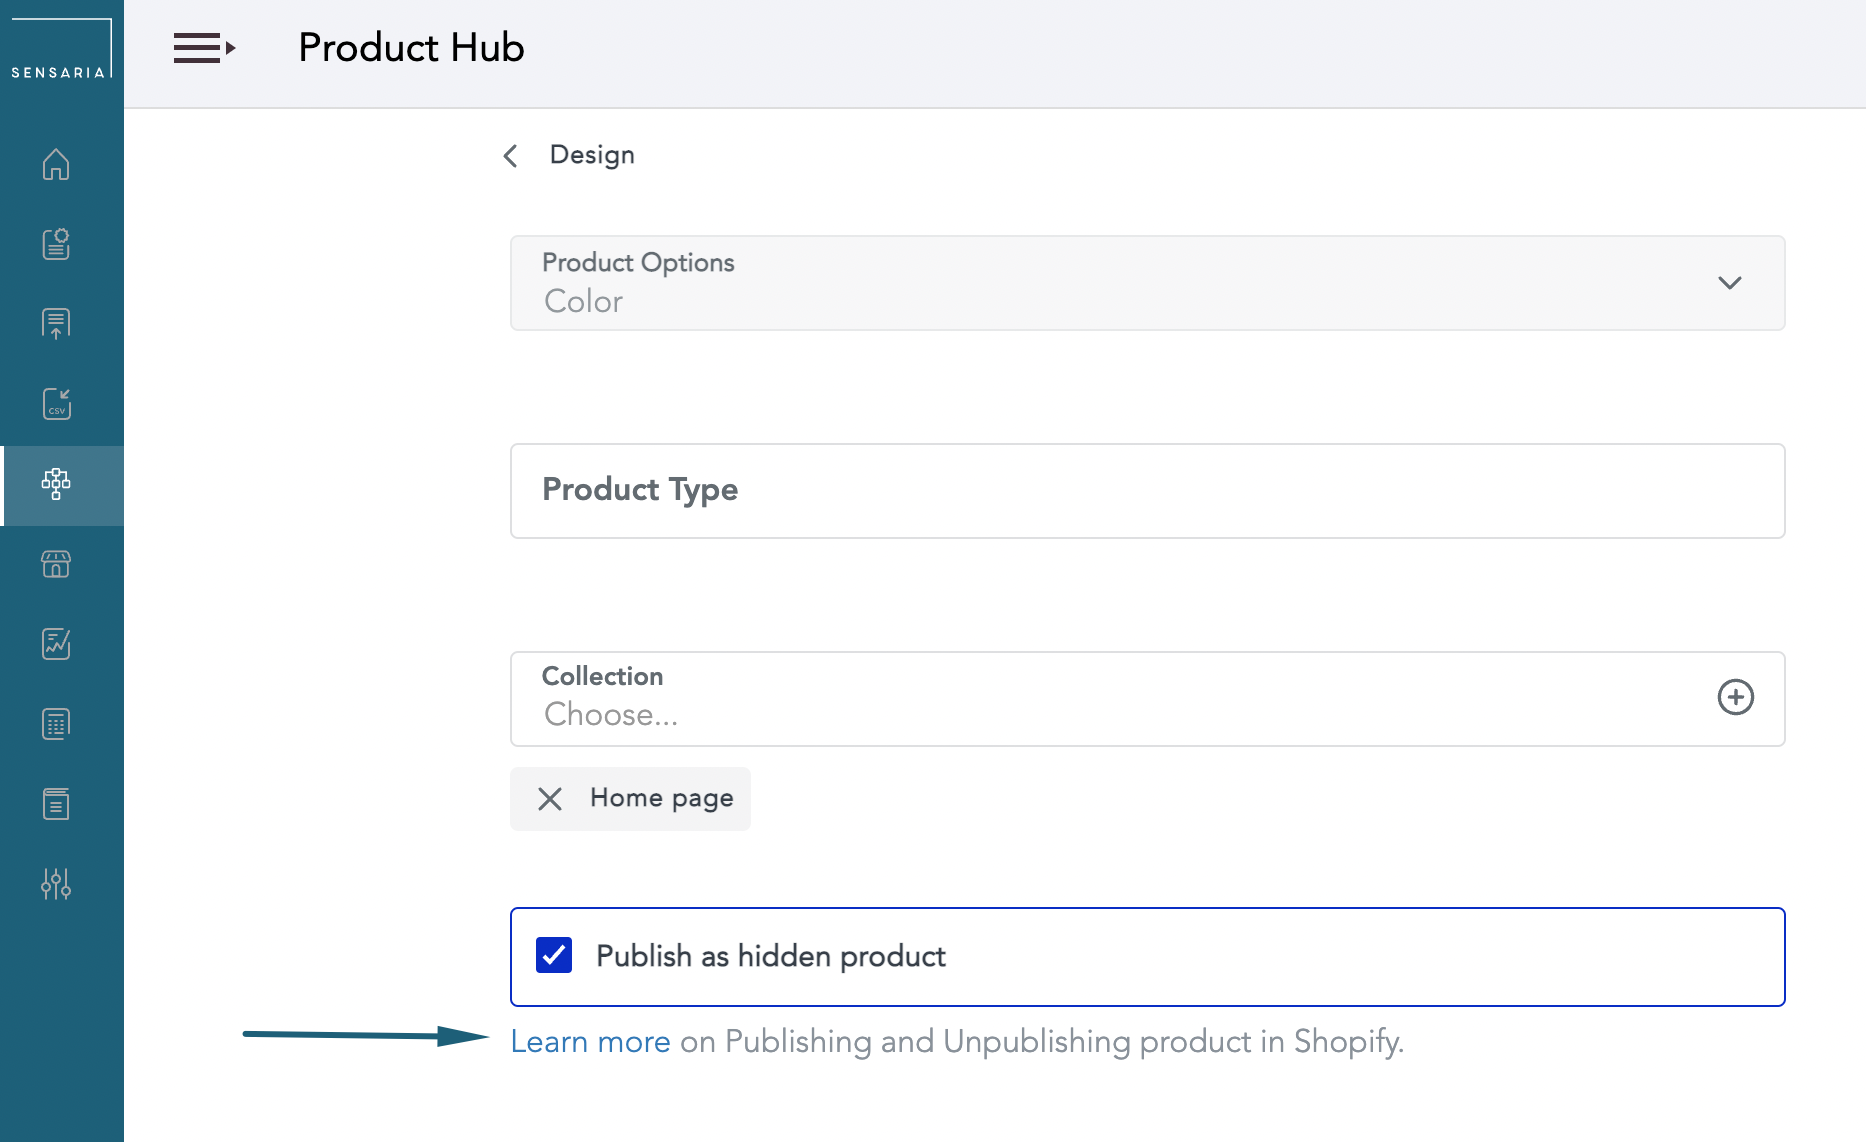
By selecting this option and saving your product in the Gooten Admin, your product will be pushed to Shopify in an Unpublished Active status. You'll see that your product is not available when viewing your product on Shopify.
If you want to fully publish your product in Shopify and make it available to your customers, you can unselect the Publish as hidden product option before saving the product. Doing this will push your product to Shopify in a Published Active status. You'll see your product available when viewing your product on Shopify. The green dot will be displayed, notifying you that the product is available.

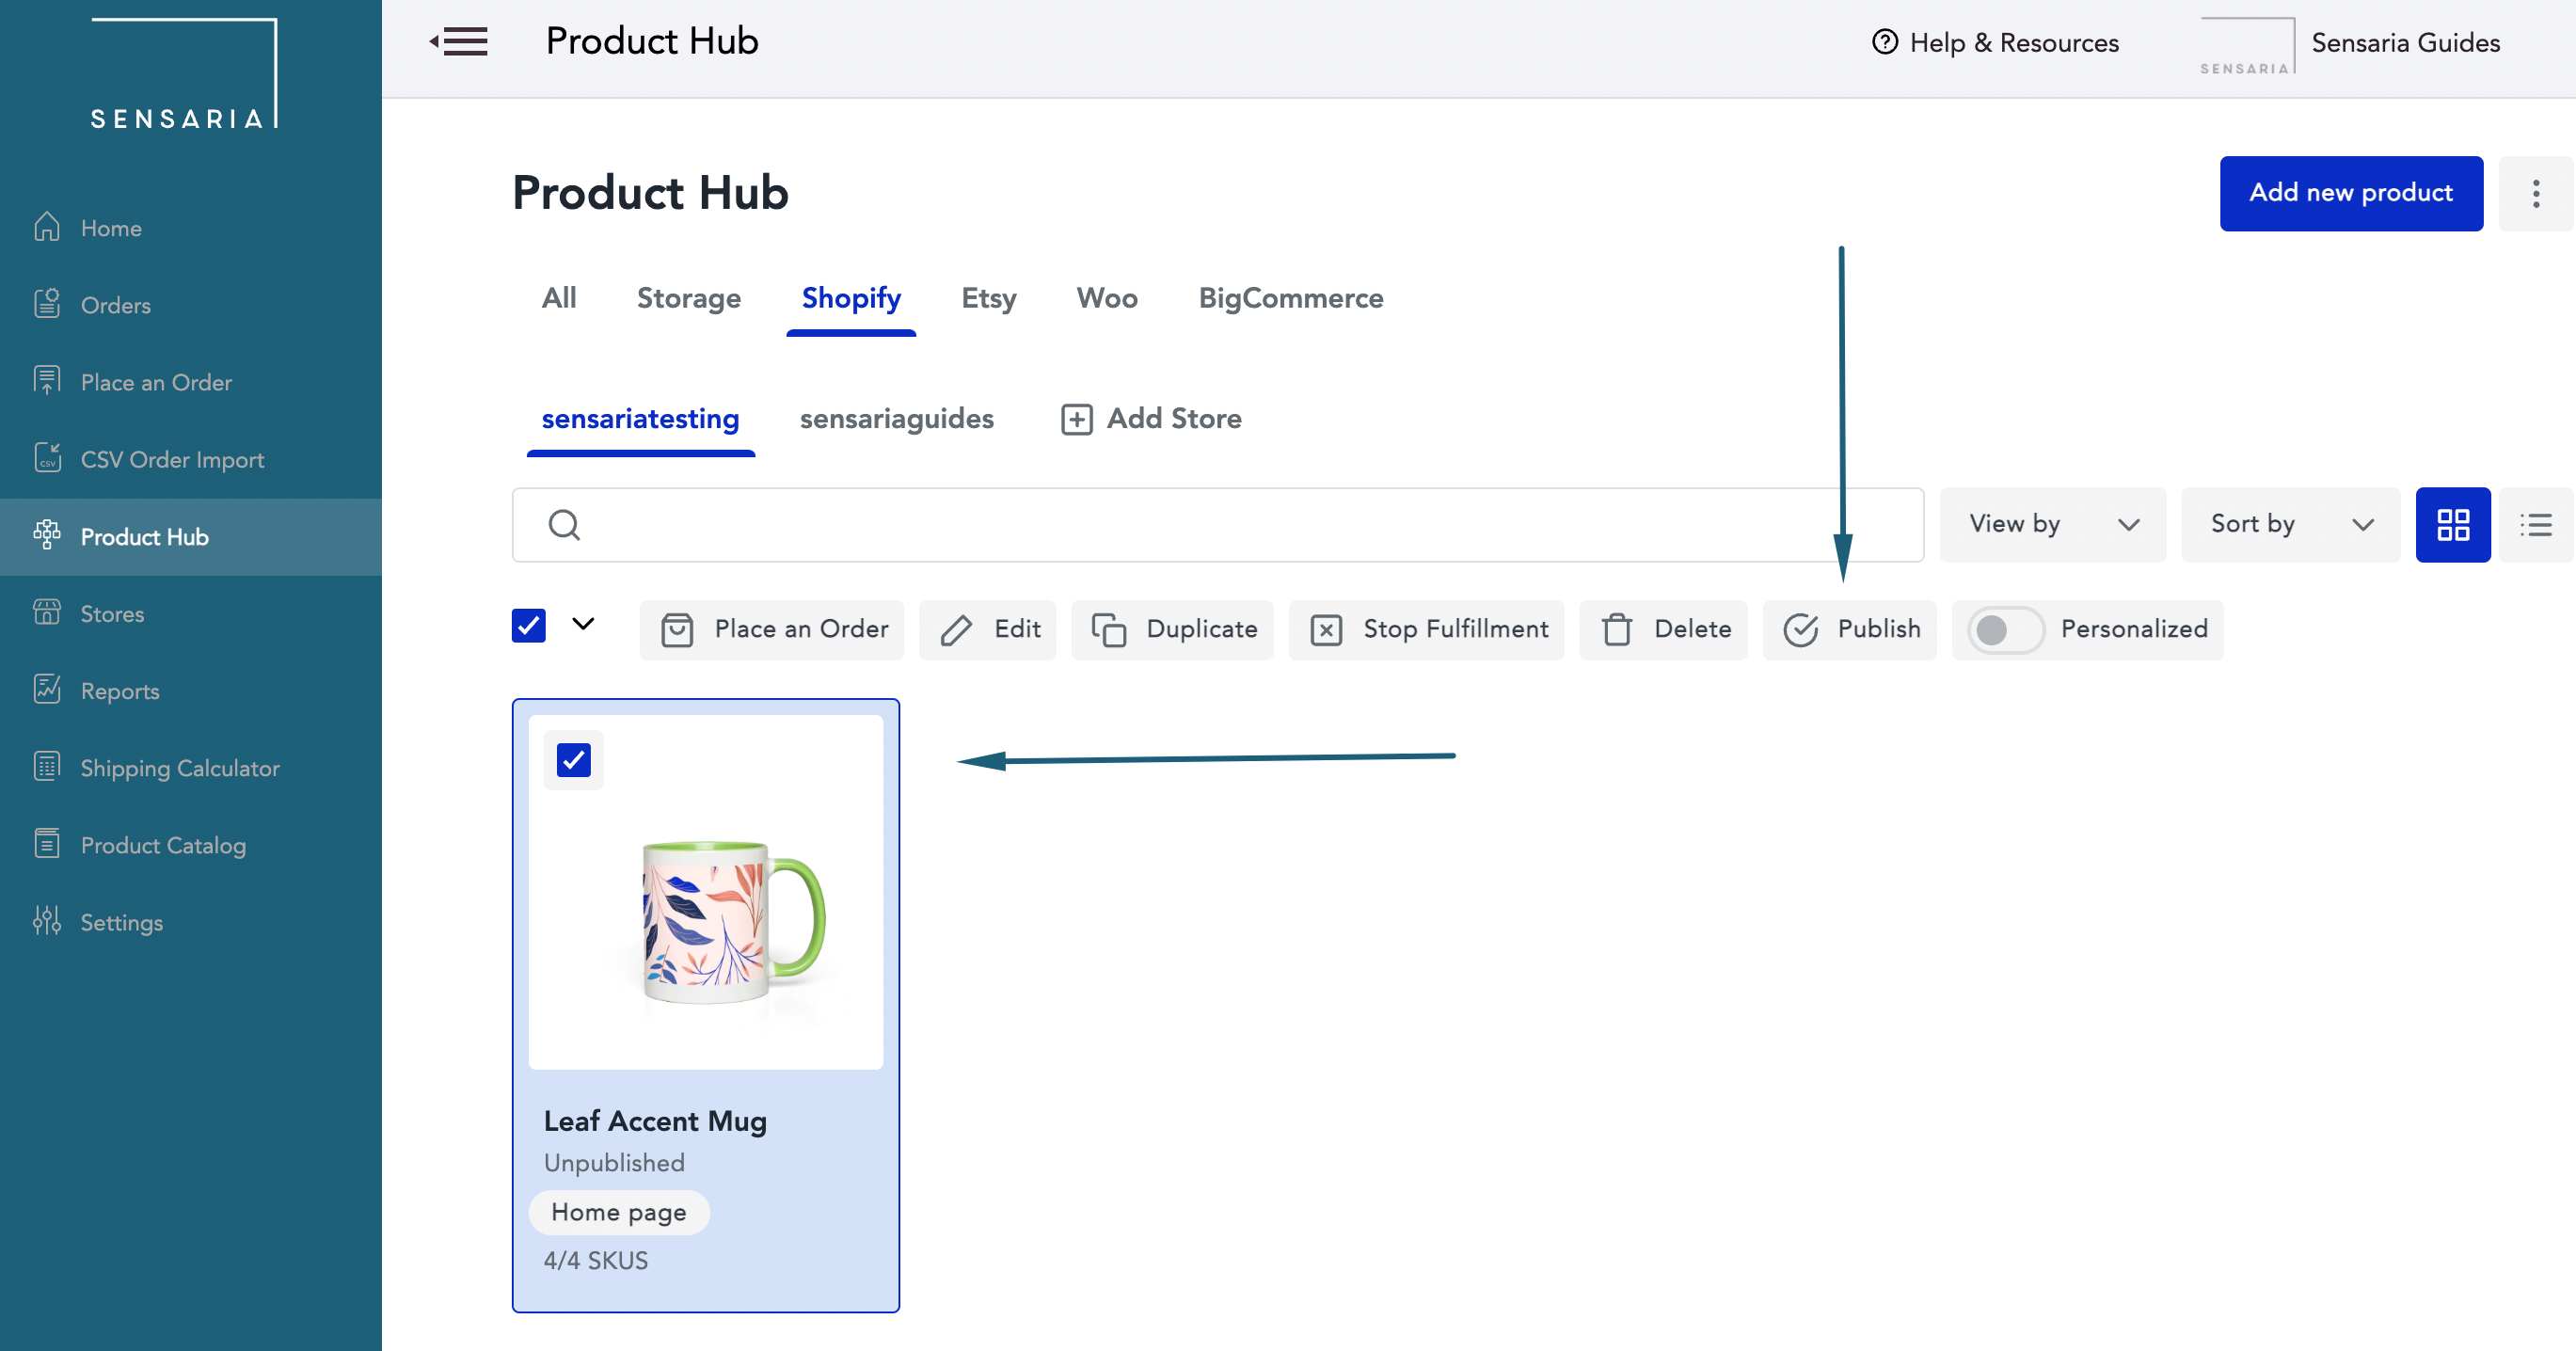
Publishing and Unpublishing Products in the Product Hub
When a Shopify product is Unpublished in the Product Hub, the product is still considered in the Active status in Shopify, but it will be in the Unpublished Active status. If you were to click on the product and then click on the Published button, it would push that product to your Shopify store as a Published Active status making your product available to your customers.
When a Shopify product is Published in the Product Hub, the product is still considered in the Active status in Shopify, but it will be in the Published Active status. If you were to click on the product and then click on the Unpublished button, it would push that product to your Shopify store as an Unpublished Active status making your product available to your customers.
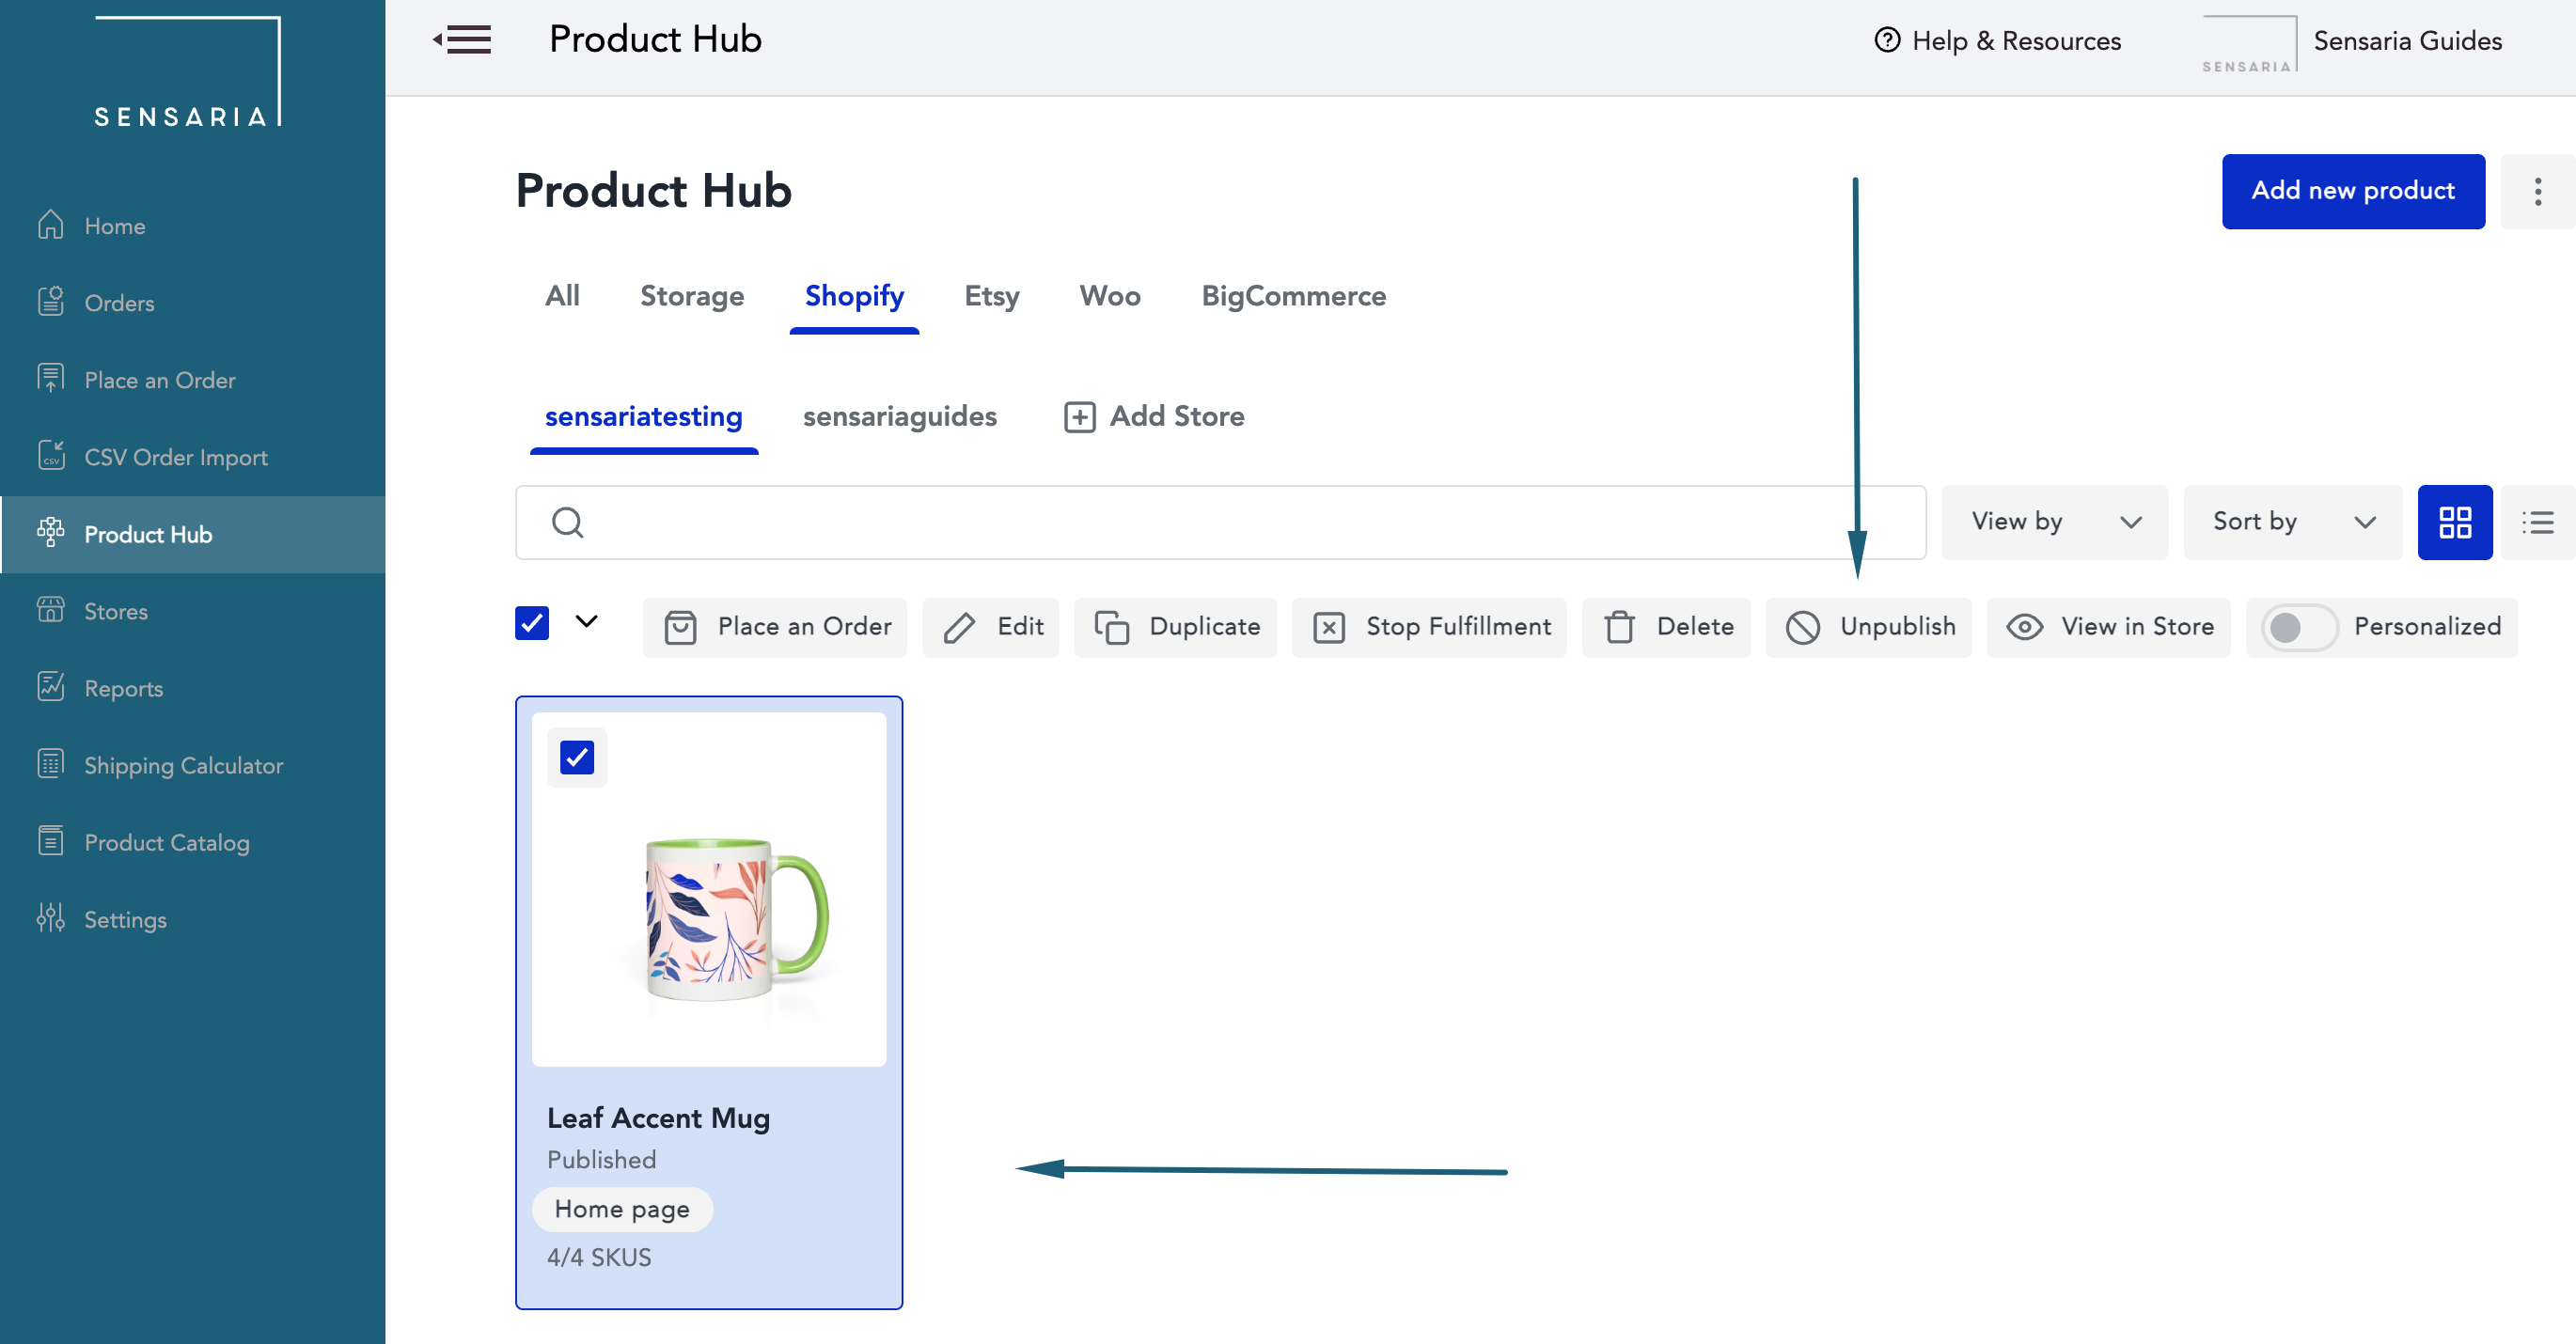
You can always check if your Shopify product is fully published or unpublished by viewing the product and looking for the availability indicator. The left image below indicates that the product is in the Published Active status and will be available to all your customers. The right image below indicates that the product is in the Unpublished Active status and is not available to your customers.
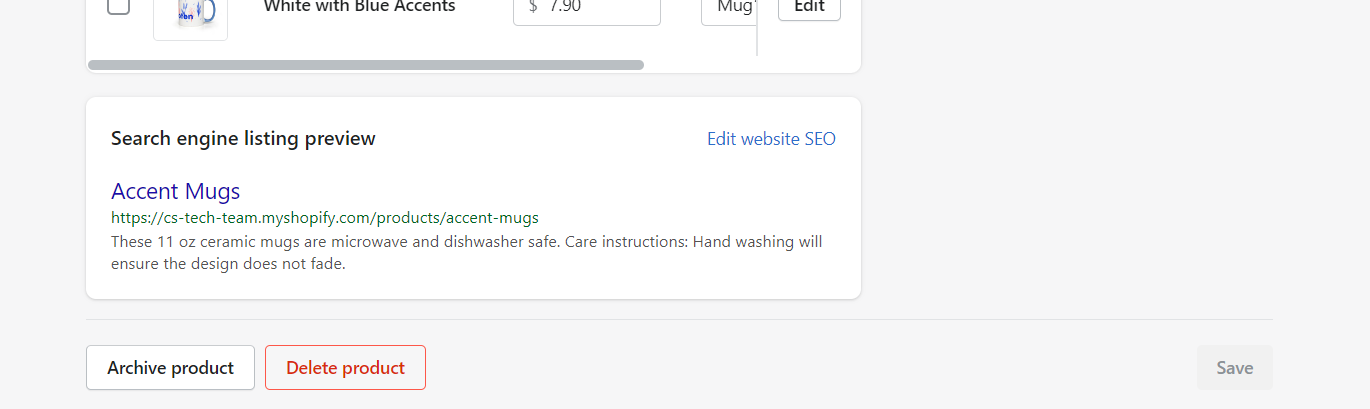
You can also archive your product in Shopify by using the Archive product button when viewing the product in the Shopify Admin.
For more details, please check out the following video tutorial:
Sync existing products
If you want to sync and add new variants to an already existing listing in your Shopify store, please follow these steps below. Shopify allows up to 100 variants within a product and 250 images associated with a given product.
1. In Shopify, create/add new variants for products to sync to Sensaria.
- Shopify has a video tutorial that explains the process, and you can find it here.
2. After saving those newly created variants, go into your Sensaria Product Hub for that store, click on the Shopify tab, and then click on the Sync product button.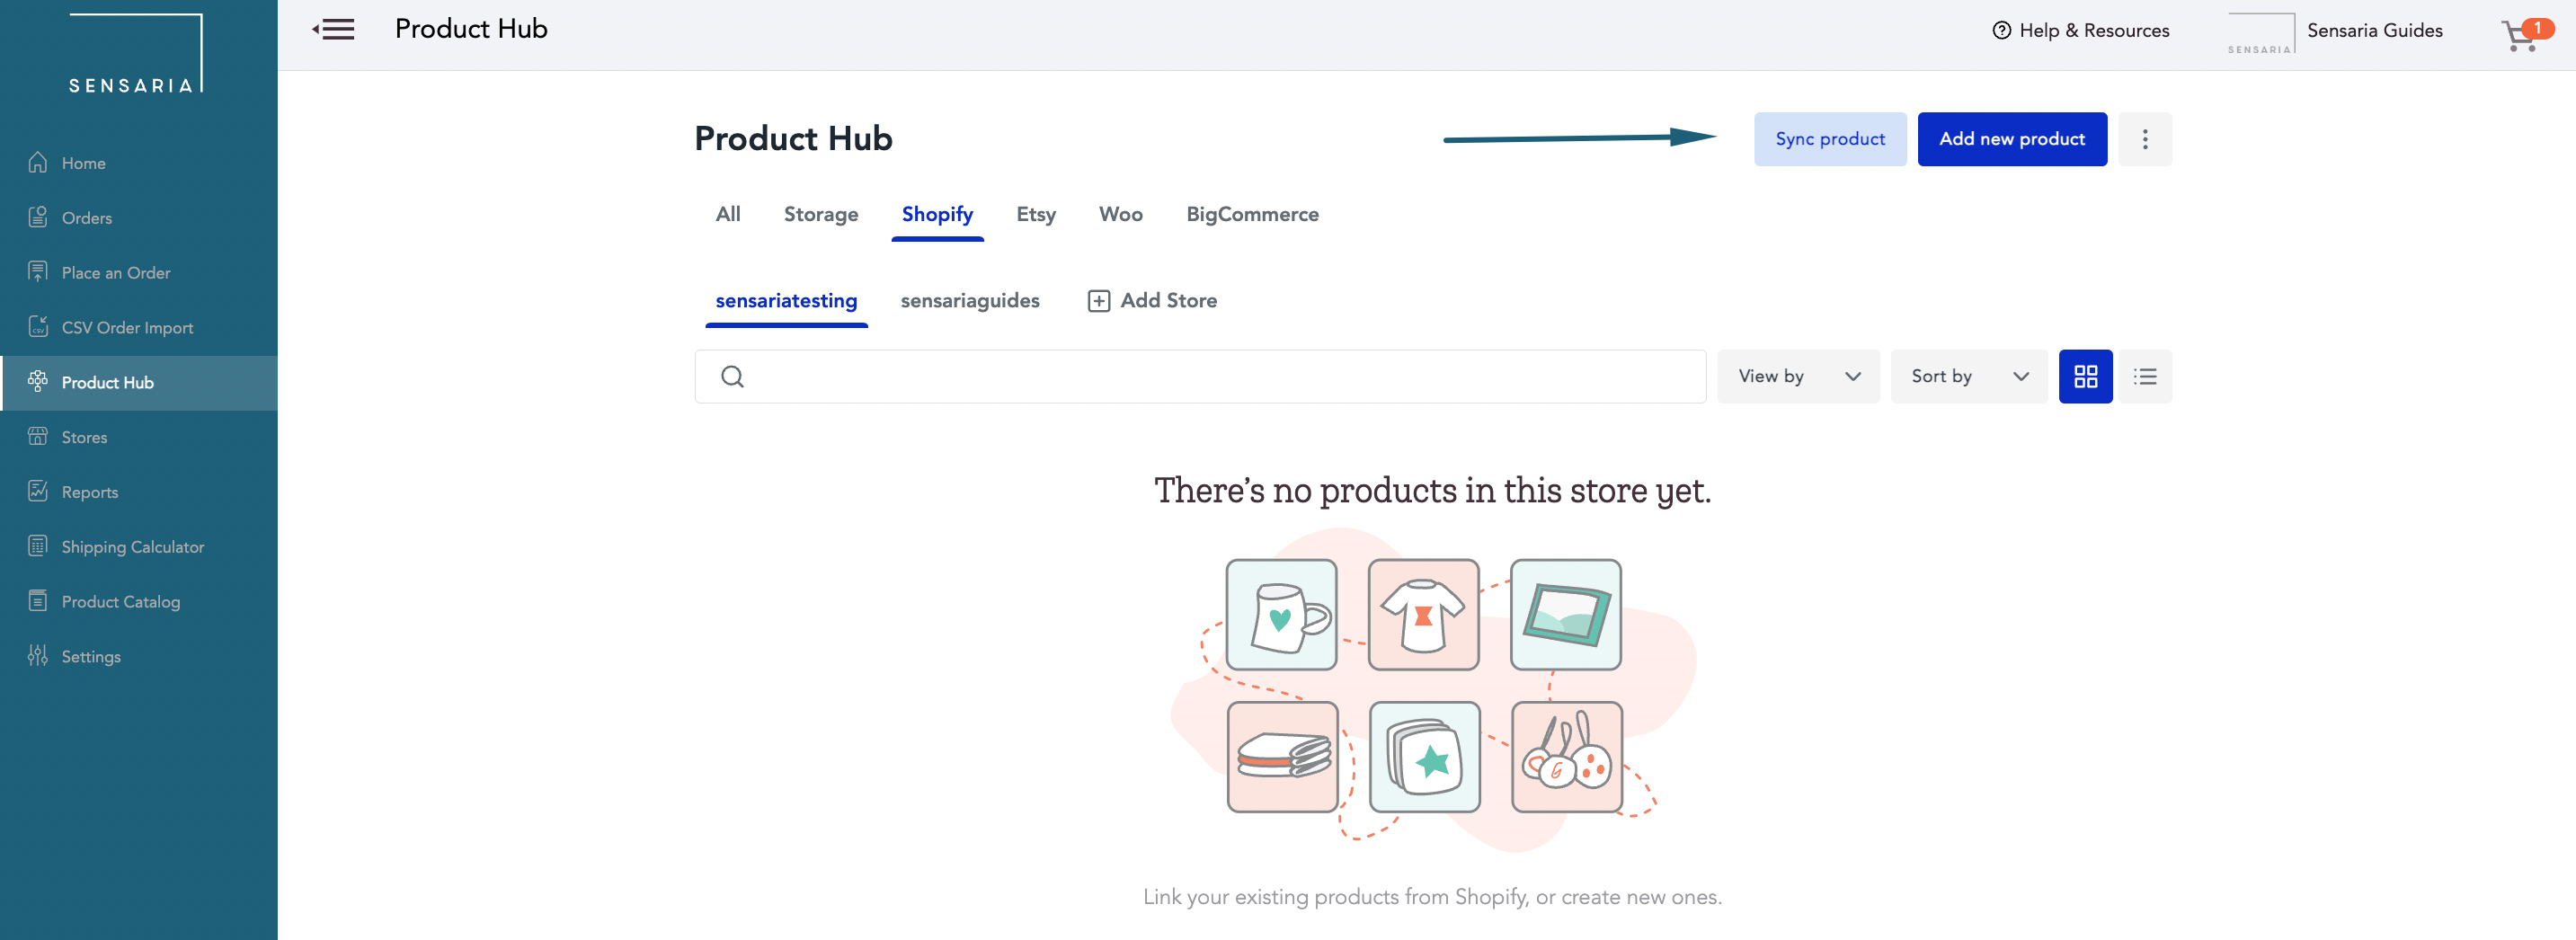
3. Select the product that you want to sync to Sensaria.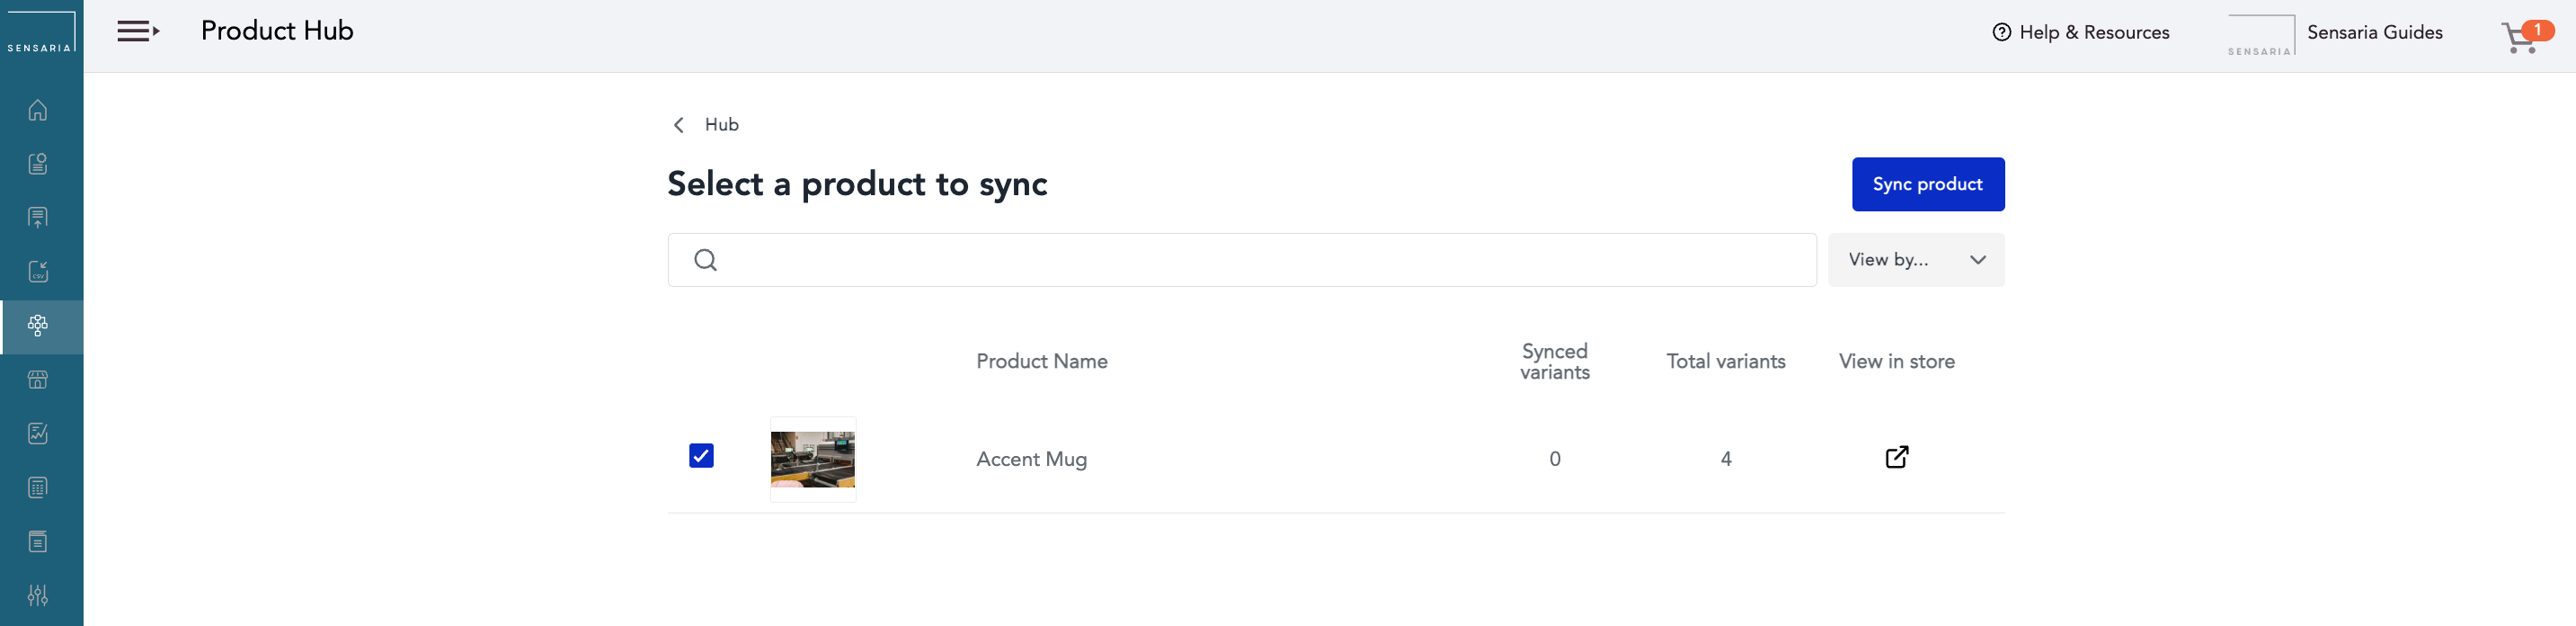
4. Select the product you are connecting to Sensaria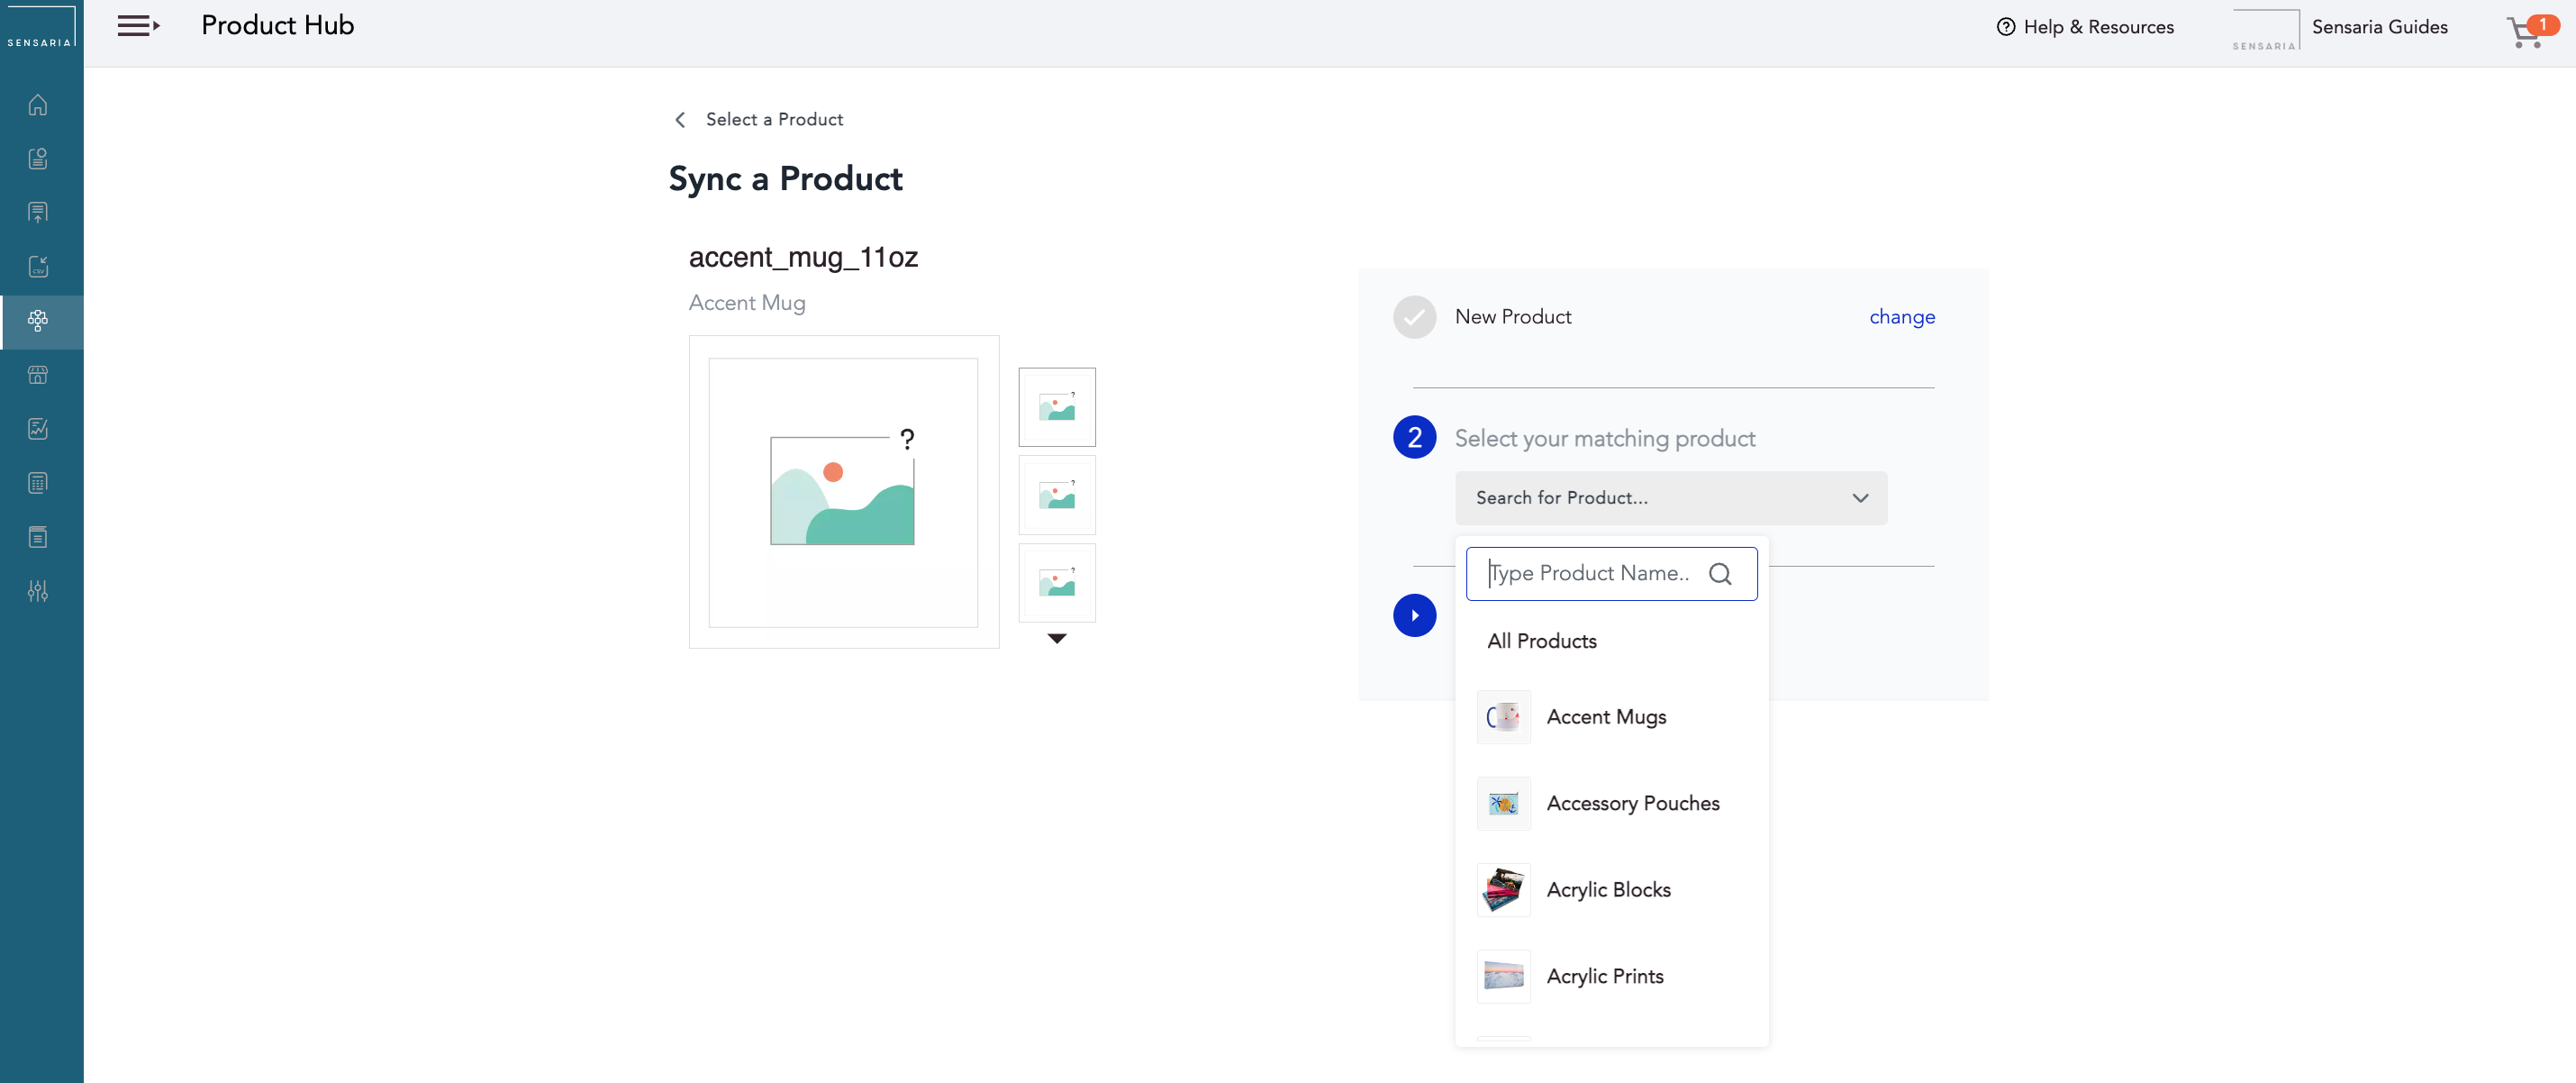
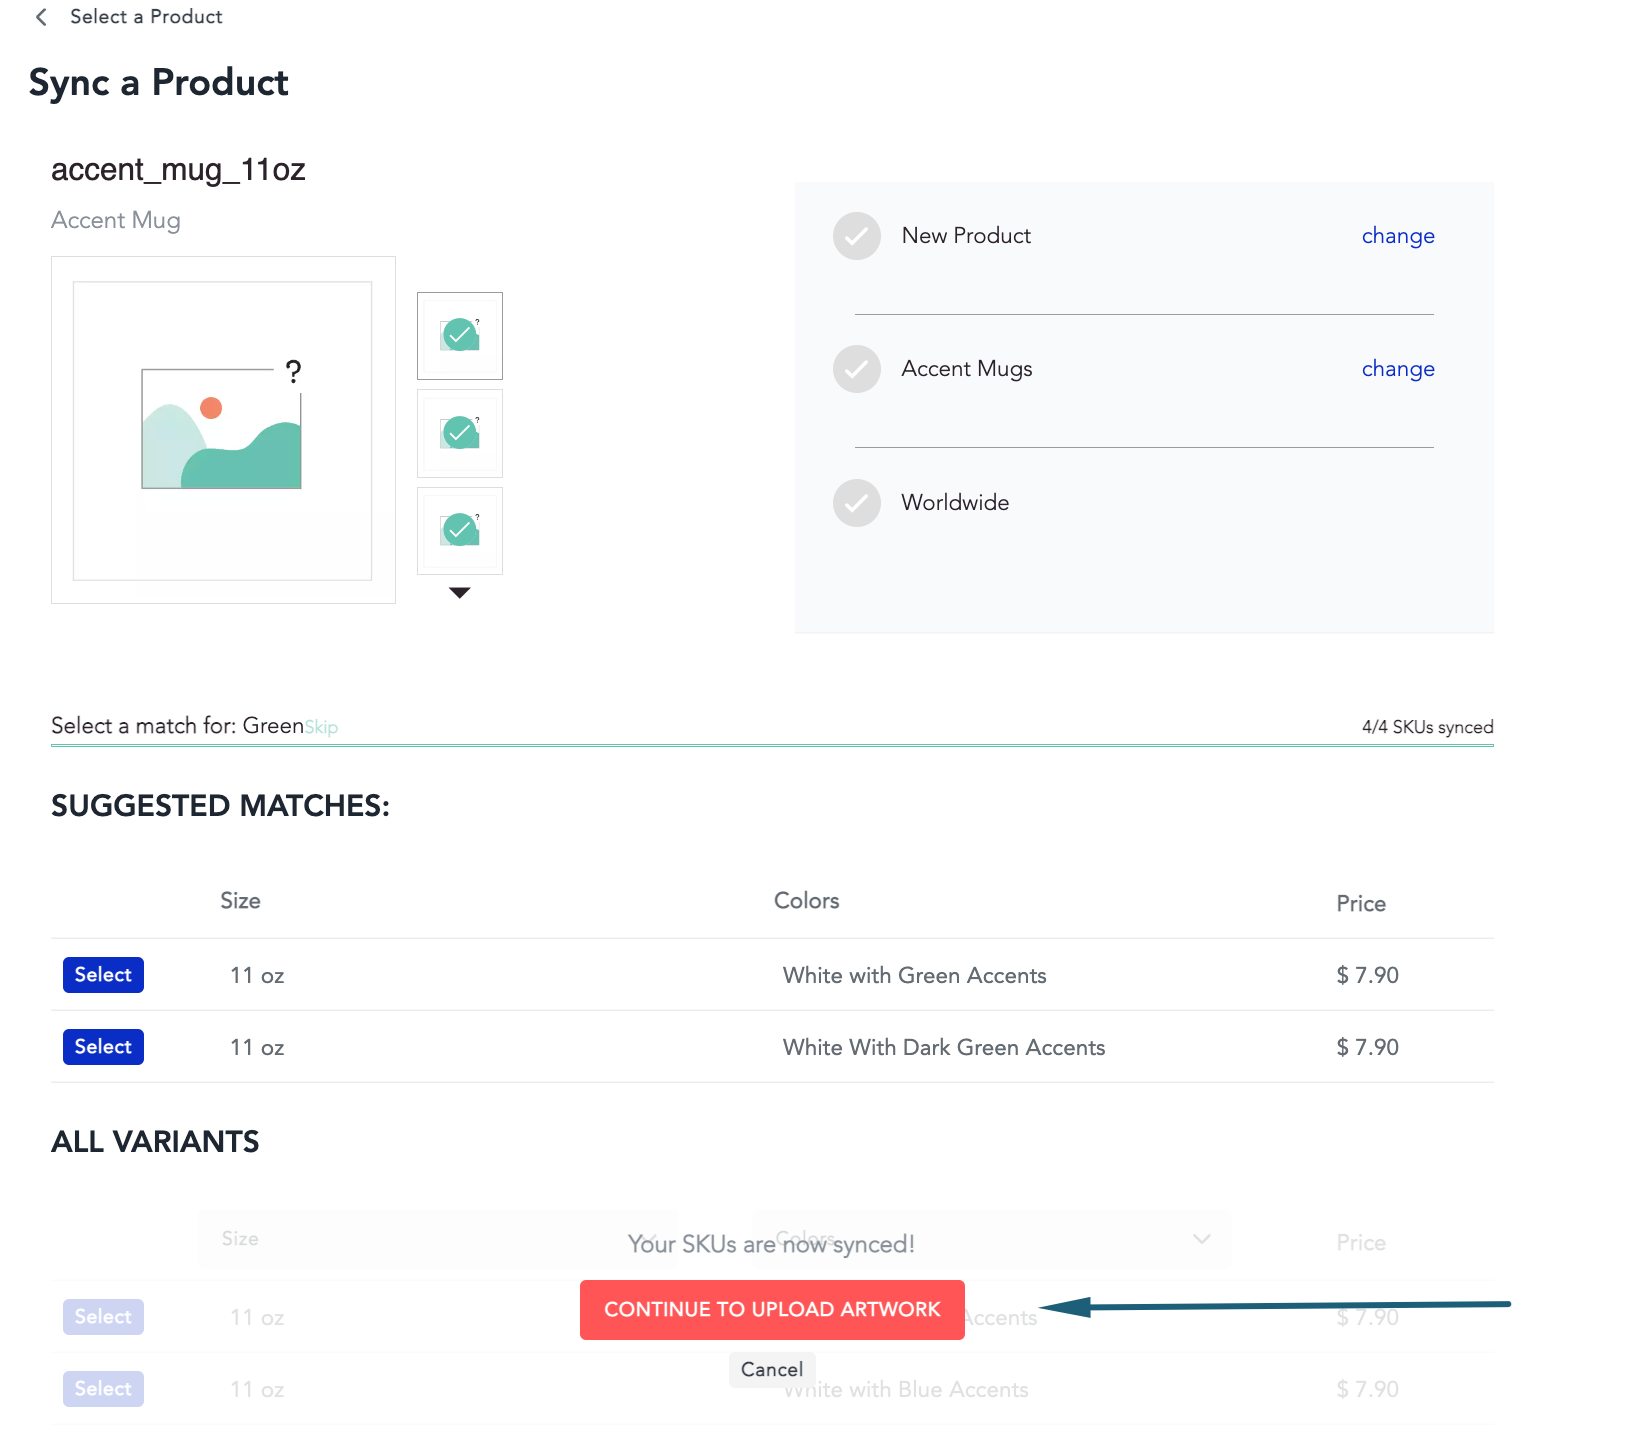
5. Select a matching product SKU that you want to connect to your Shopify product variant.
- Repeat this step for each of the variants, or you can use the Skip option if you want to leave any of them out of the syncing process.

6. Once you've connected the variants, click on the Continue to upload artwork button to design the product and go through the rest of the syncing process
To see our short video tutorial about syncing your existing products, please check out the video below:
Edit products
You can change the name and the description of the product in your Shopify store directly or by editing the product in Sensaria and going all the way to the Product Details page. However, editing the product options can’t be done via the Hub, and you need to adjust it in your store.
Additionally, while editing, you can adjust the image in any way, or you can add a new image altogether. The design page is all yours.