We highly recommend if you're integrated with Shopify, Etsy, or WooCommerce that you use their email notification system to email your customers. By using their email system, you can manage it all in one place.
Partners using the API integration can utilize the webhooks to integrate with any email system to send tracking information or notifications.
As a last resort, you can also set up order and shipping confirmation emails for both you and your customers in the Sensaria co-branded hub! Check out the sections below to see how you can set it up in Sensaria admin.
Setting up Order and Shipping Notifications for yourself
Enabling this will cause you to receive an order and shipping confirmation every time your customer submits an order.
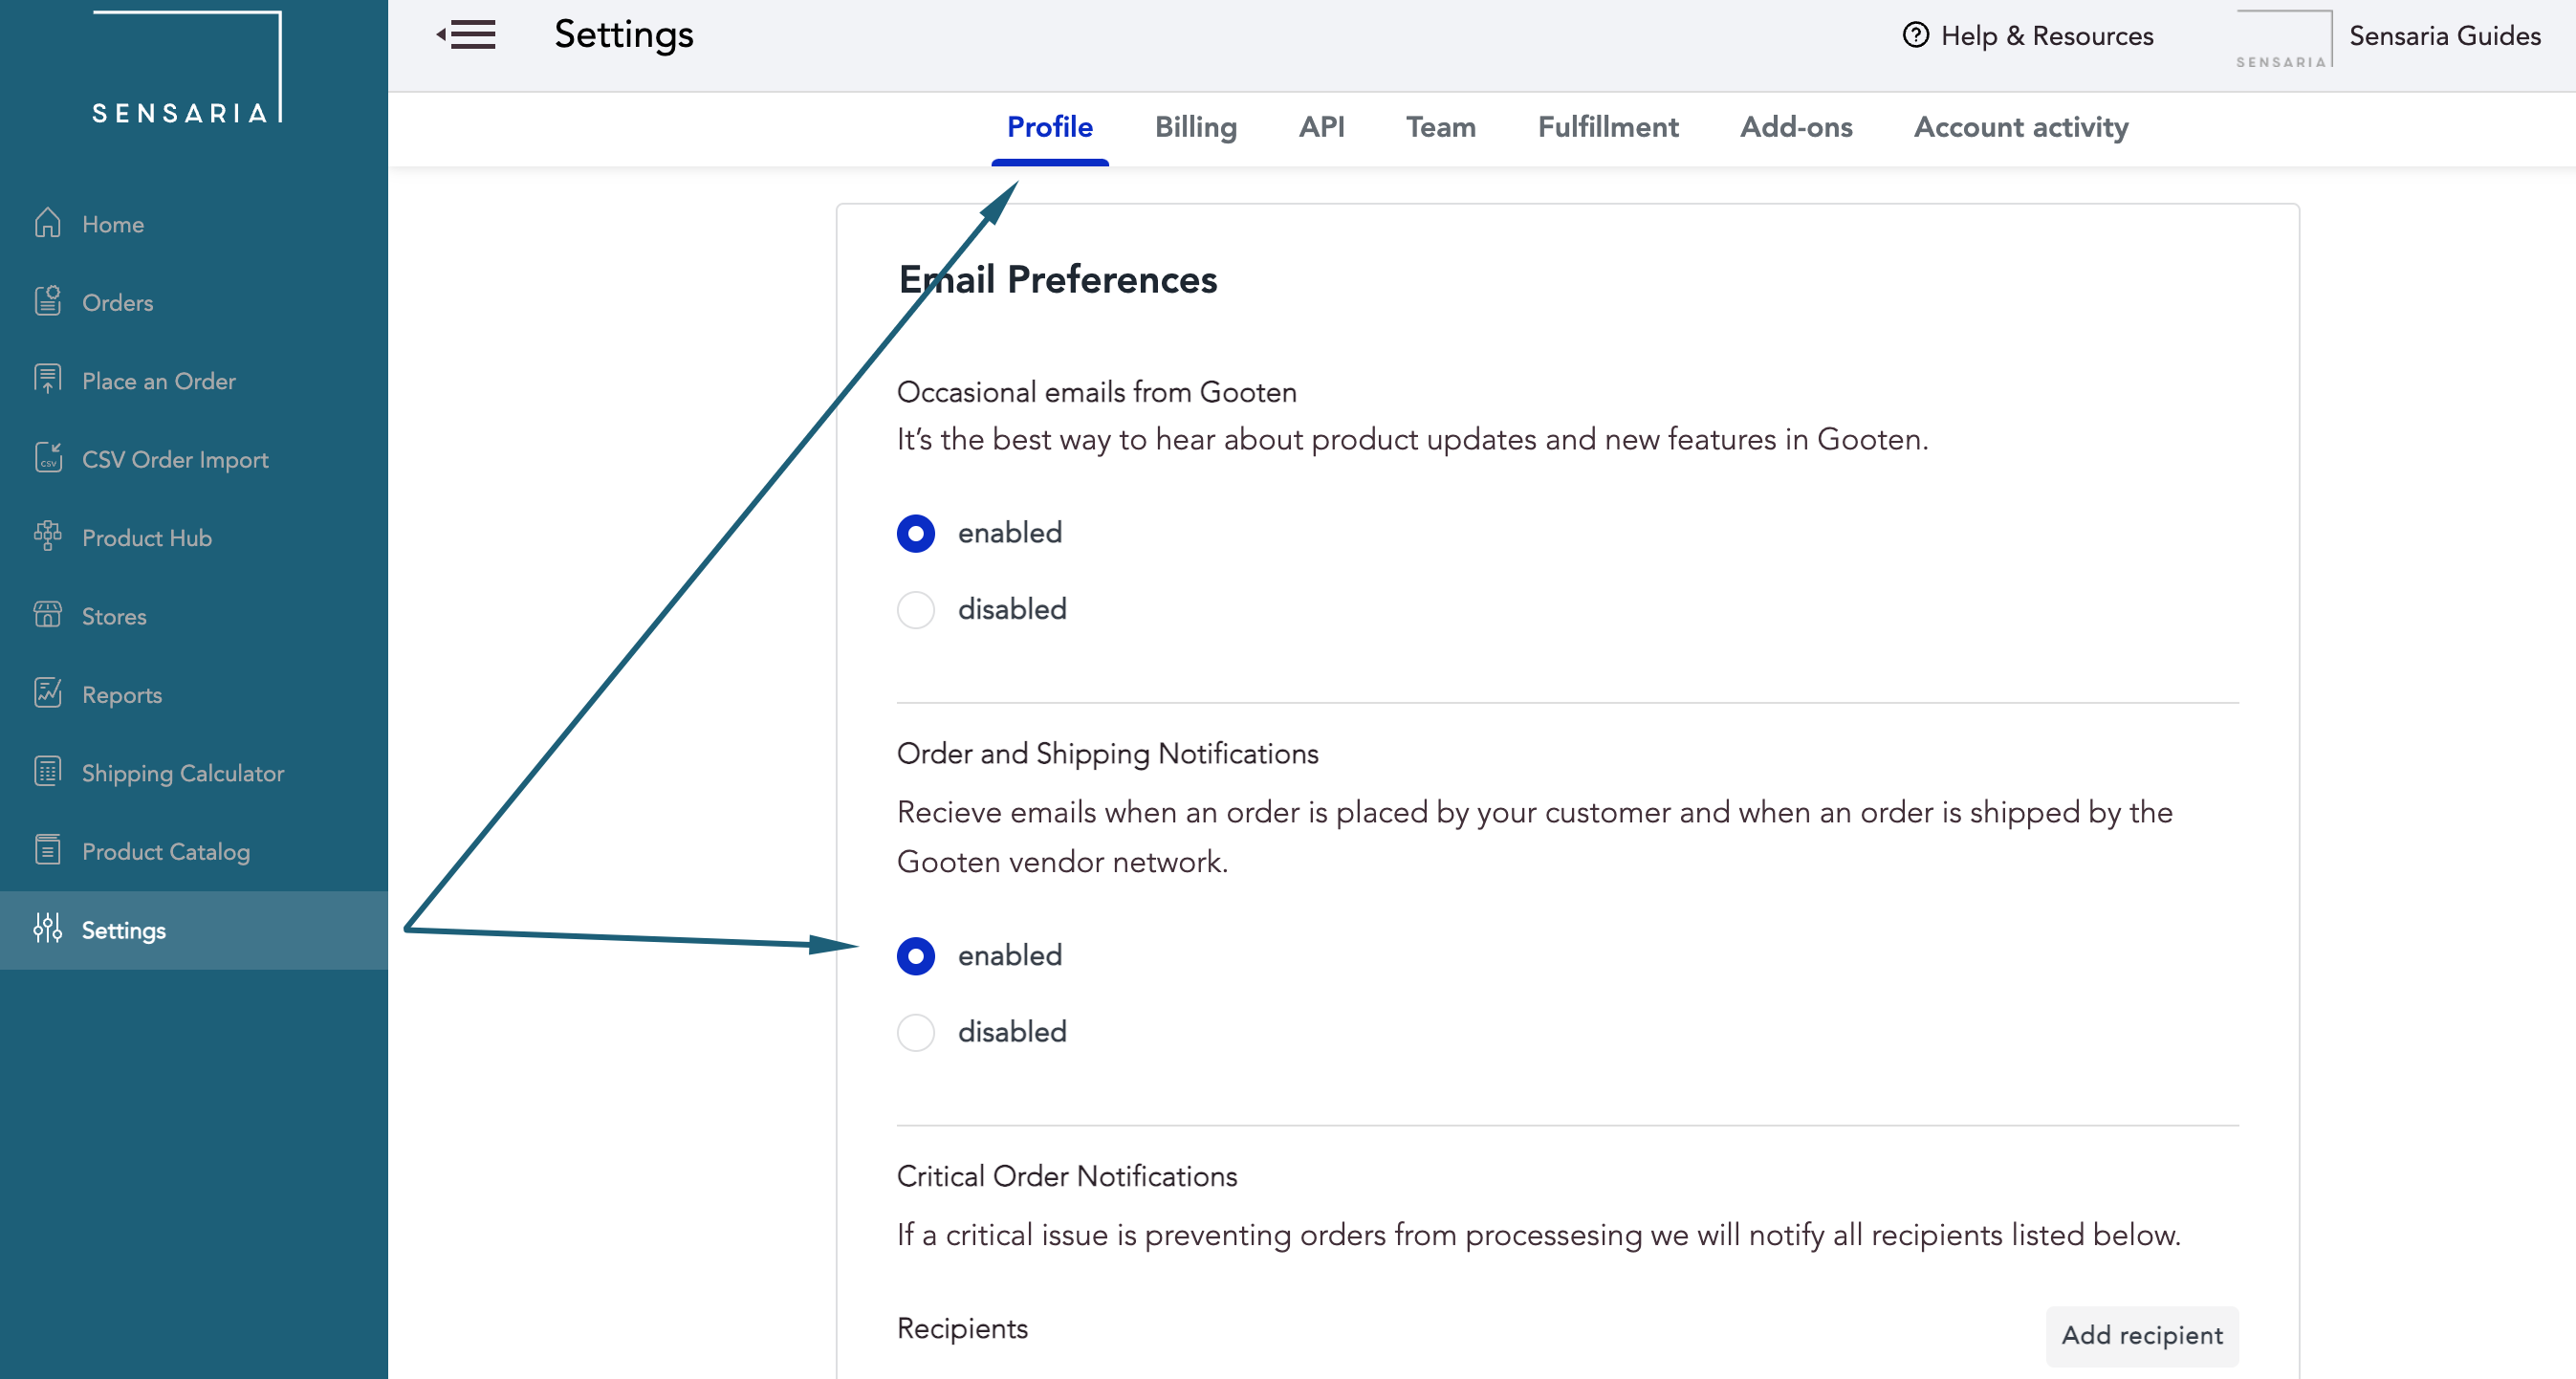
1. Go to the Profile tab in the Settings page and scroll down to the Emails Preferences section.
2. Enable the Order and Shipping Notifications option.
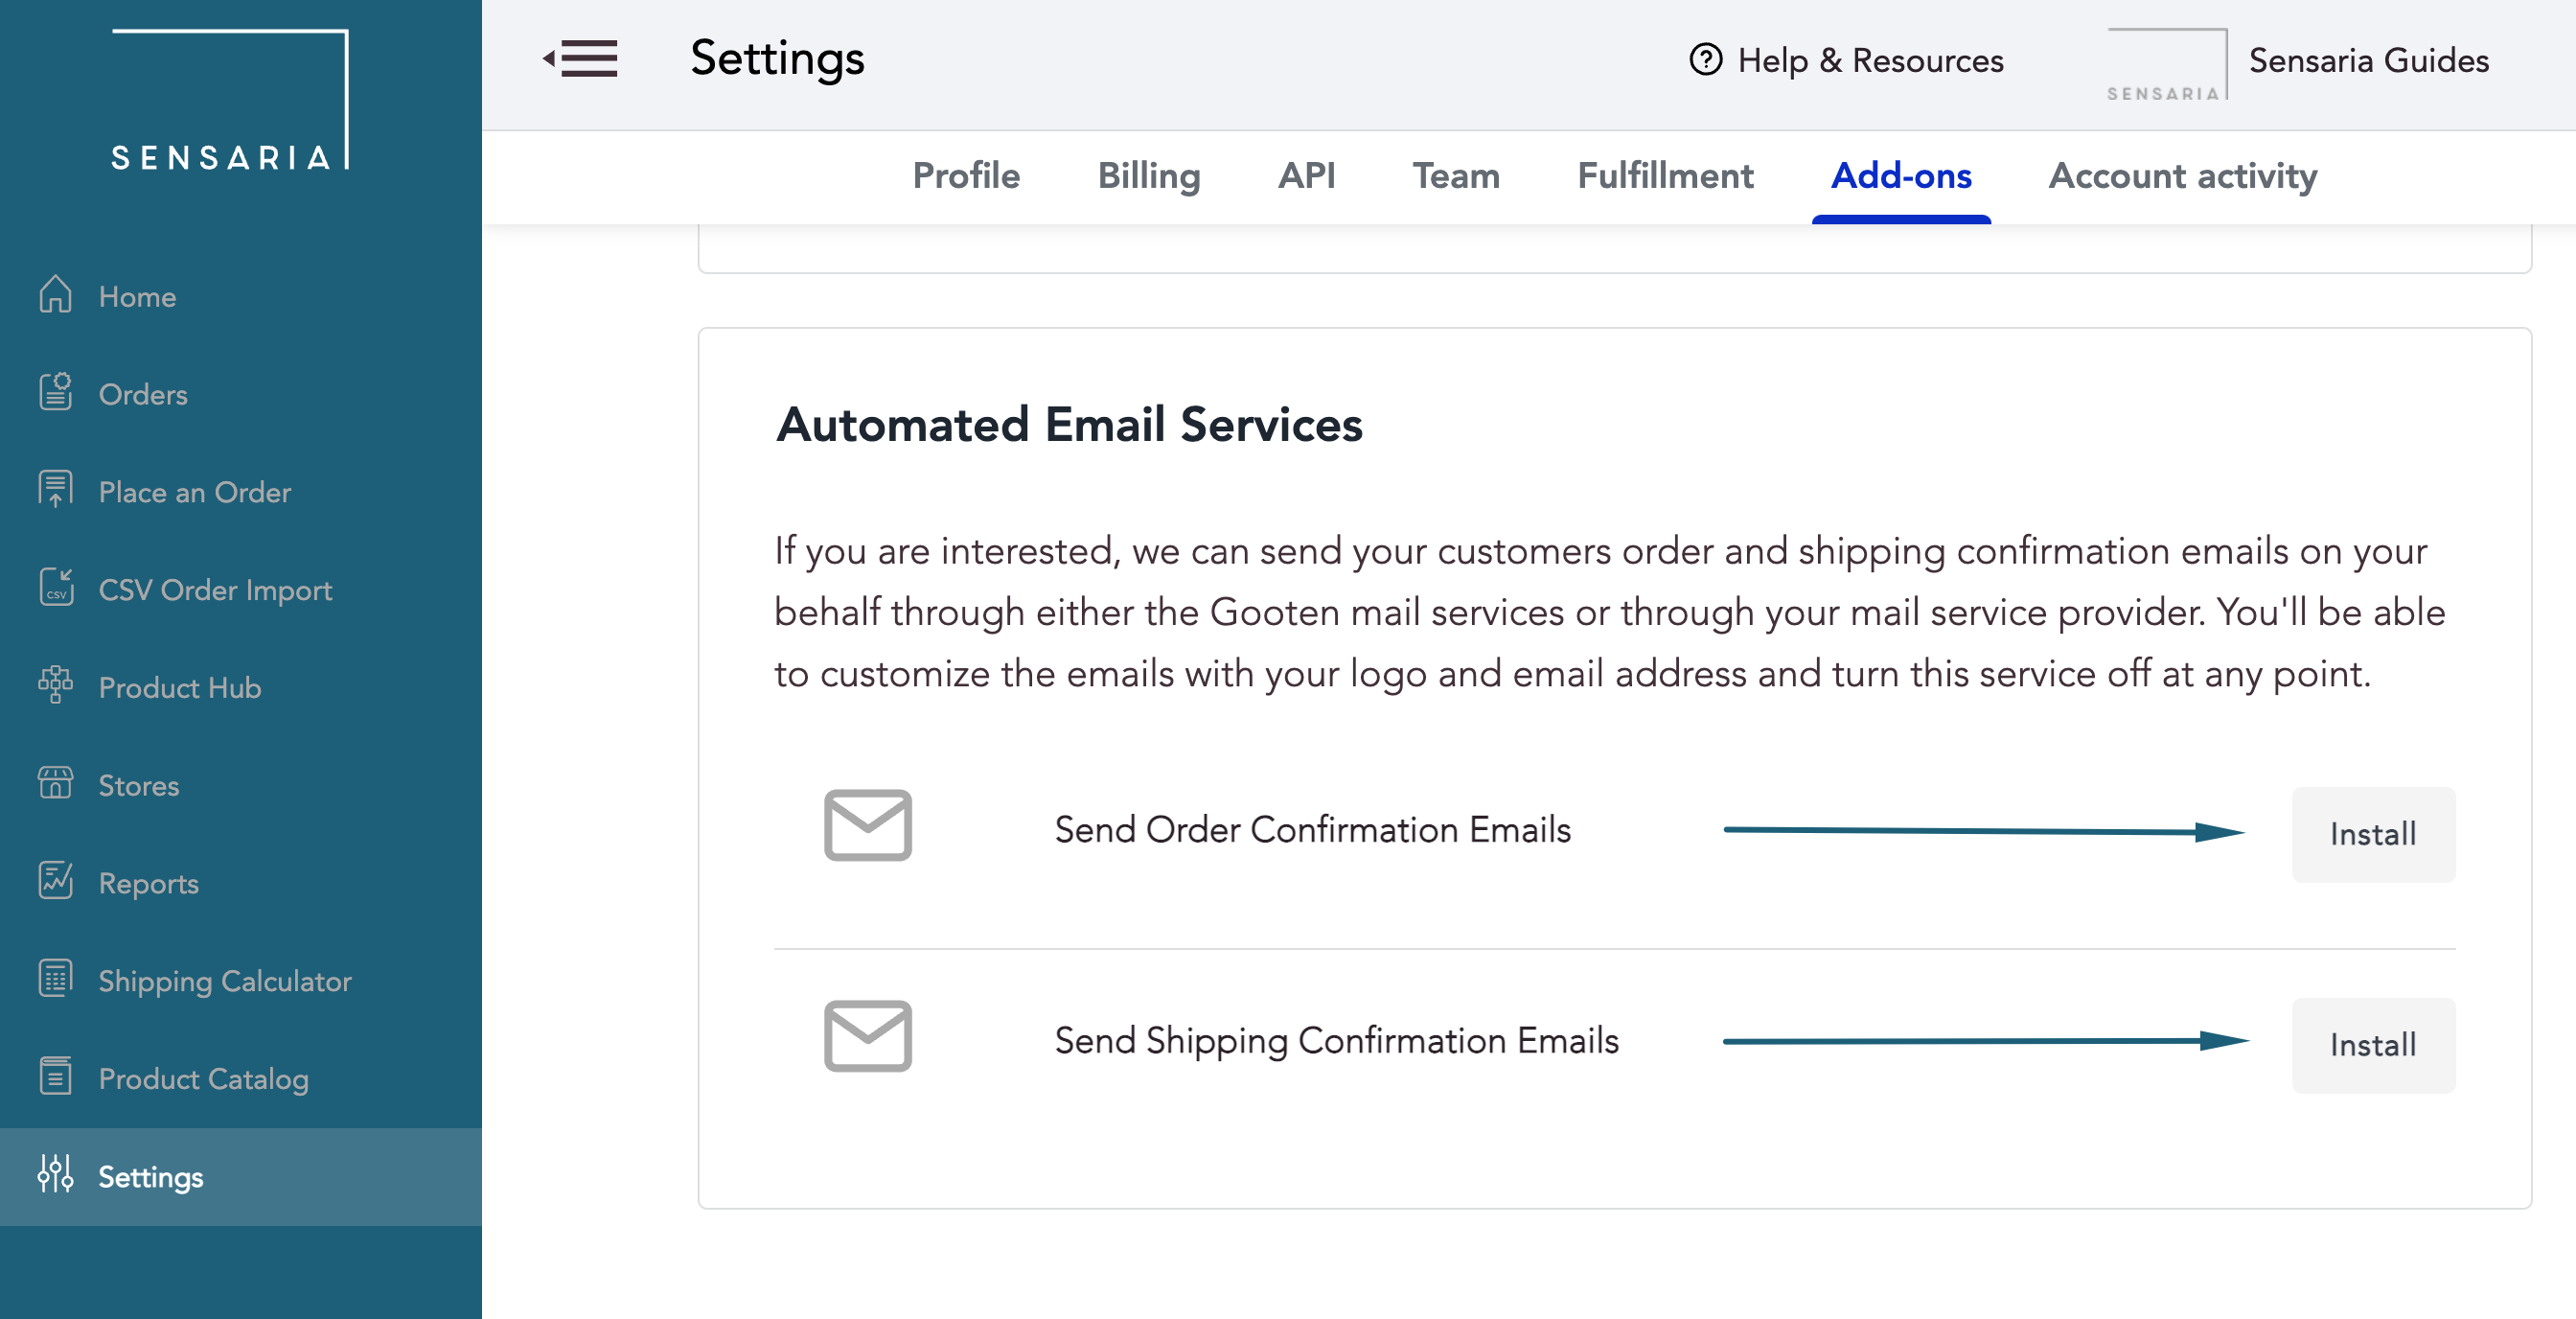
Setting up Automated Email Services for your Customers
- You can send these emails on our behalf using our Sensaria mail services or you send them using your own mail service provider.
- Email addresses from Gmail accounts will not work here and if your email address/services are not working, we highly suggest using Mailgun for sending emails.
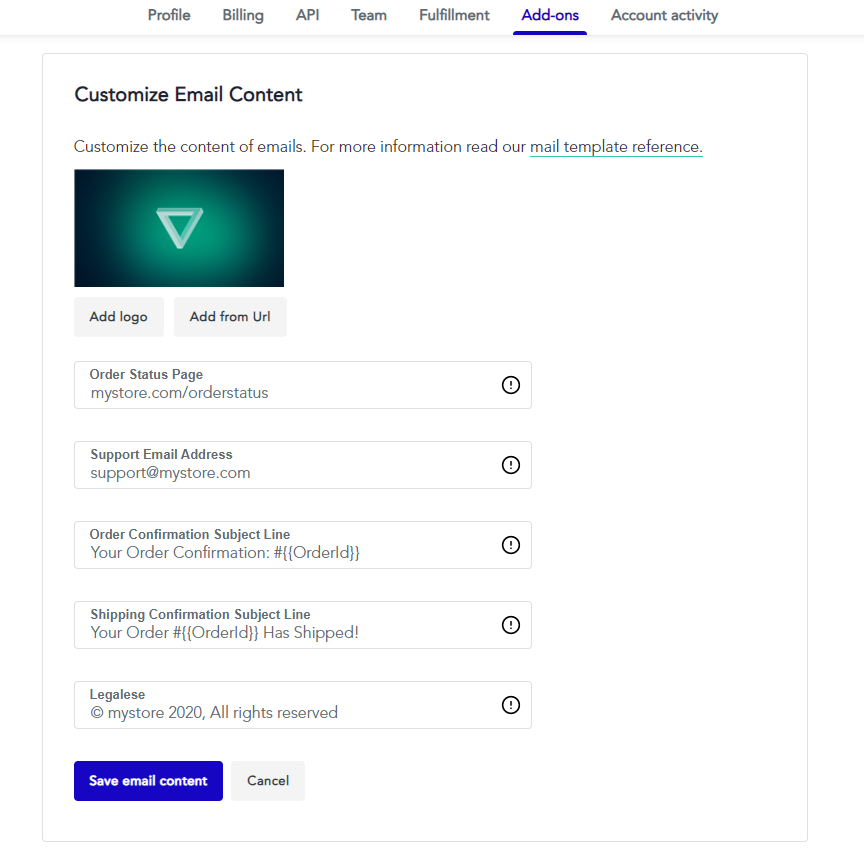
- You'll also have the option to customize the emails with your own logo and email address.
- Logo - Change and customize the logo of the emails sent to your customers.
- Order Status Page - The URL where the customer can check the status of their order. Leaving this blank will direct your customers to email the support email address you provided in the next field for order statuses.
- Support Email Address - The email address where customers can request support and order status updates.
- Order Confirmation Subject Line - The email subject used for order confirmation emails.
- Shipping Confirmation Subject Line - The email subject used for shipping notification emails.
- Legalese - The copyright section at the bottom of the emails.
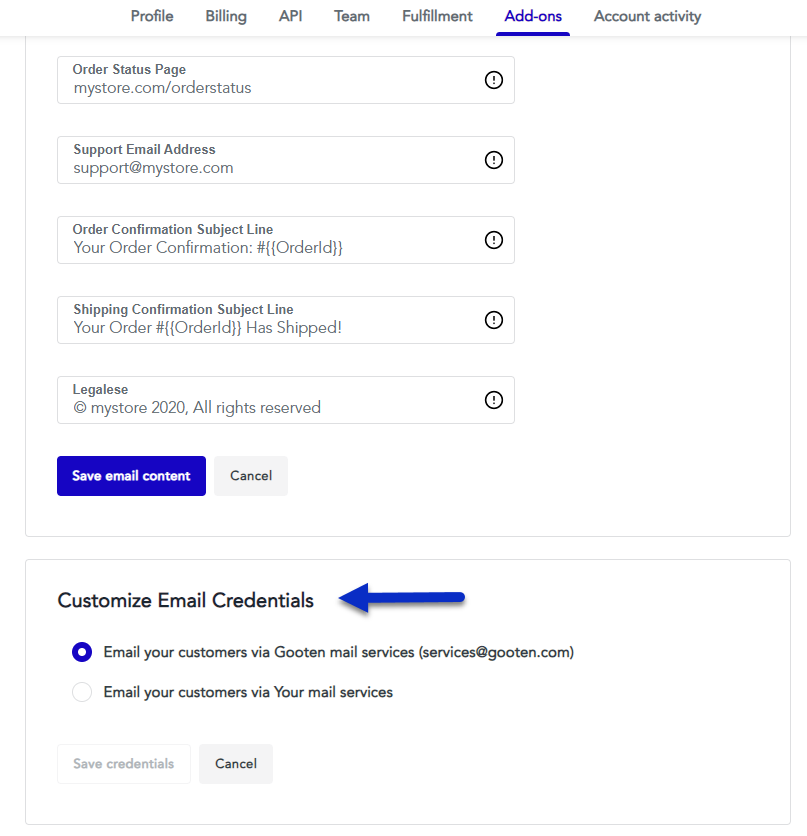
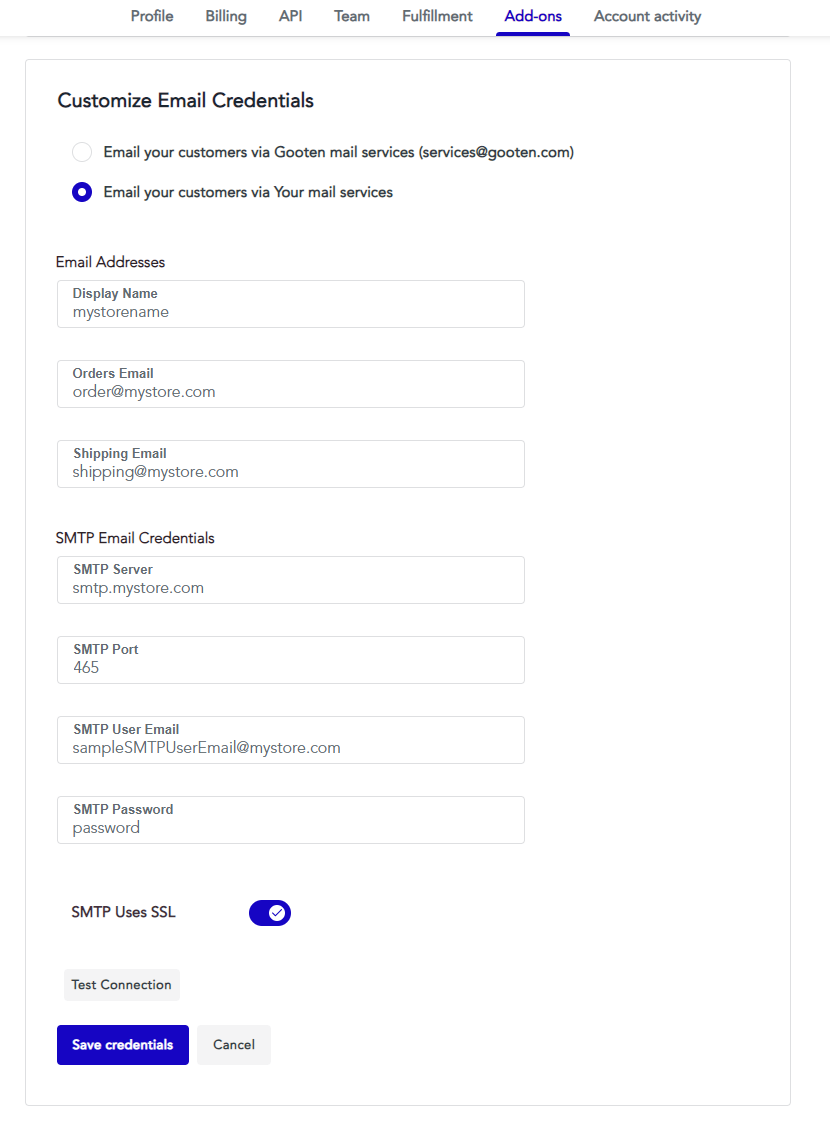
- Email customers via Sensaria mail services - This uses our mail services to send automated confirmation emails to your customers. This option is selected by default.
- Email your customers via Your mail services - This uses your own mailing services to send the automated confirmation emails to your customers.
- Display Name - The display name for your email address.
- Orders Email - The email used for the order confirmation emails.
- Shipping Email - The email used for the shipping confirmation emails.
- SMTP Server - Your SMTP Server for your email service.
- SMTP Port - Your SMPT Port for your email service.
- SMTP User Email - The email for your SMTP User Email to connect your email service.
- SMTP Password - The SMTP password used to connect your email service.
Email Template Syntax
Our emails are templated using Mustache, a lightweight syntax for simple templating. The simplest way to use Mustache is to include variables like this: {{variable_name}}
Mustache allows conditional rendering. For example, when a value is not available, a larger part of the template can be prevented from rendering. This is practical for optional parameters.
There are many variables available for use in email templates and in your email settings:
- BusinessName - The name of the partner
- LogoUrl - a URL pointing to an image of the partner logo
- OrderId - The full order ID for this order
- OrderStatusUrl - A URL to check the status of the order (e.g. shipping information)
- SupportEmail - The email address to contact the company’s support team.
- OrderTotal - The total the order amounted to, consisting of:
- ItemsTotal - The sum of all purchased items
- DiscountAmt - The amount deducted from the OrderTotal
- Tax - The amount of Tax applied to the ItemsTotal
- ShippingTotal - The total shipping cost
- BillingAddress
- FirstName
- LastName
Line1 - Address Line 1 - Line2 - Address Line 2
- City
- State
- PostalCode
- CountryCode - A country code (e.g. “US”)
- ShippingAddress - Similar to the BillingAddress above
- Shipments - A collection of shipments
- Index - The index of the shipment described (computed)
- ShipmentCount - For a given shipment, the number of items (computed)
- TrackingNumber - A shipment provider’s tracking number
- TrackingUrl - A URL pointing to a website where the shipping status can be inspected
- Items - The collection of items/products in each shipment
- ProductName - The name of the product
- ImgUrl - A URL pointing to the image of the product
- SKU - The stock-keeping-unit for the product
- Price - The displayed product price
- Quantity - The quantity enumerating the product purchased
- ShipPrice - The shipping price for this product
- ArrivalDate - An estimated shipment arrival date for the product
- Legalese - A legal disclaimer (e.g. copyright information)